Warehouse-Free Mode
Quick Start Guide
12 steps to launch a lean, asset-light vending operation — no warehouse needed. 95% of daily tasks completed entirely in the app.

Complete these steps before your machine ships.
Search for Yo!Vending in your mobile app store and download the application.

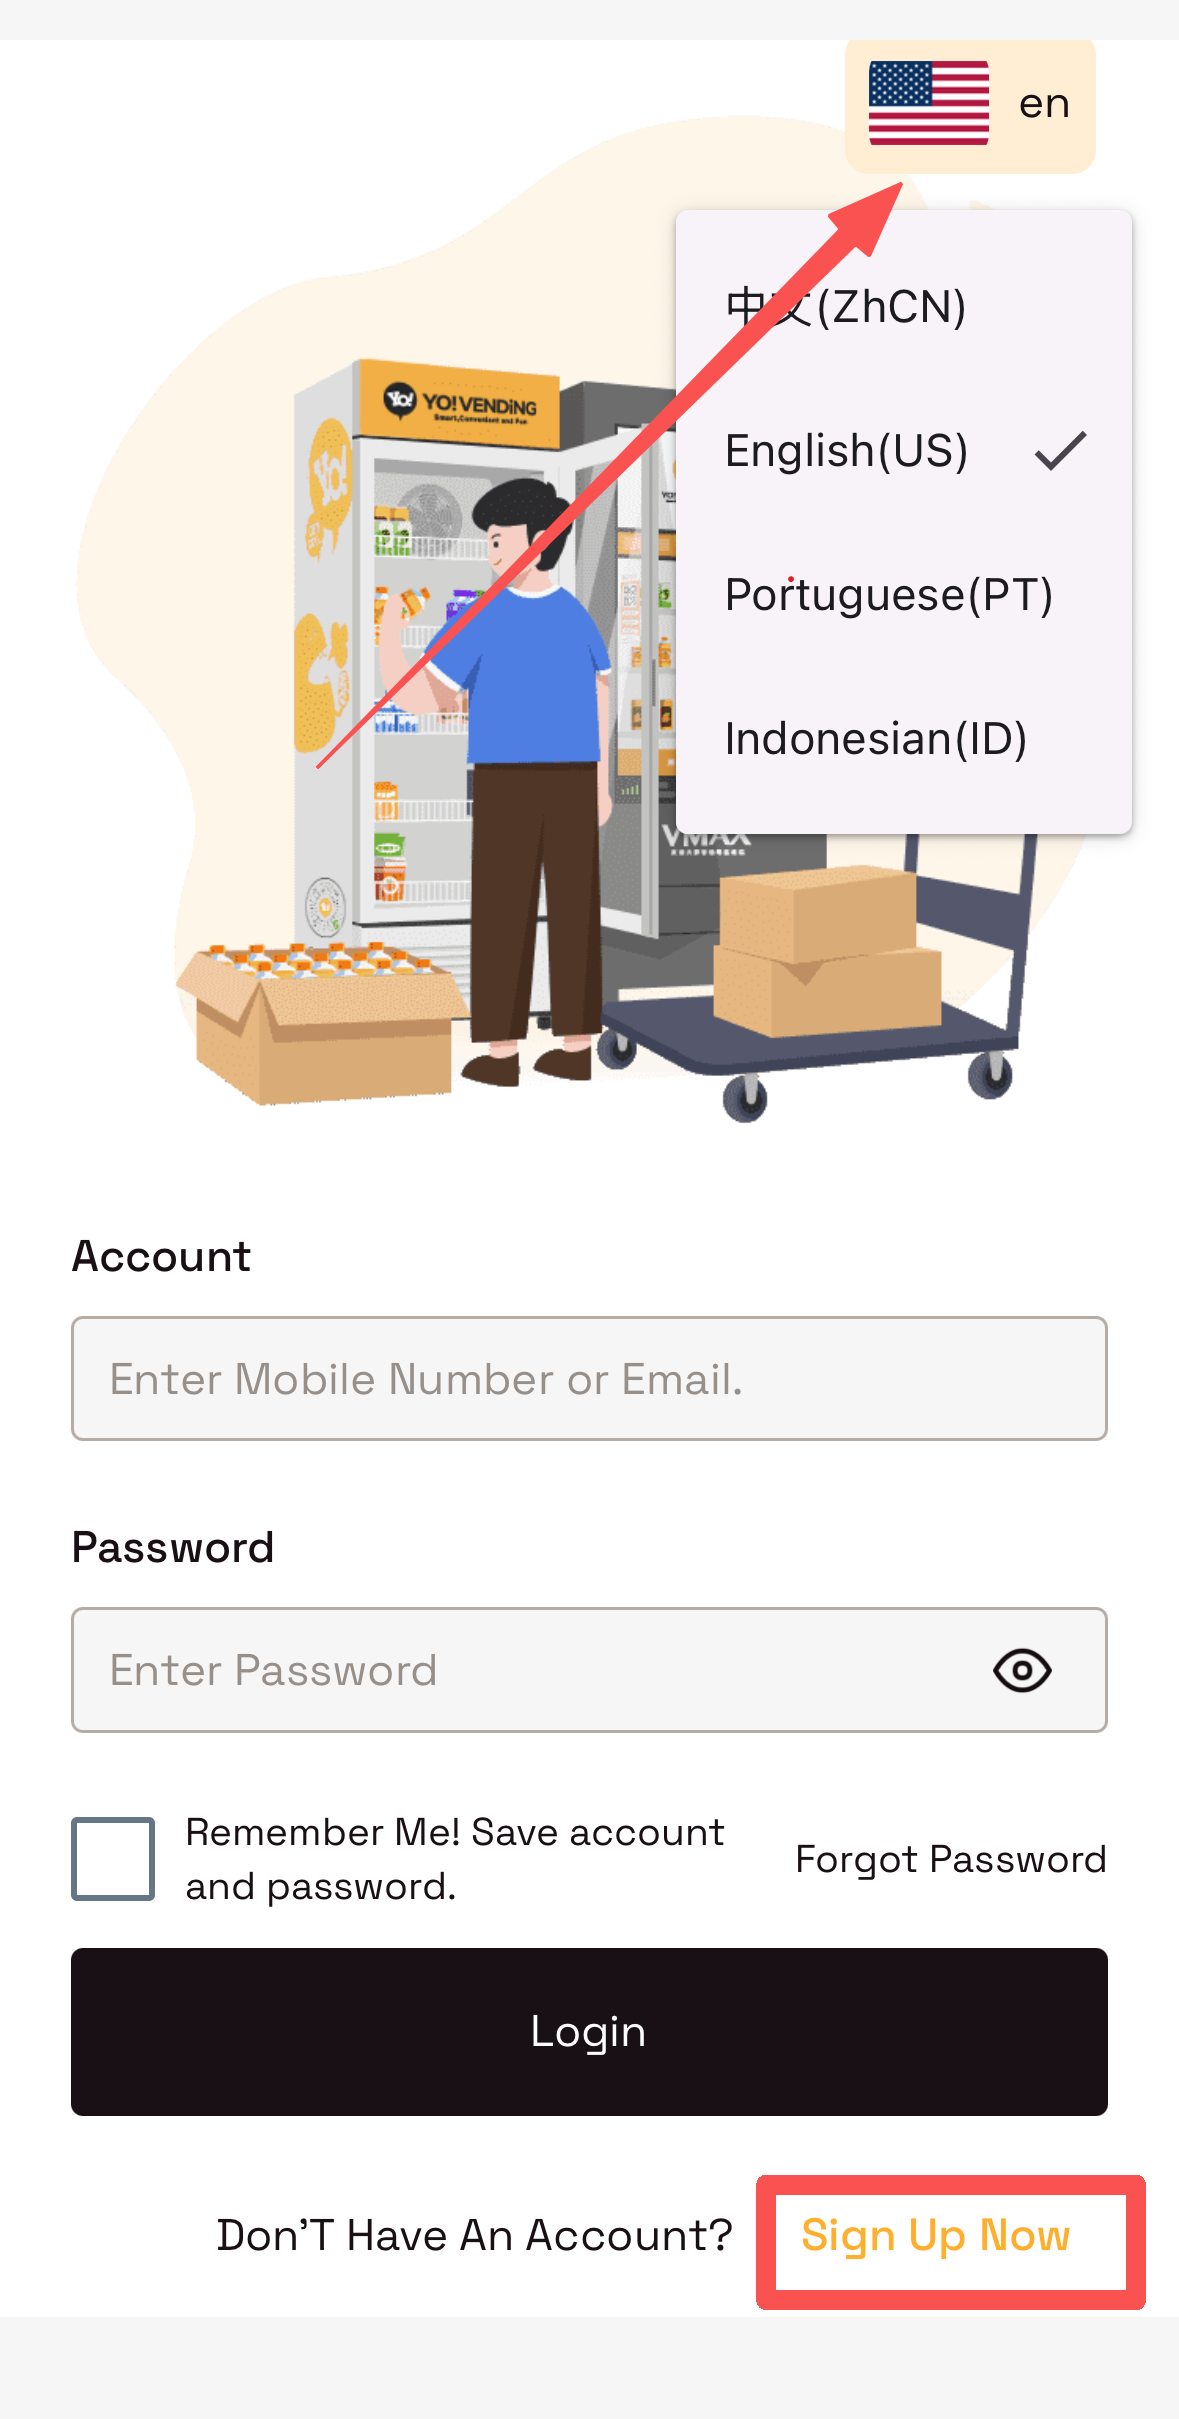
- Switch language using the toggle in the top-right corner.
- Tap
Sign Up Nowand register with your email address.
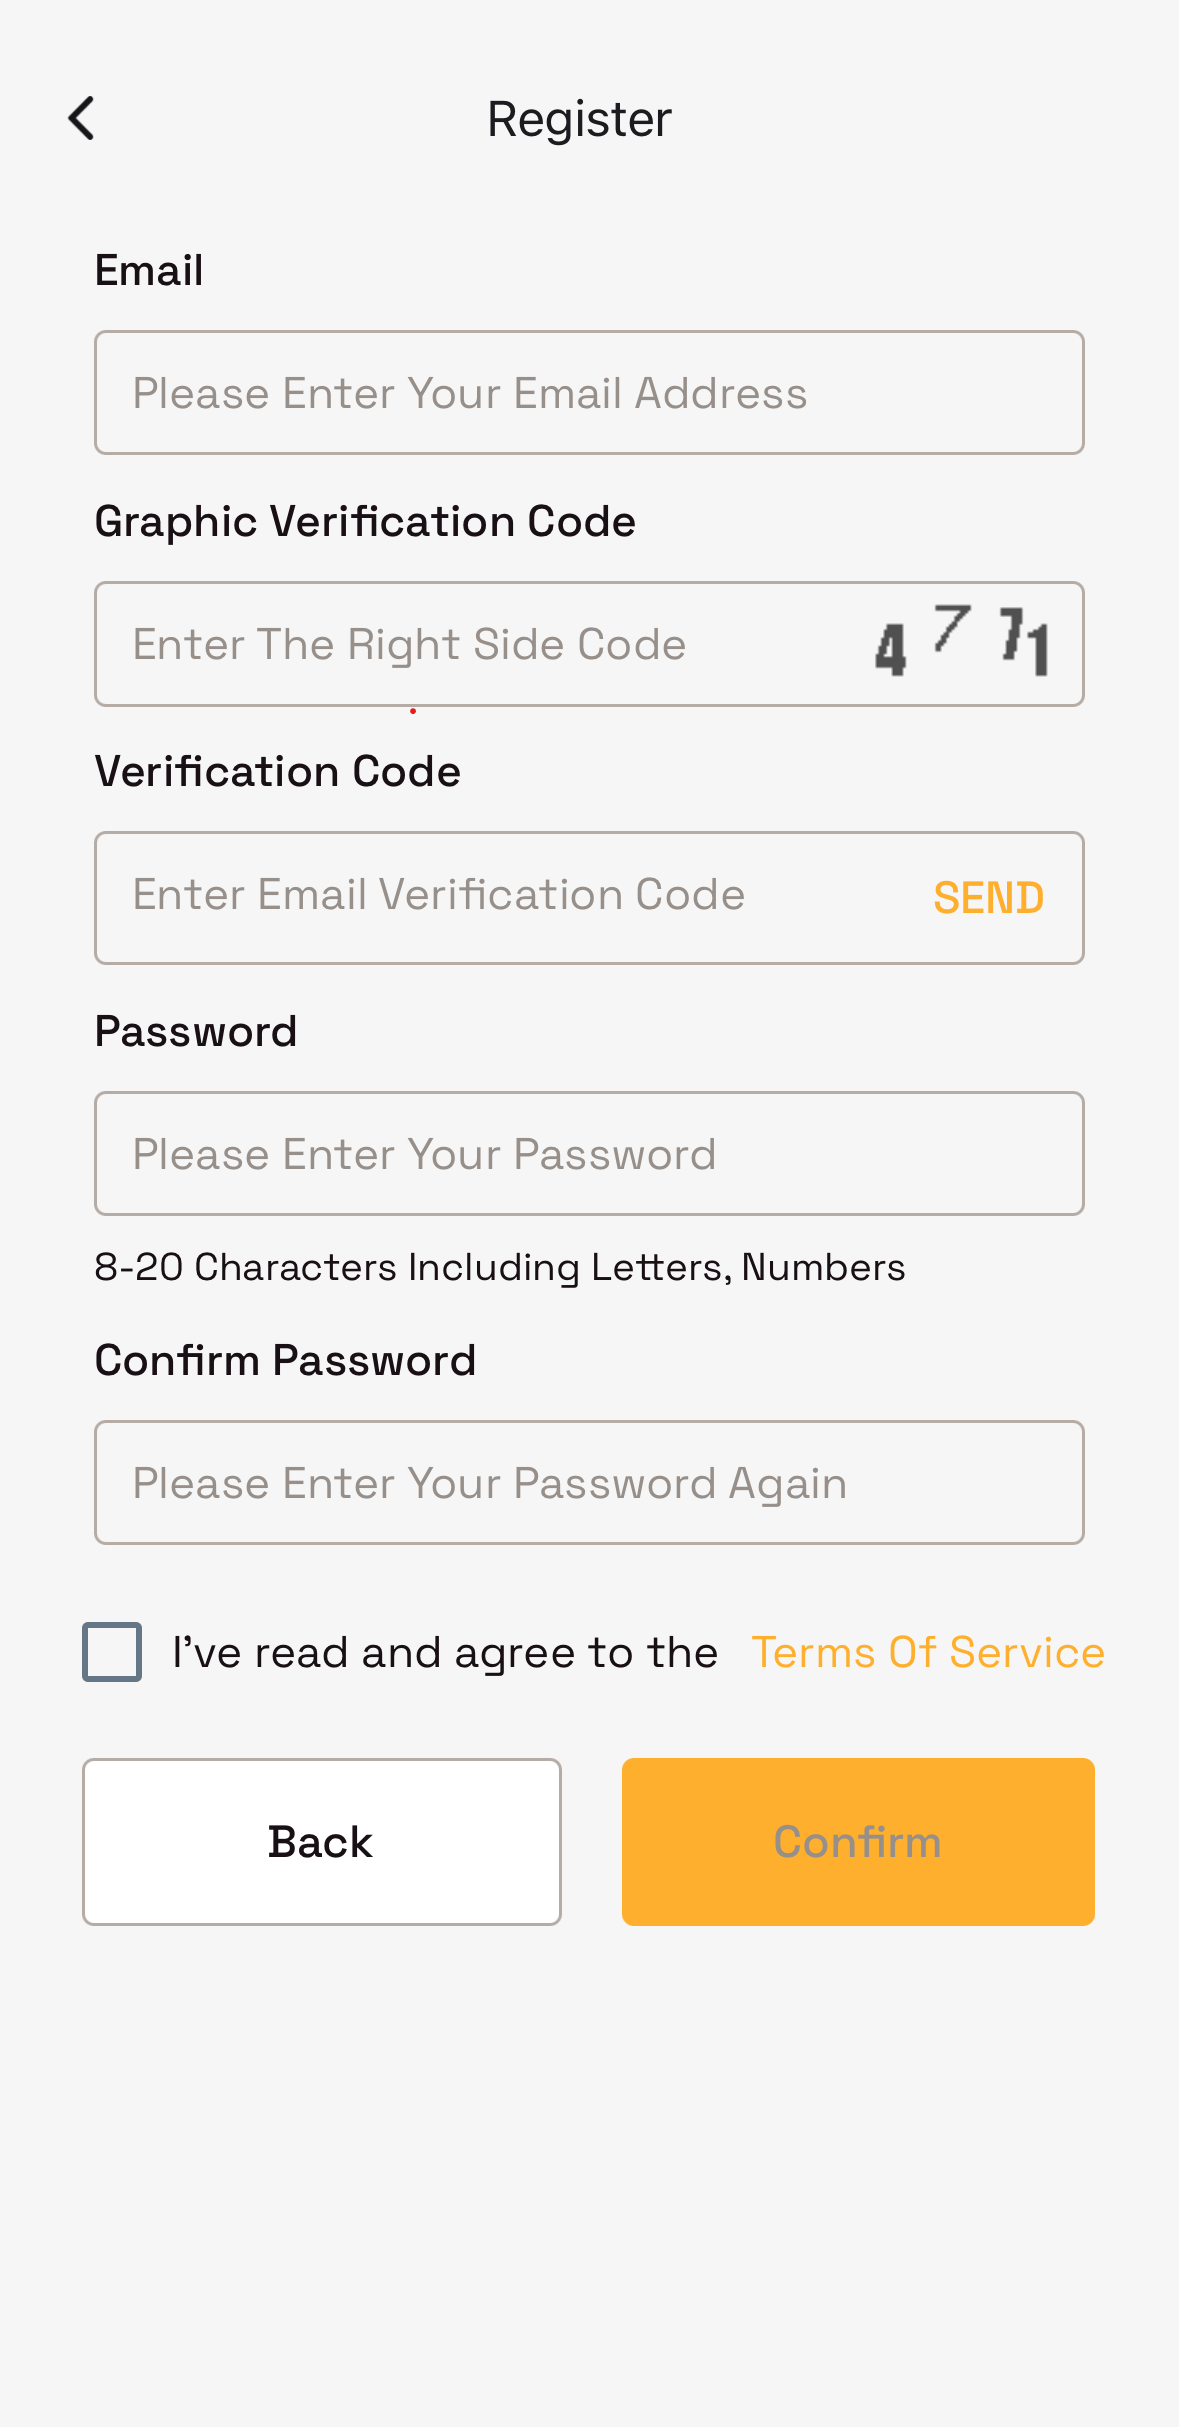
Follow in-app prompts to complete operator account setup.
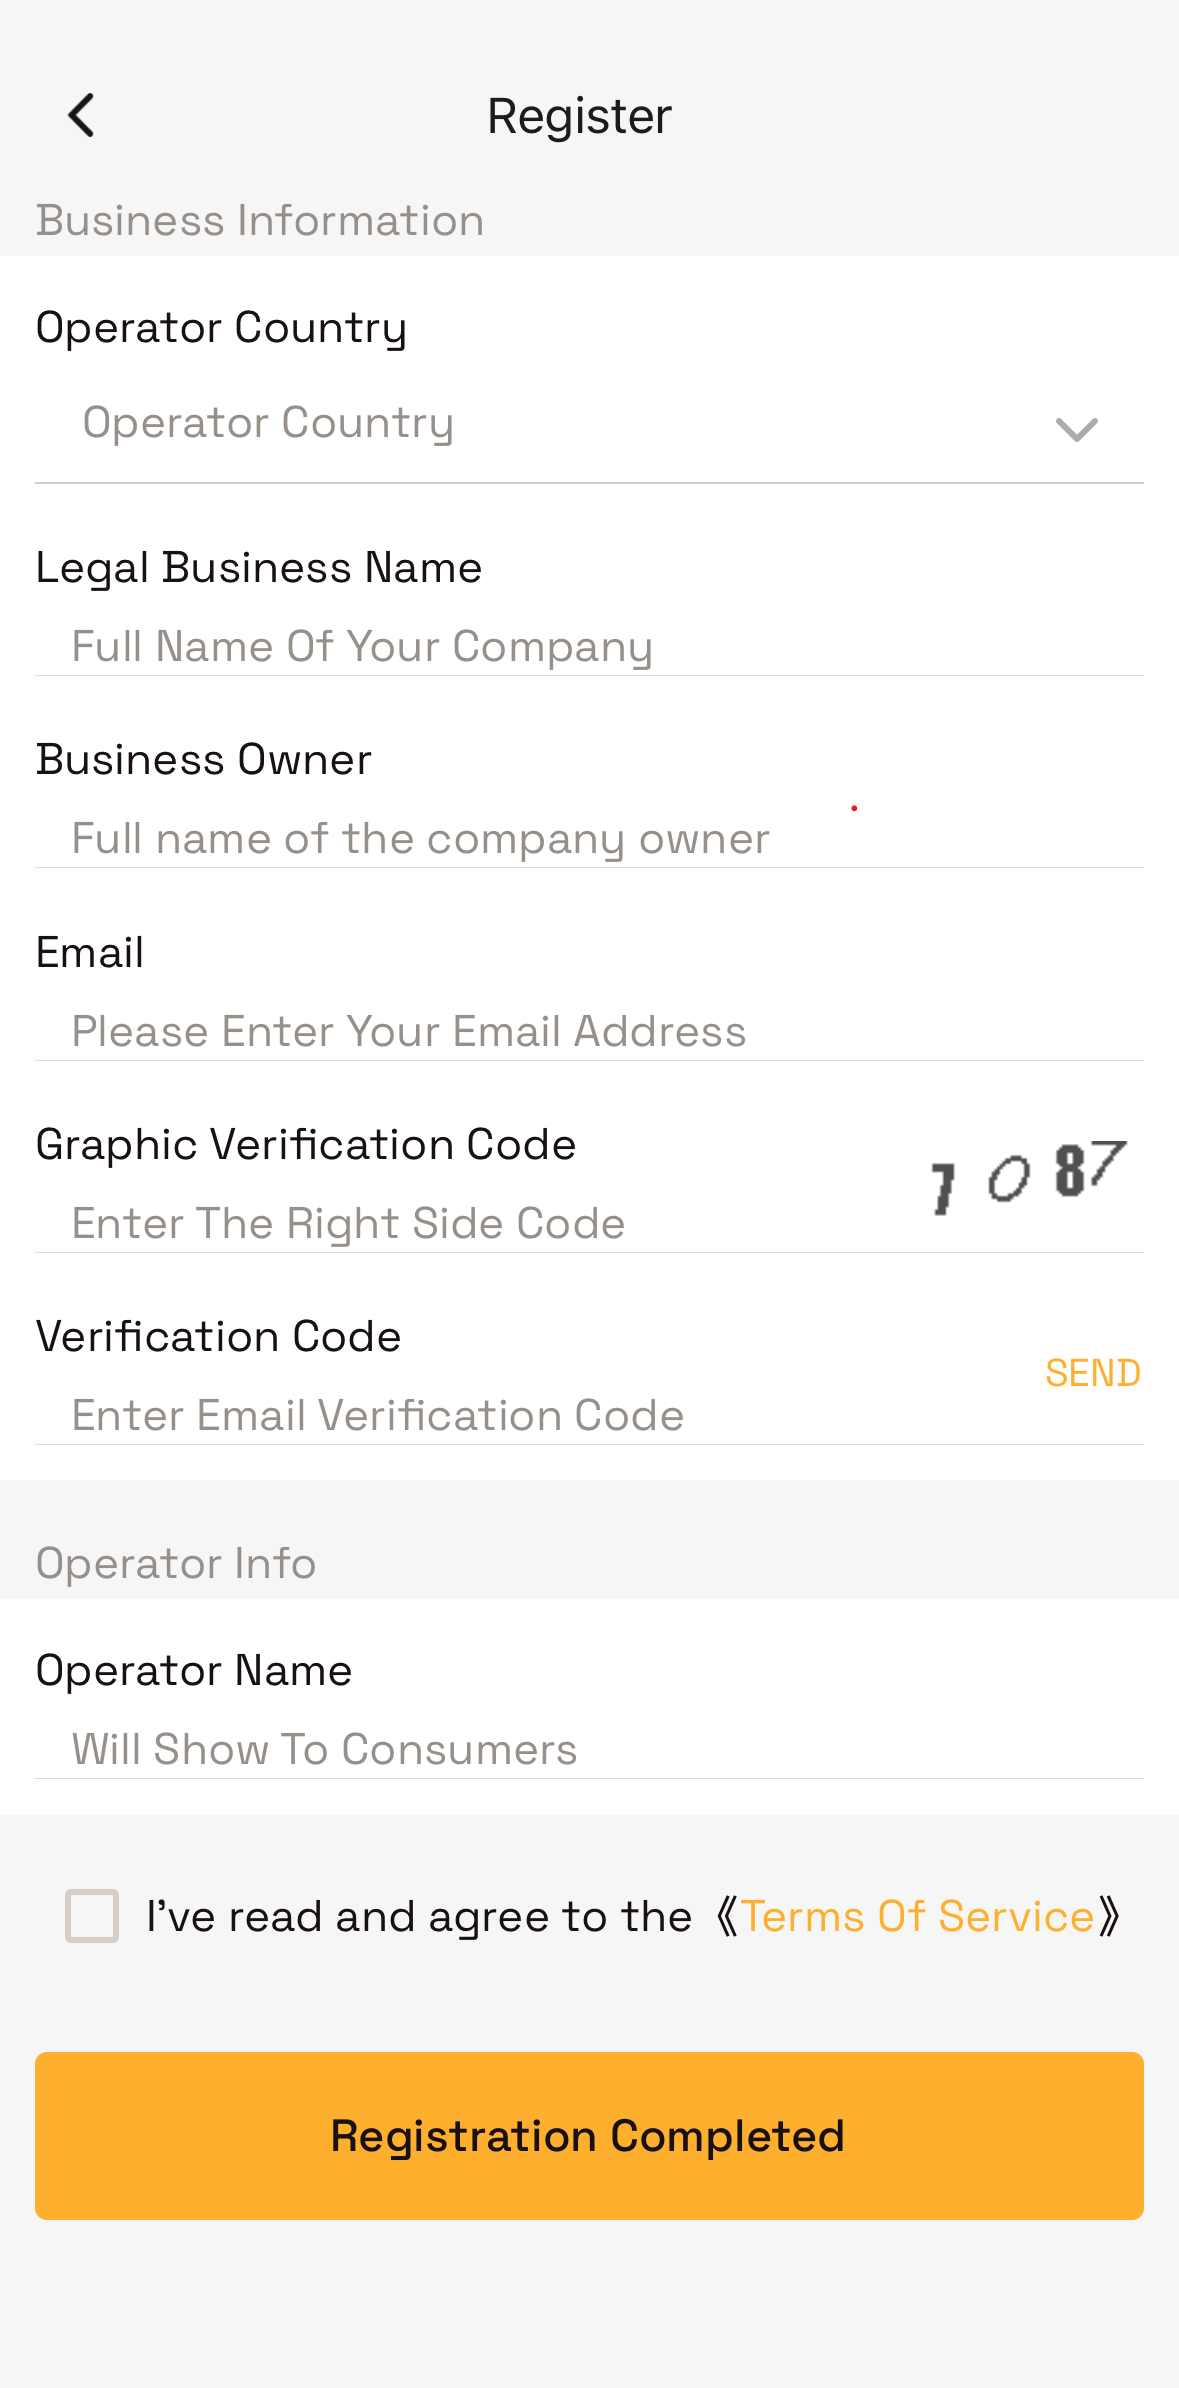
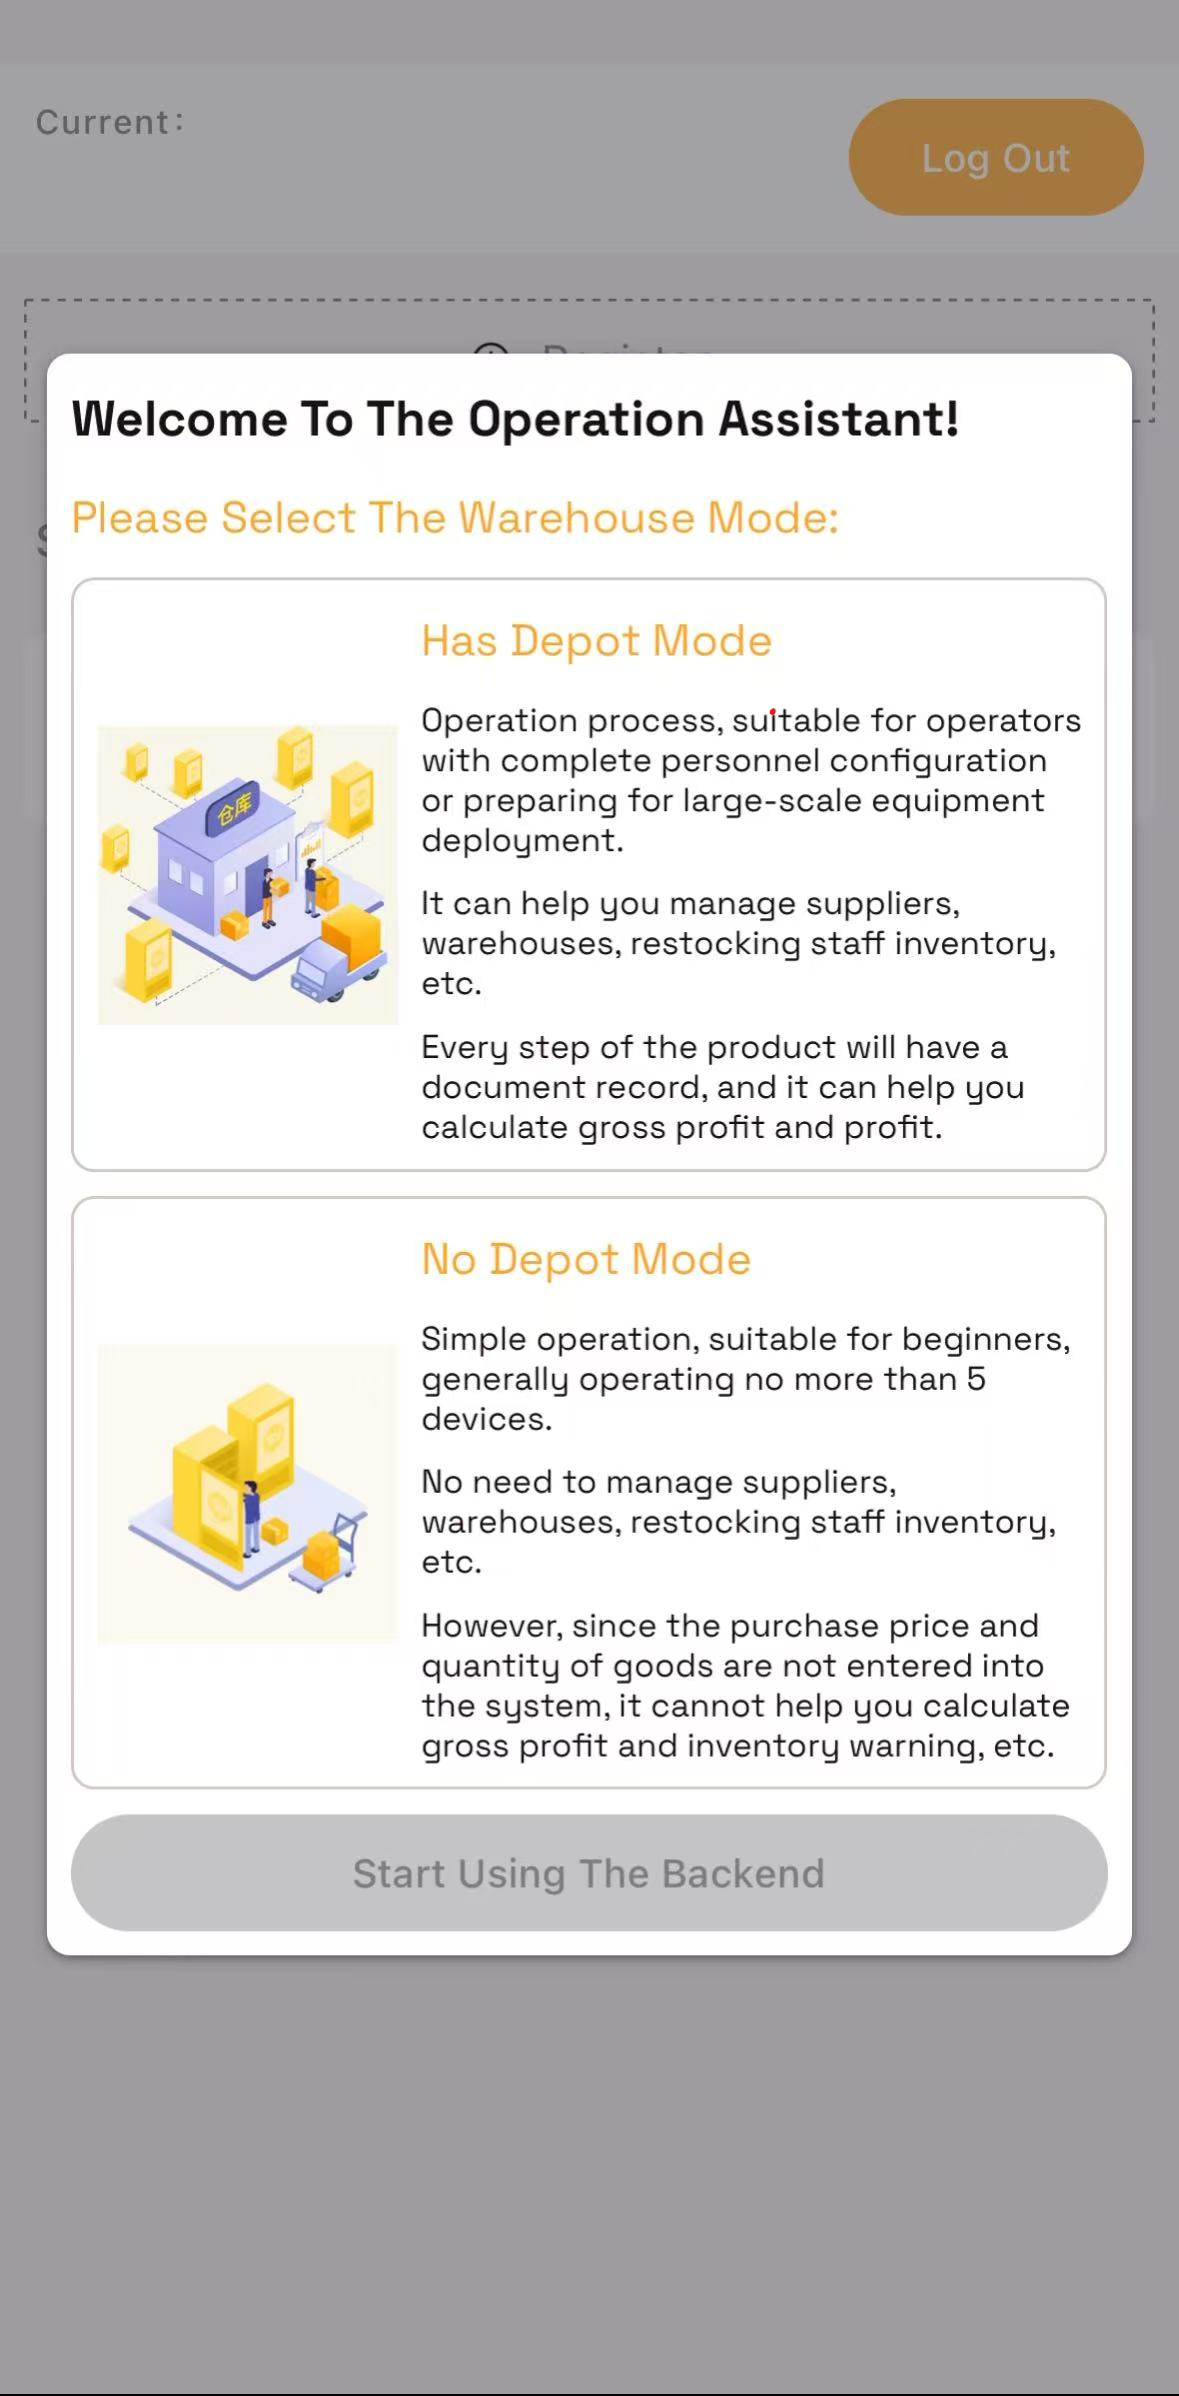
When prompted, choose Warehouse-Free Mode.
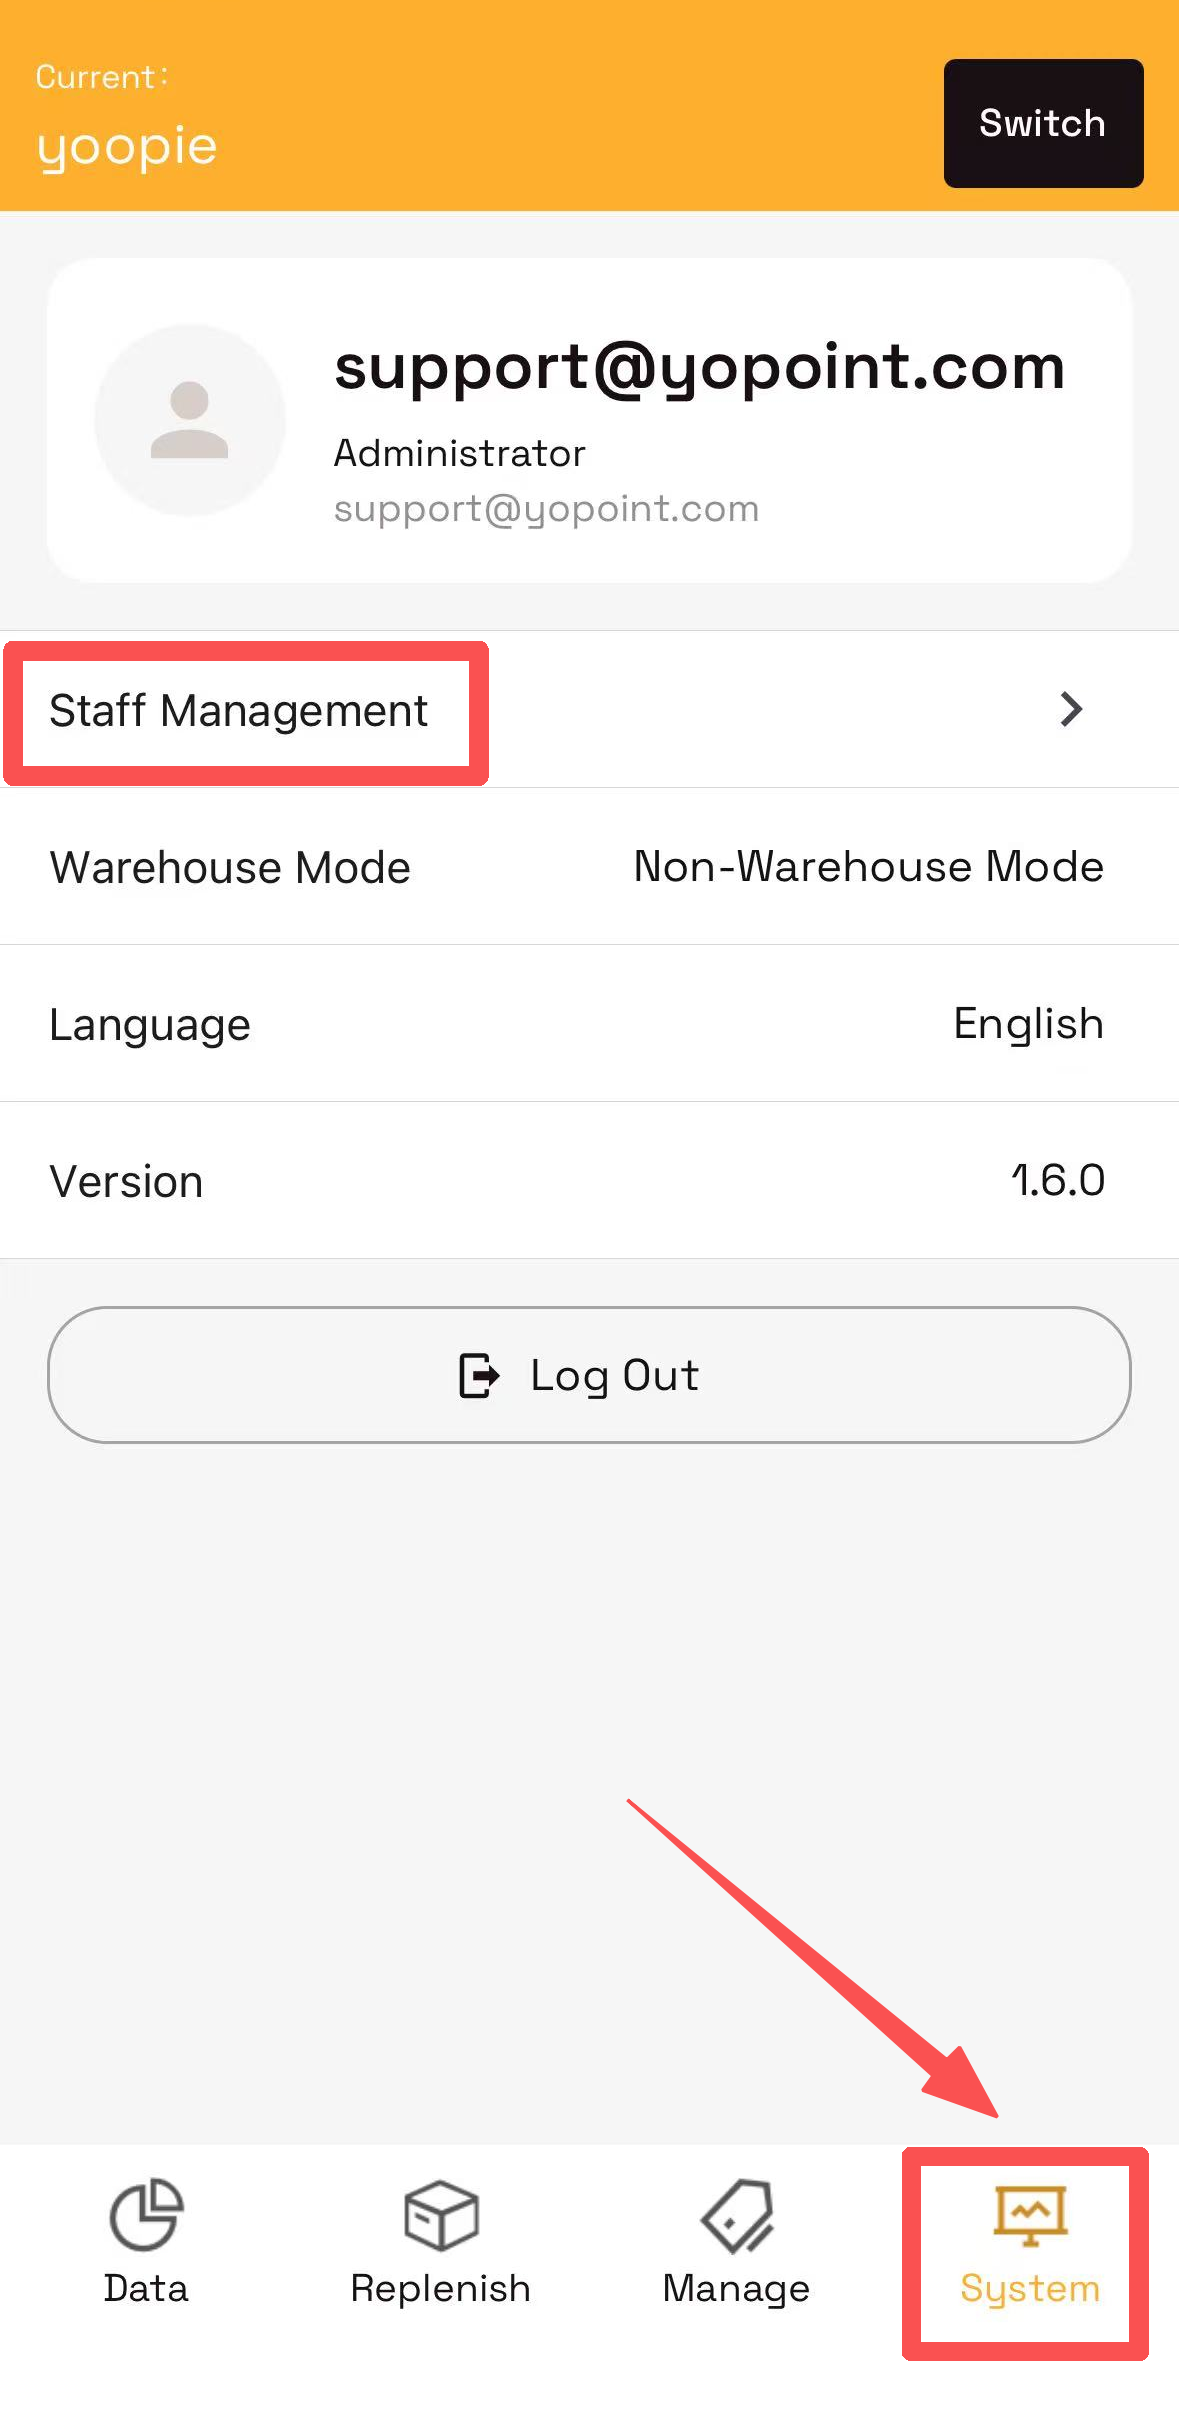
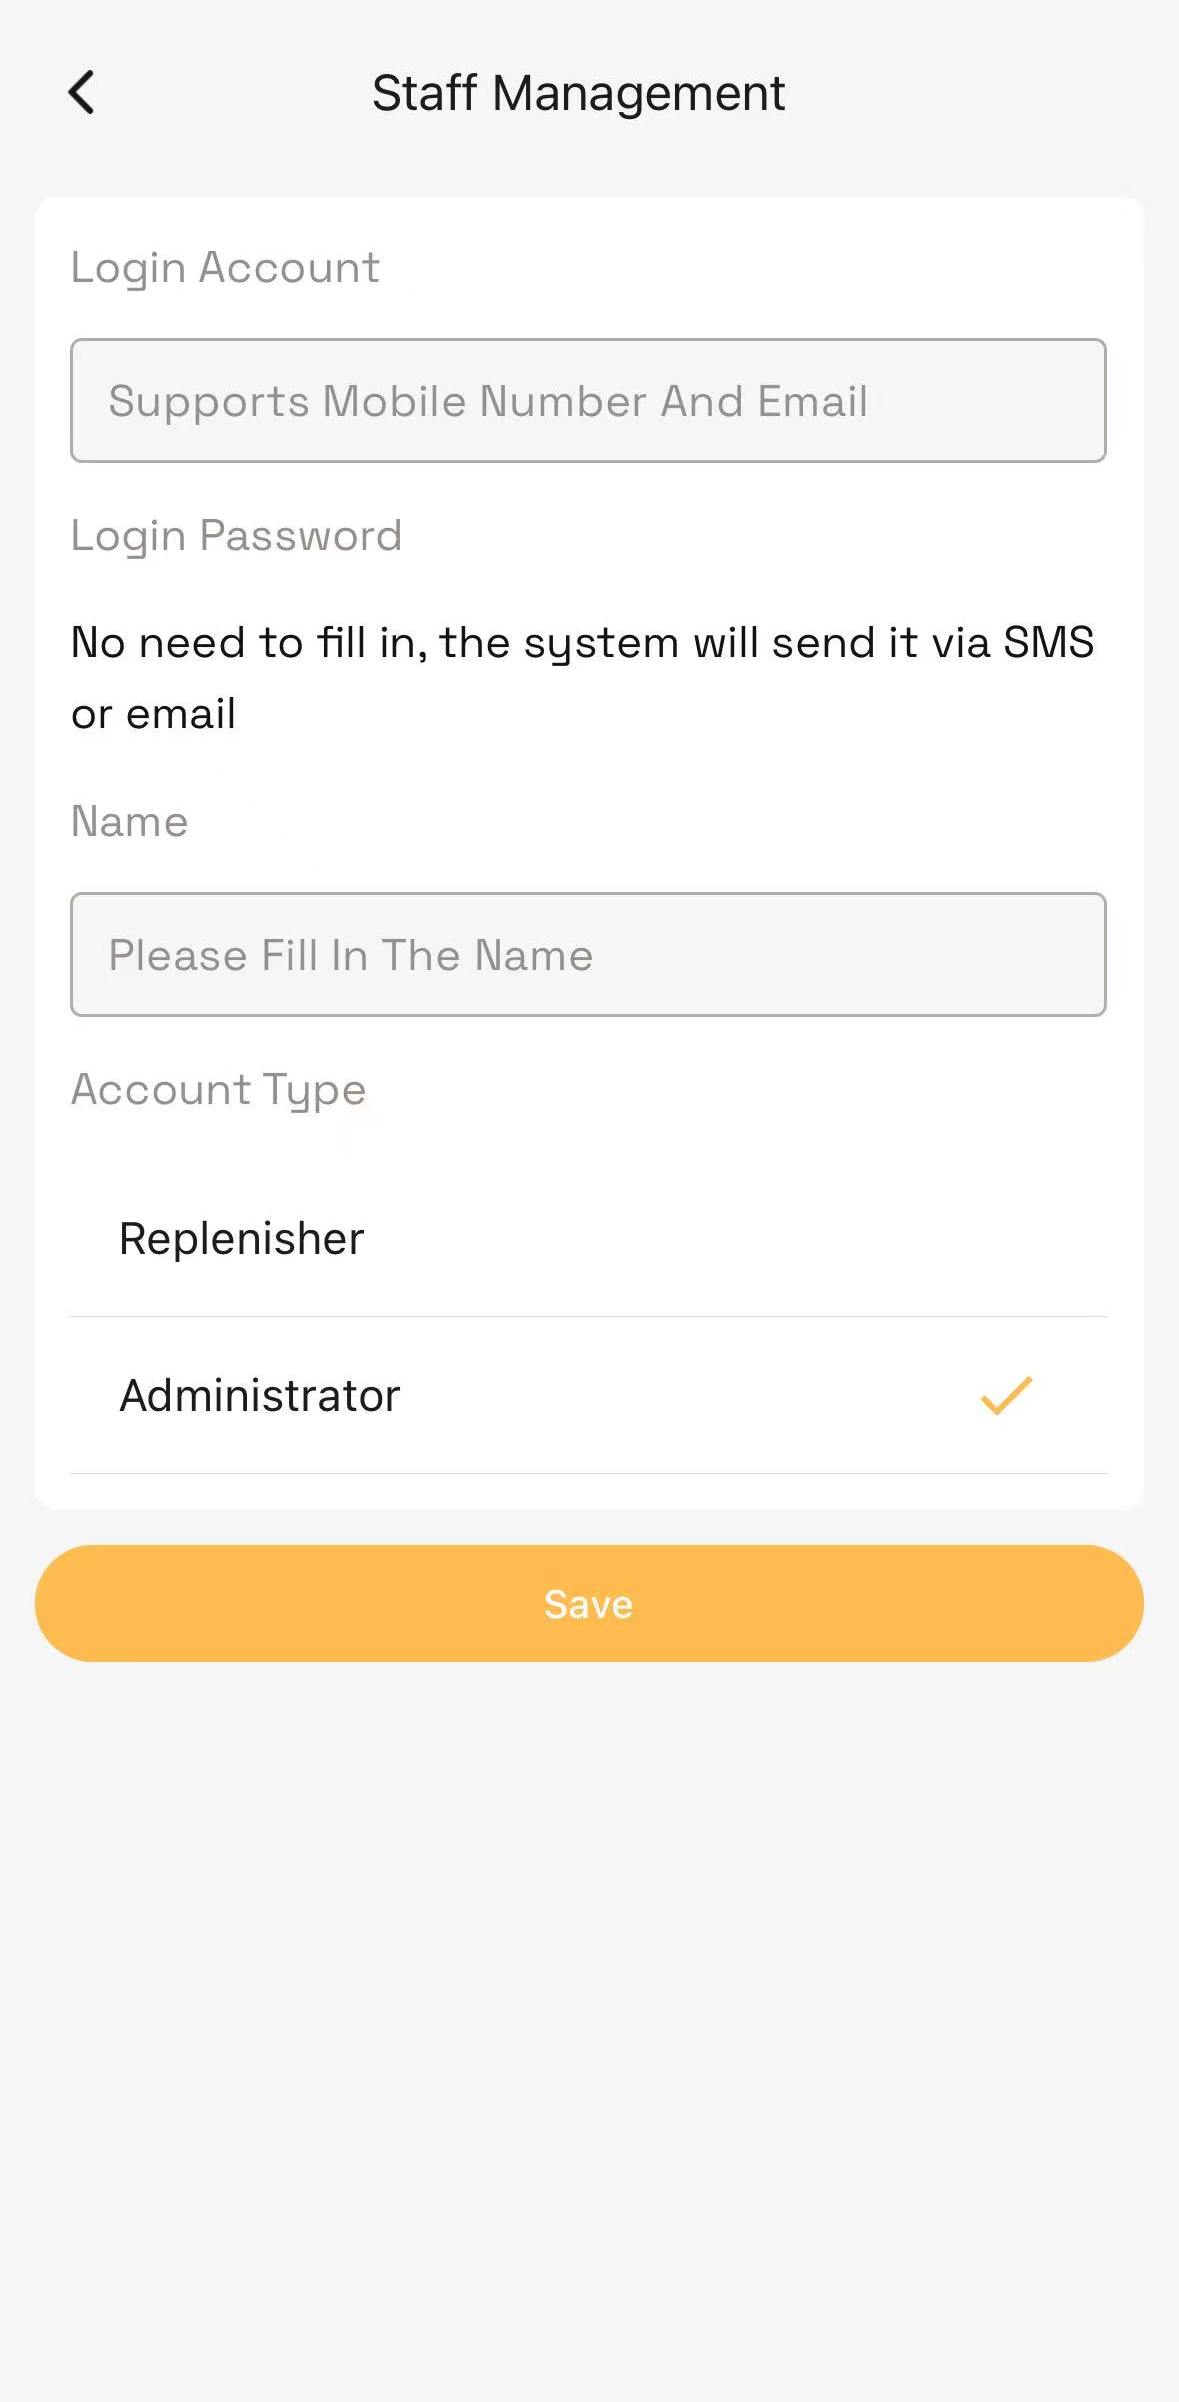
For team-driven operations, create sub-accounts for collaboration:
Enter the sub-account email to create an Administrator or Restocking Staff account. The system automatically emails new staff their credentials and passcode.
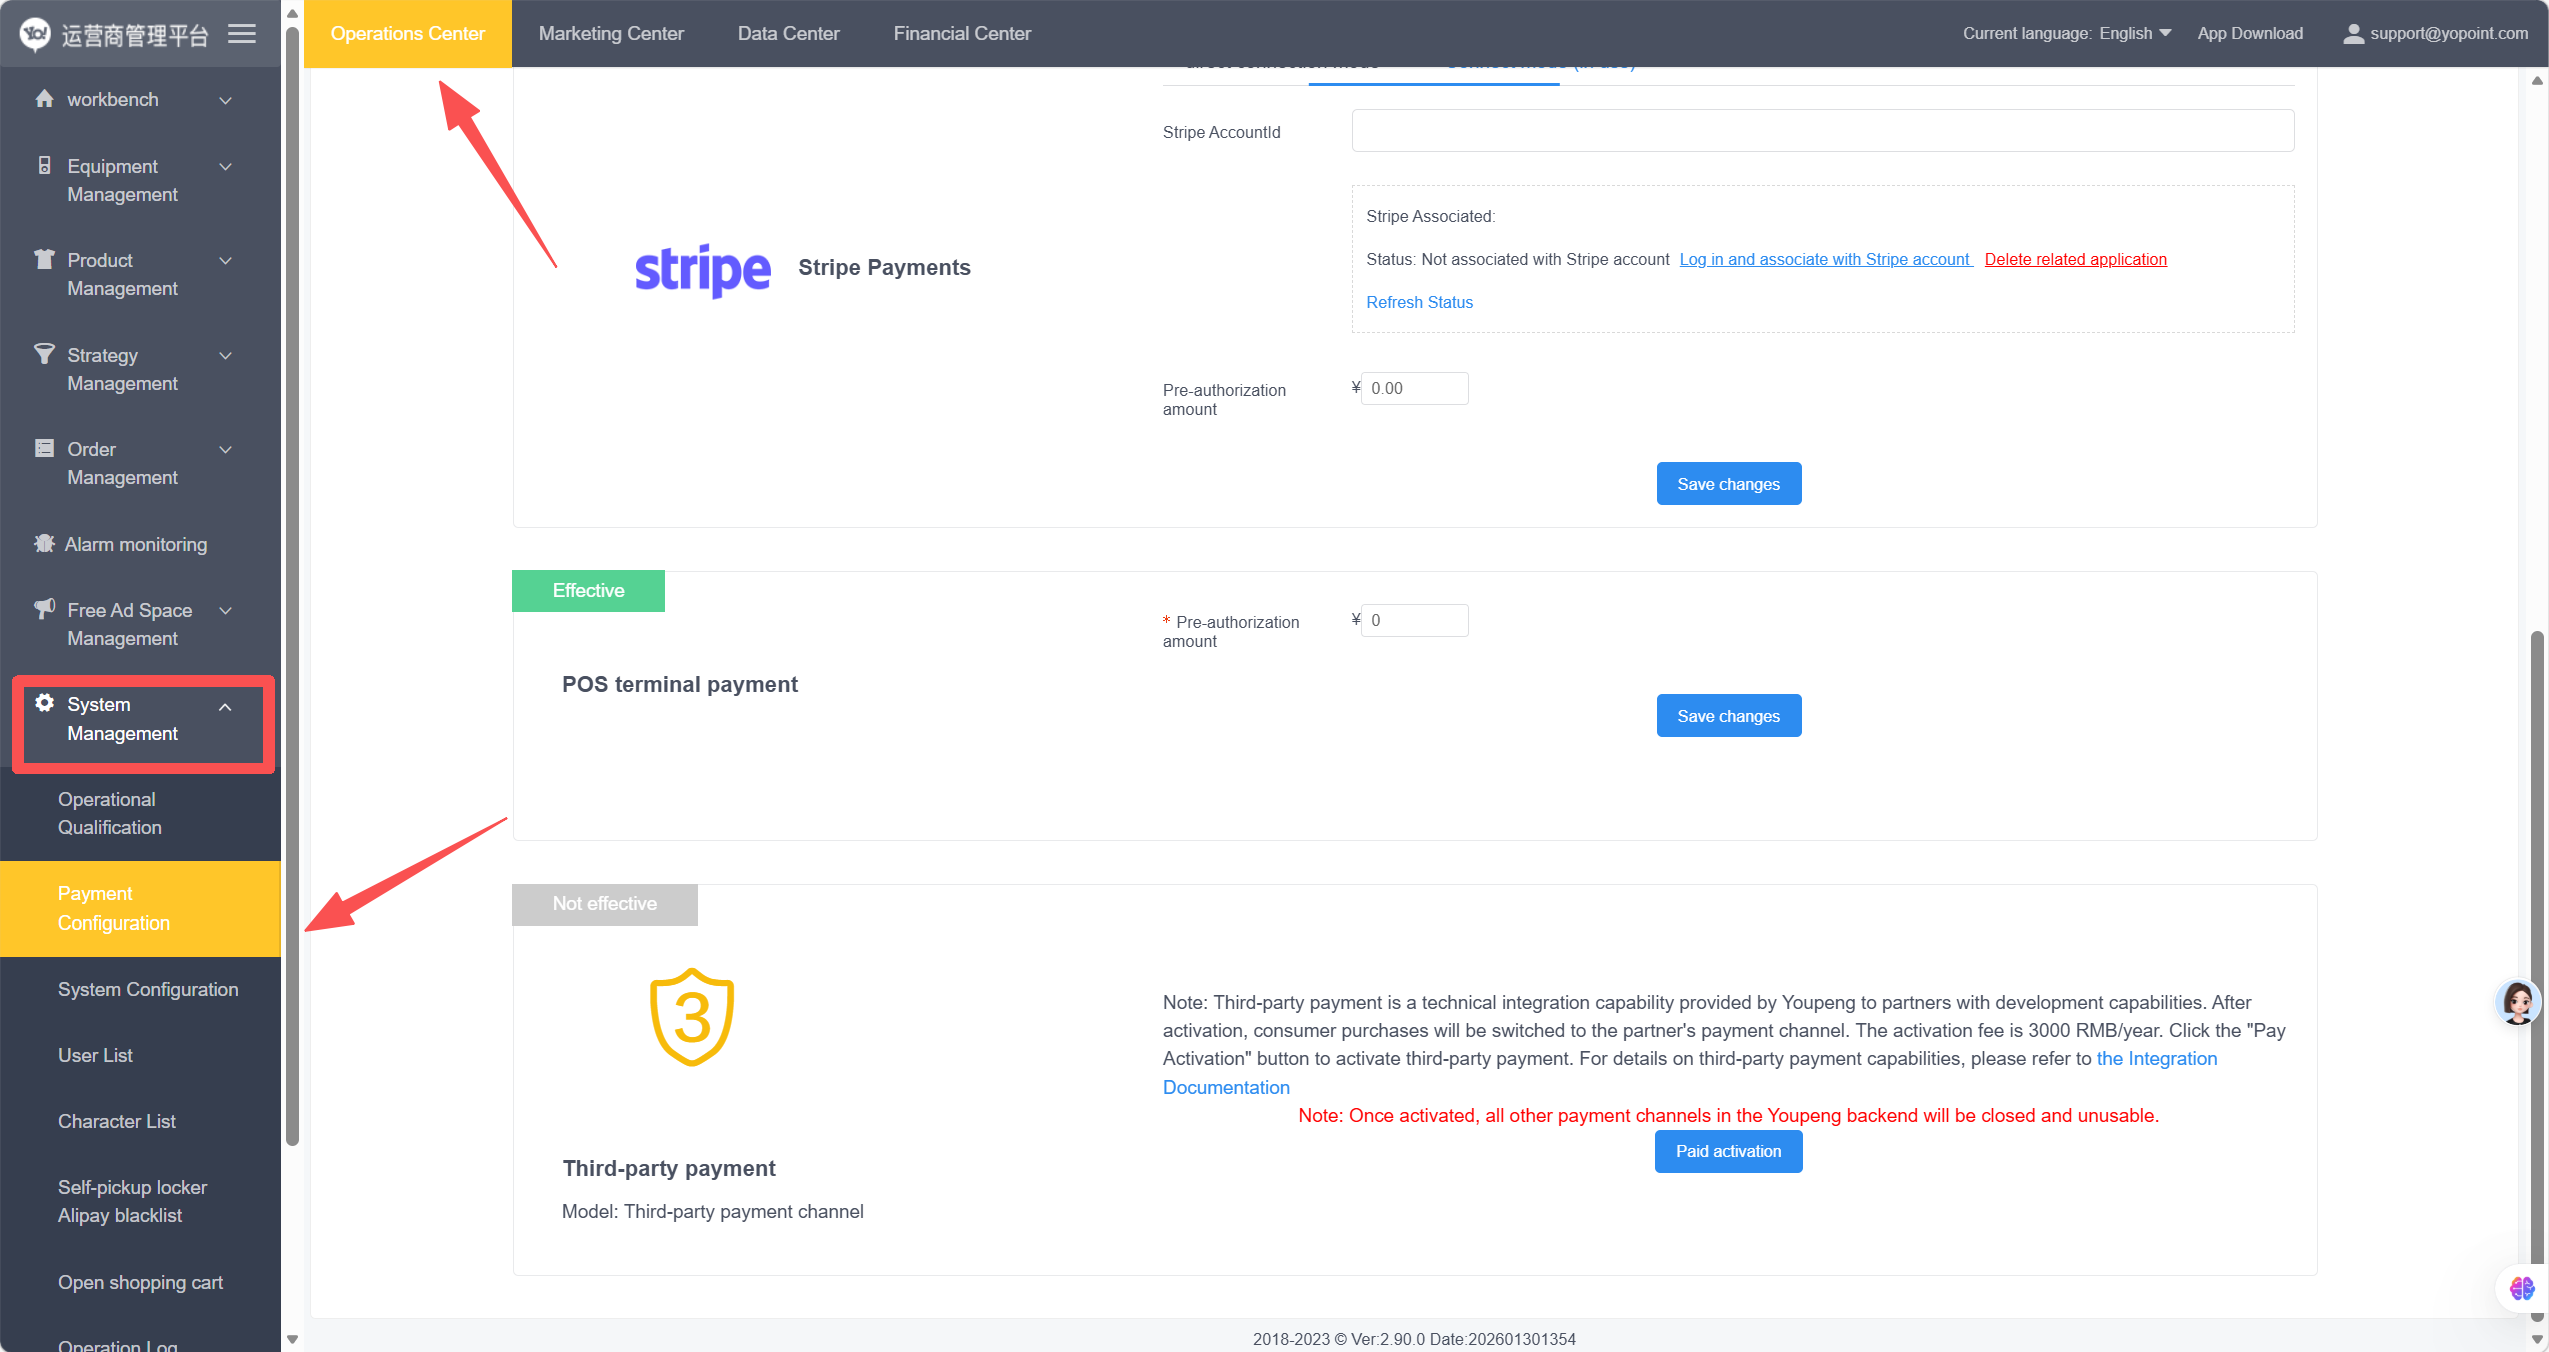
In YoPoint's system, all incoming and outgoing payments are processed through Stripe. Two completely separate financial streams:
Log in at https://o.yopoint.com/
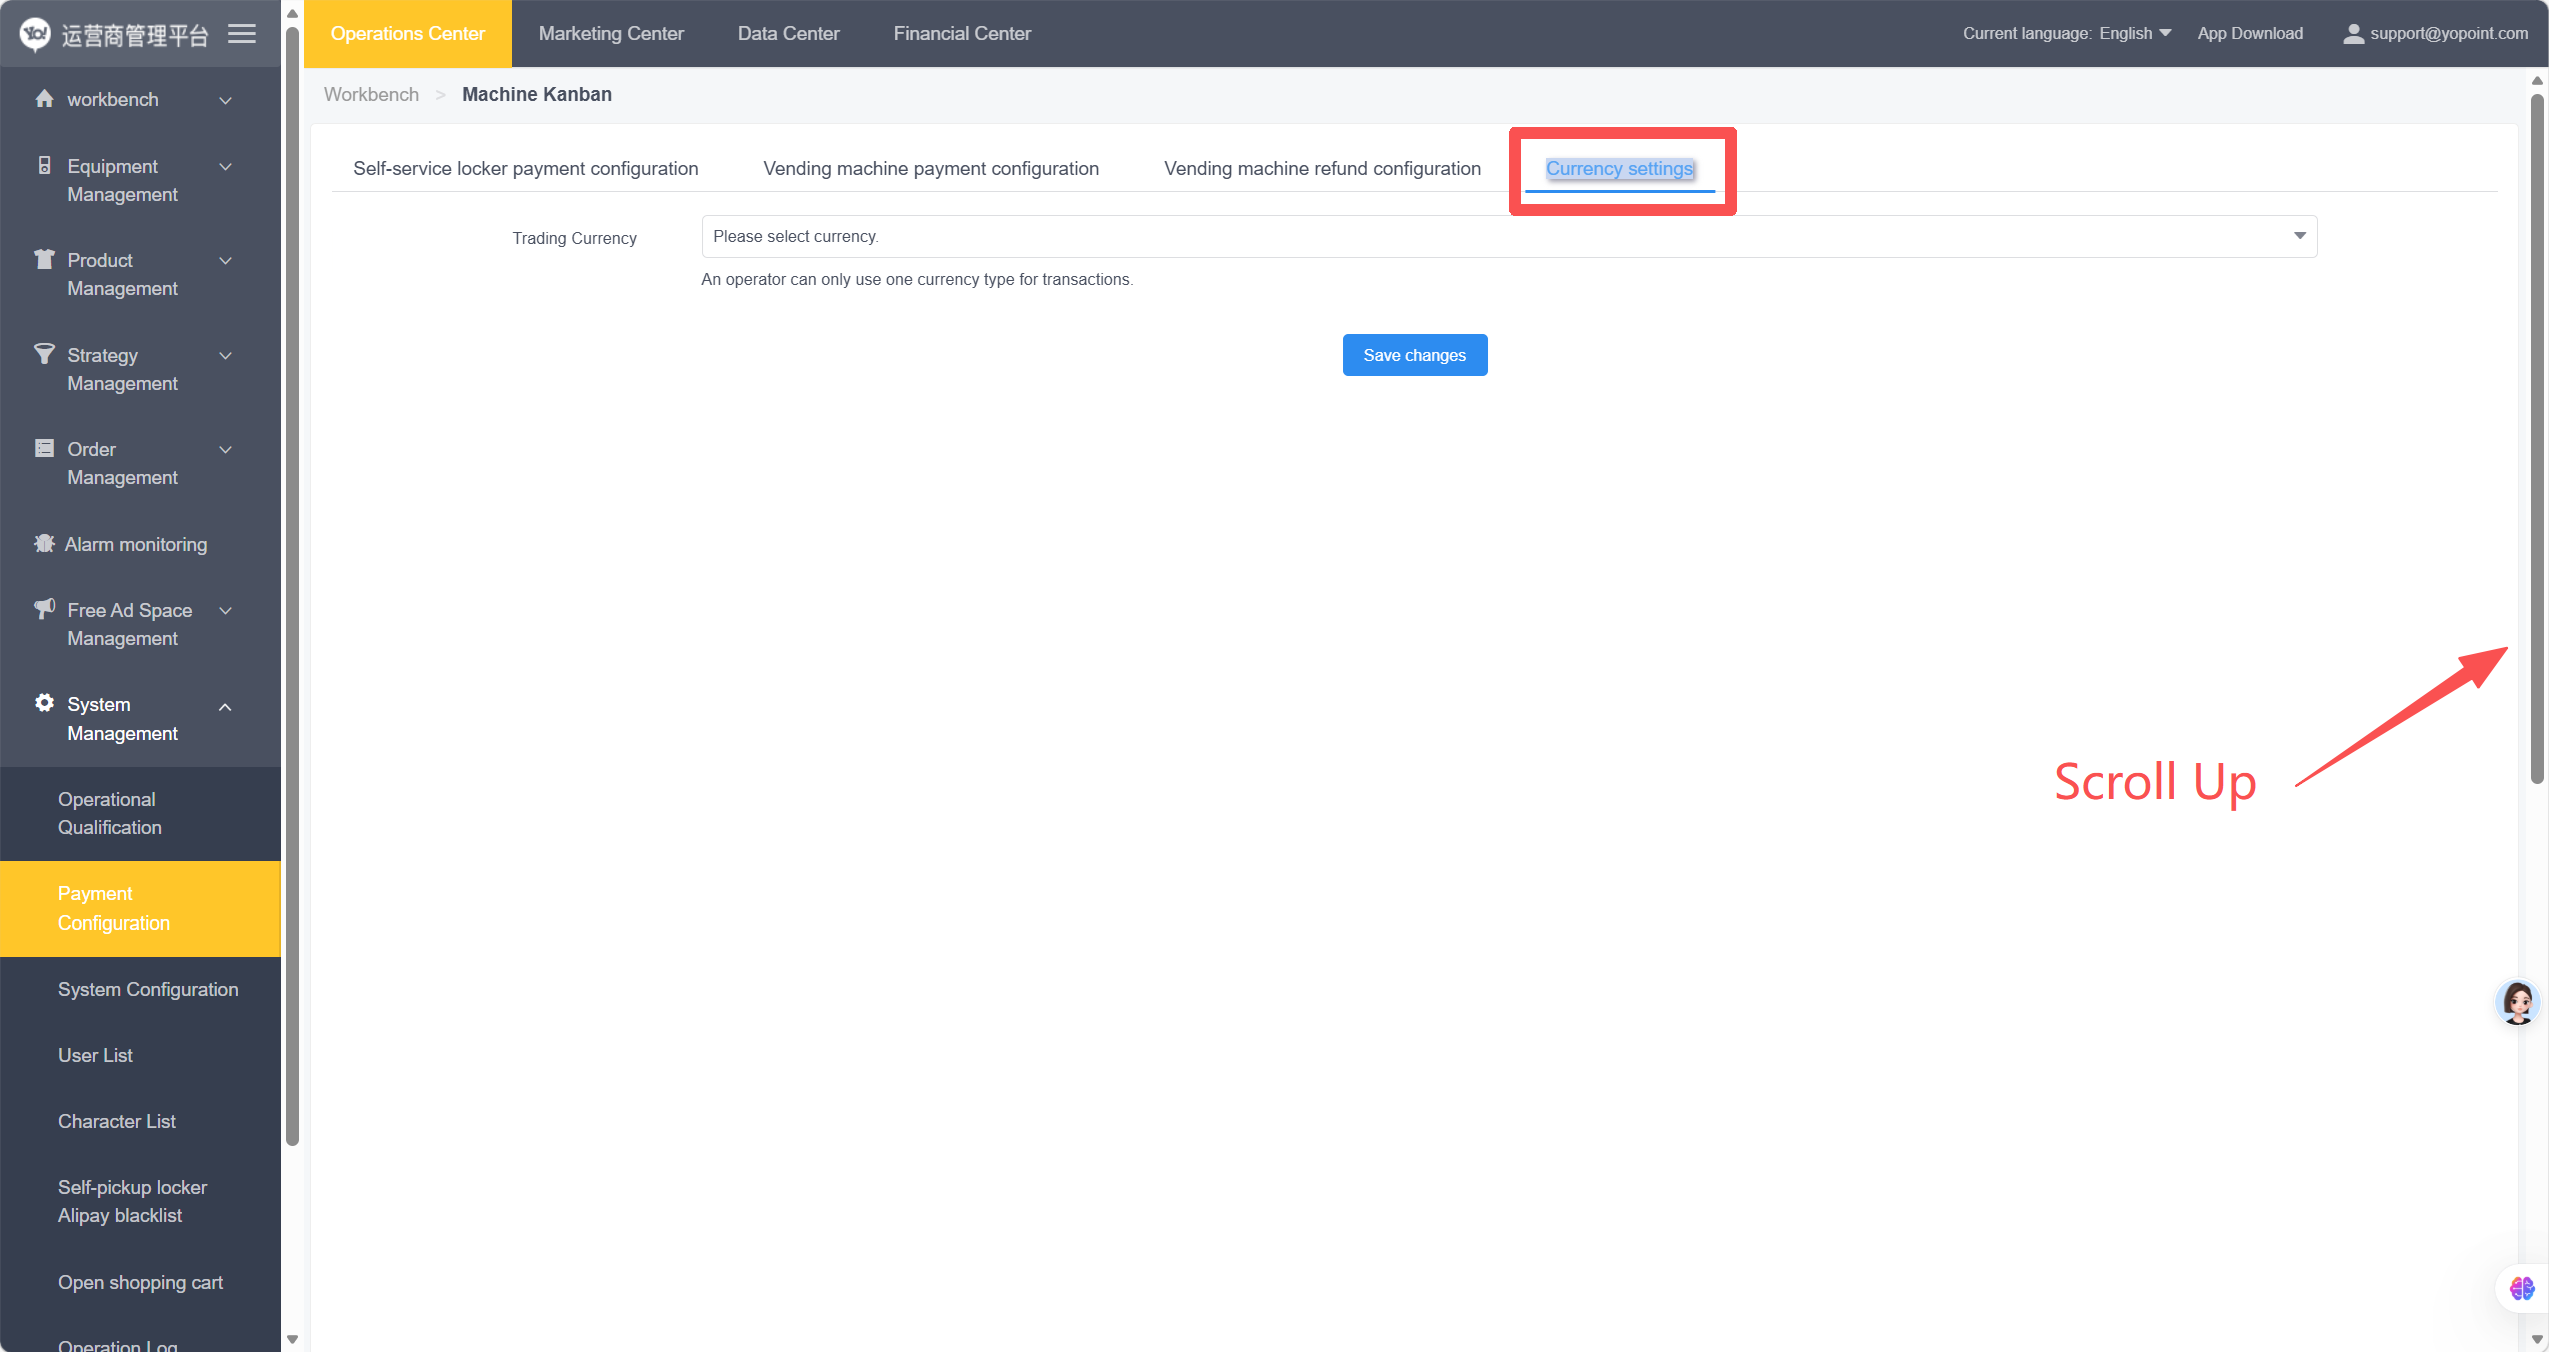
Scroll up within the page to find and modify currency settings.
Already have Stripe
Authorize directly. Paste your Stripe ID:acct_9SmniPLqog1lCAUK
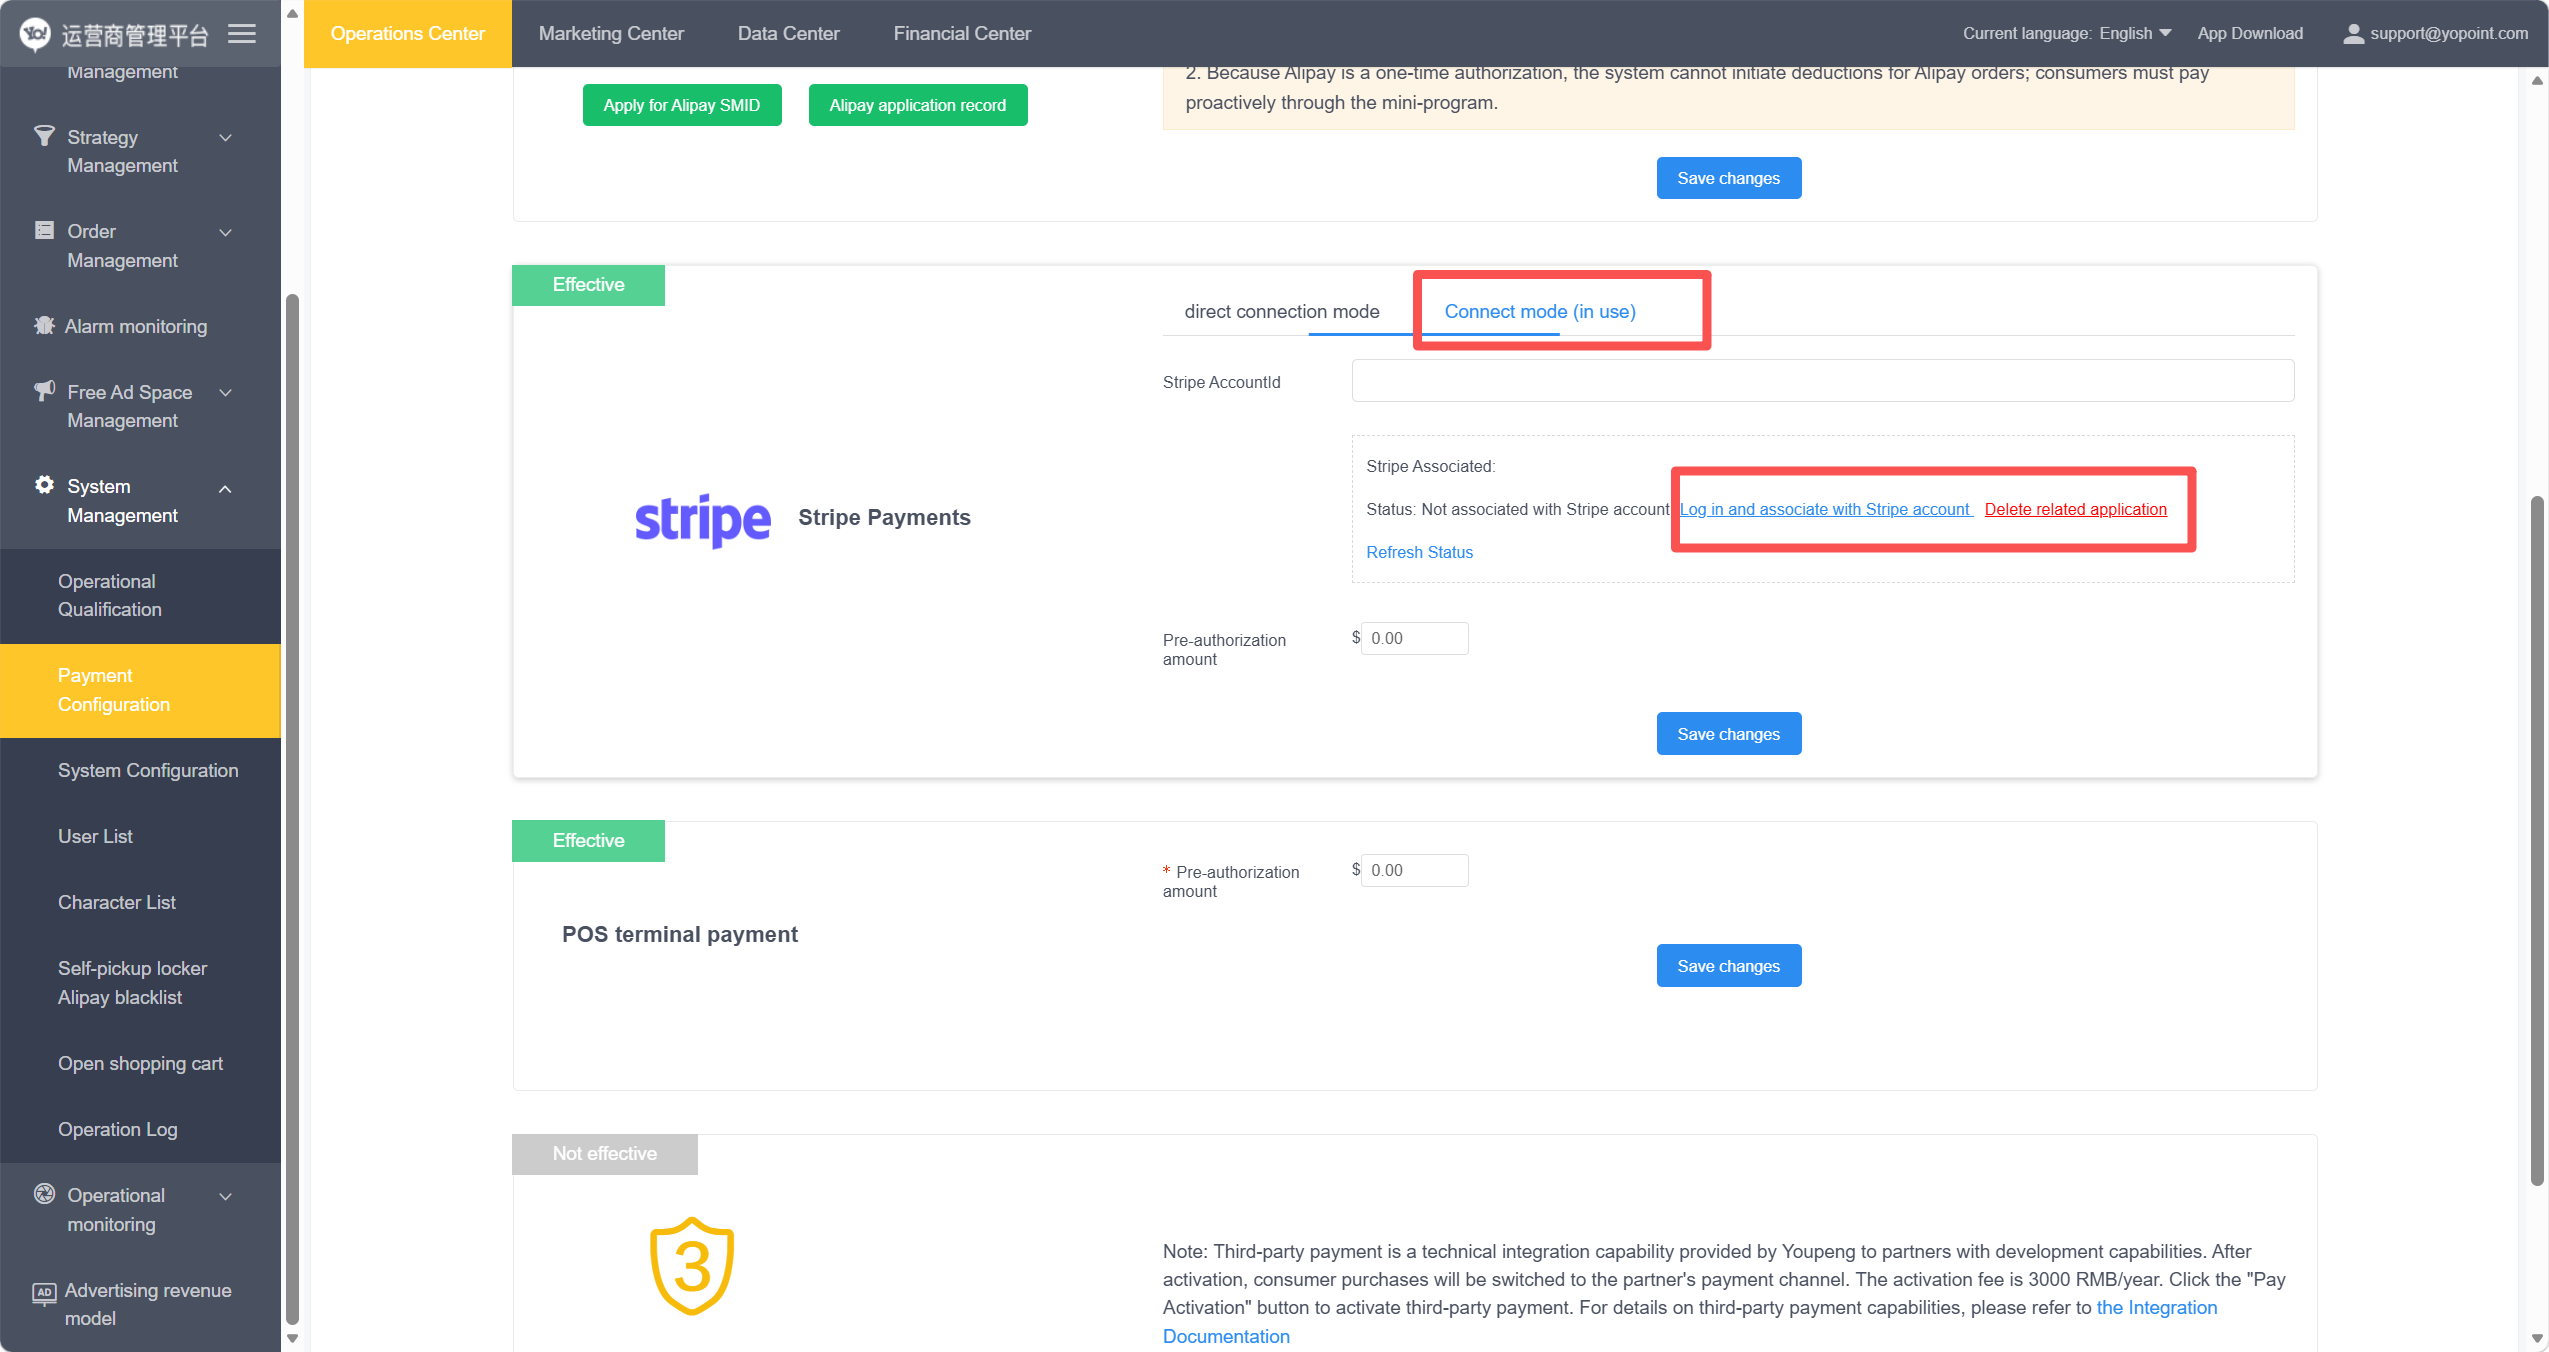
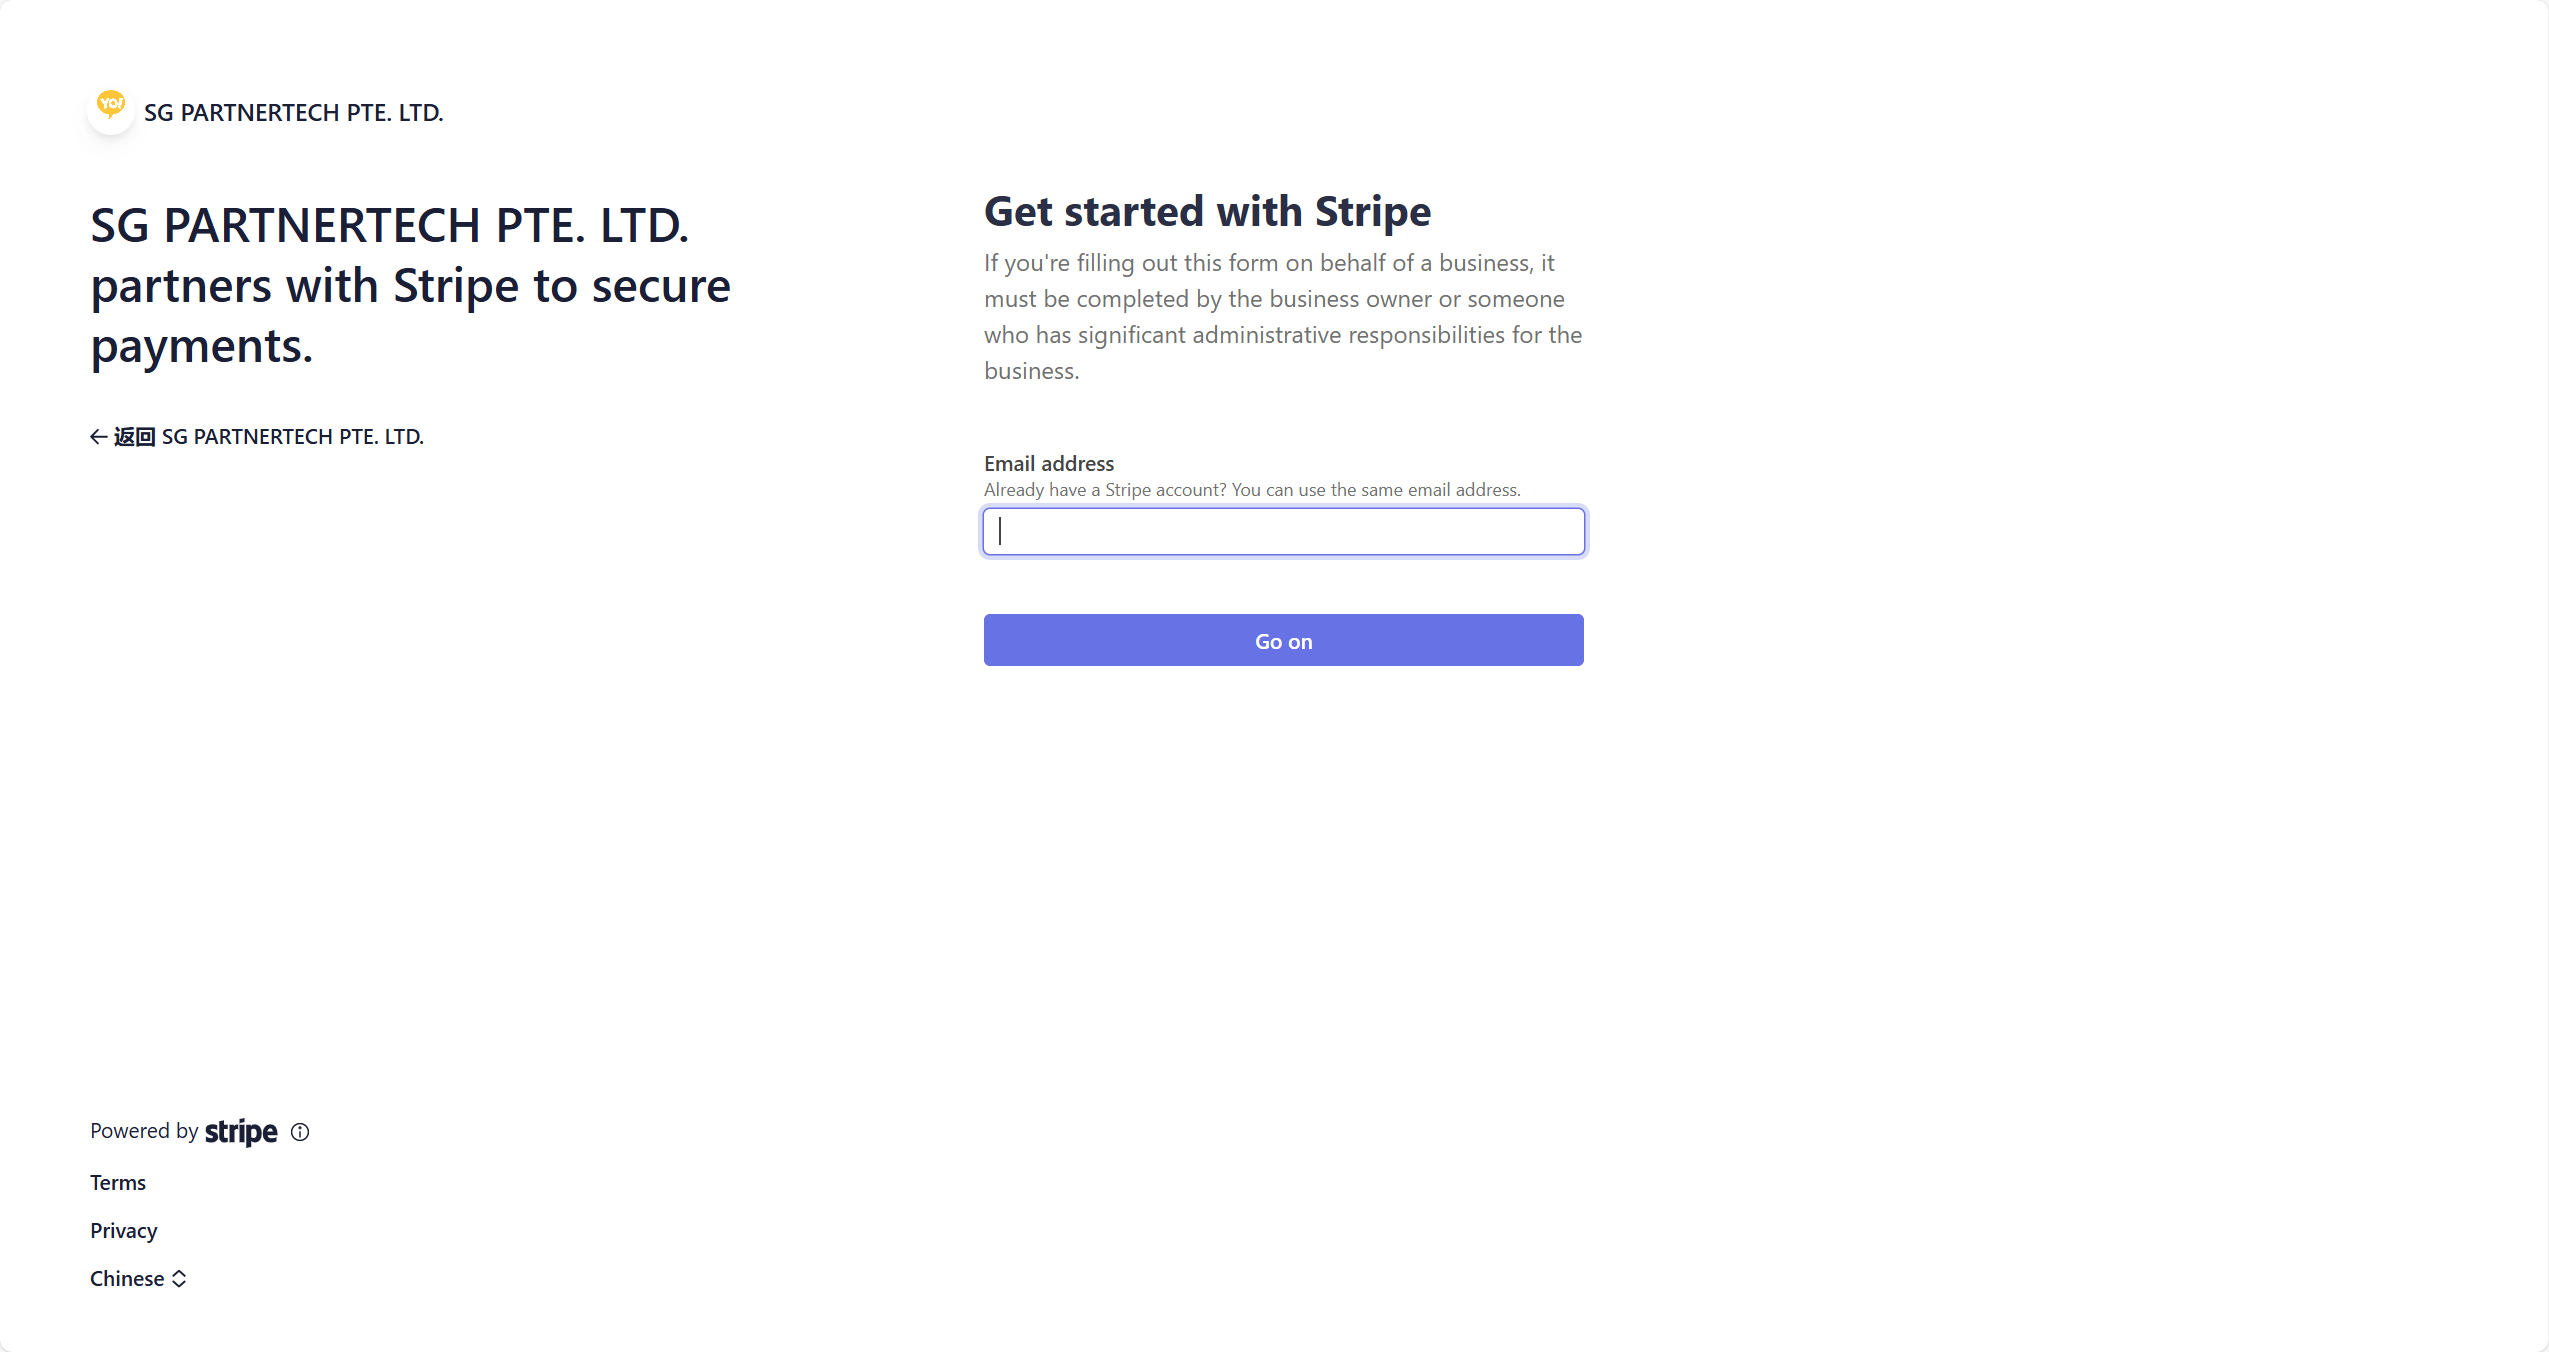
No Stripe account yet
Select Connect Mode (active/in use) → follow the flow to link and register.
🚫 Critical: Always select Connect Mode (active/in use). Do NOT choose "Direct Connection Mode".
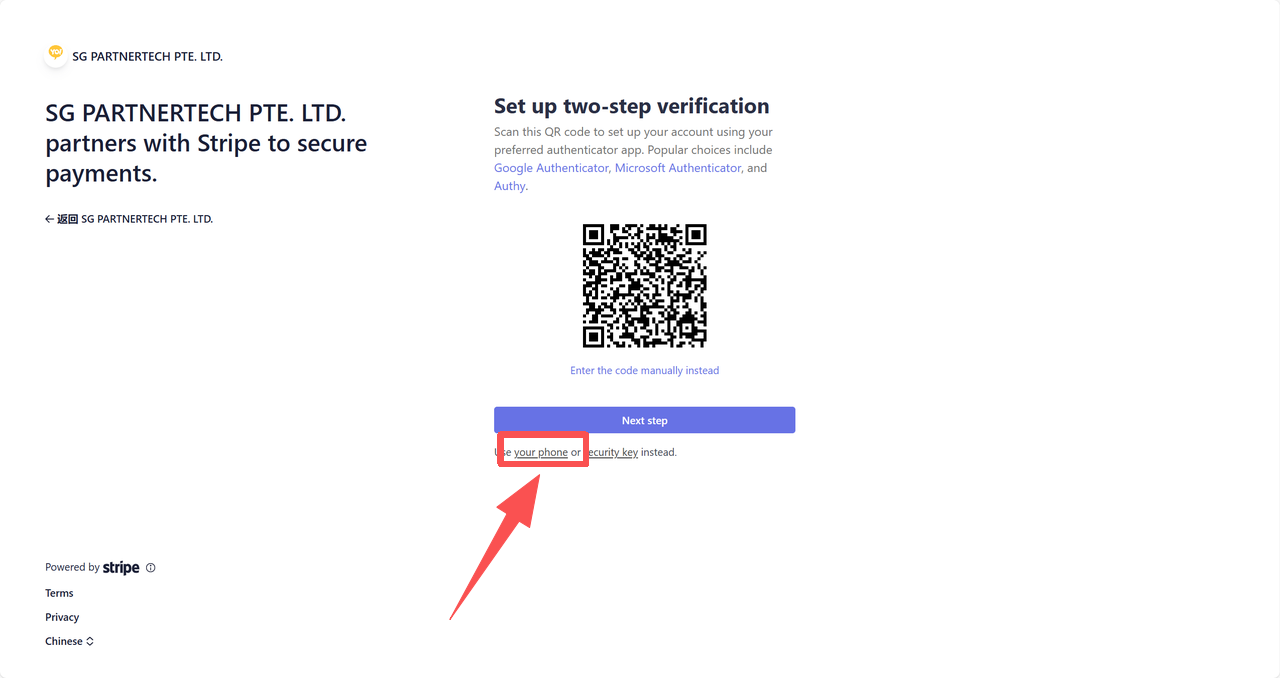
- Two-factor authentication: Use a third-party Authenticator app, or tap
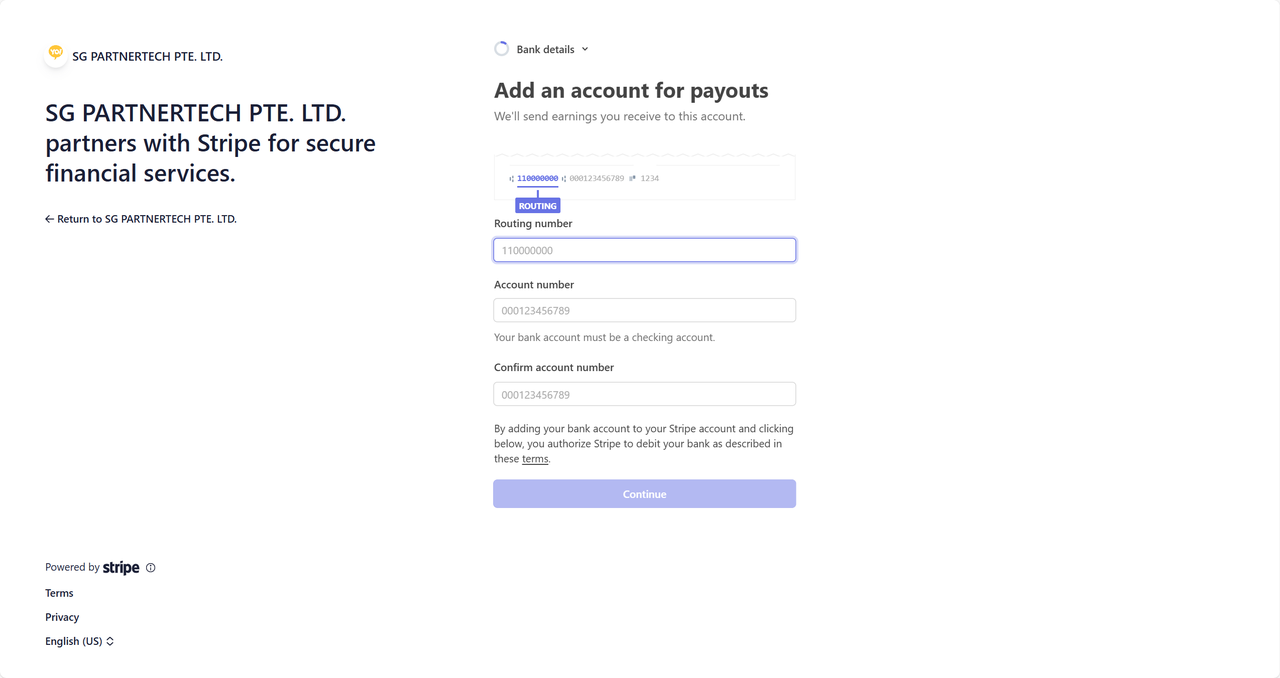
Your Phonefor phone verification. - Payouts account: The bank account you enter is where customer payments will be deposited — verify carefully.
After Stripe registration, return to Payment Configuration and fill in:
- Stripe Account Number: Paste your Stripe ID (format:
acct_9SmniPLqog1lCAUK). Click "Please fill in the information" to complete terminal location details. - POS Pre-authorization amount:
- Stripe Pre-authorization — for customers opening doors via QR code
- POS Terminal Pre-authorization — for customers swiping credit/debit cards
A security measure for "take-first, pay-later" transactions. When a customer opens the door, a small amount is temporarily held on their payment method to verify ability to pay — preventing theft. The hold is not a charge — banks release it automatically within 30 minutes to several days. Similar to gas station pre-authorization.
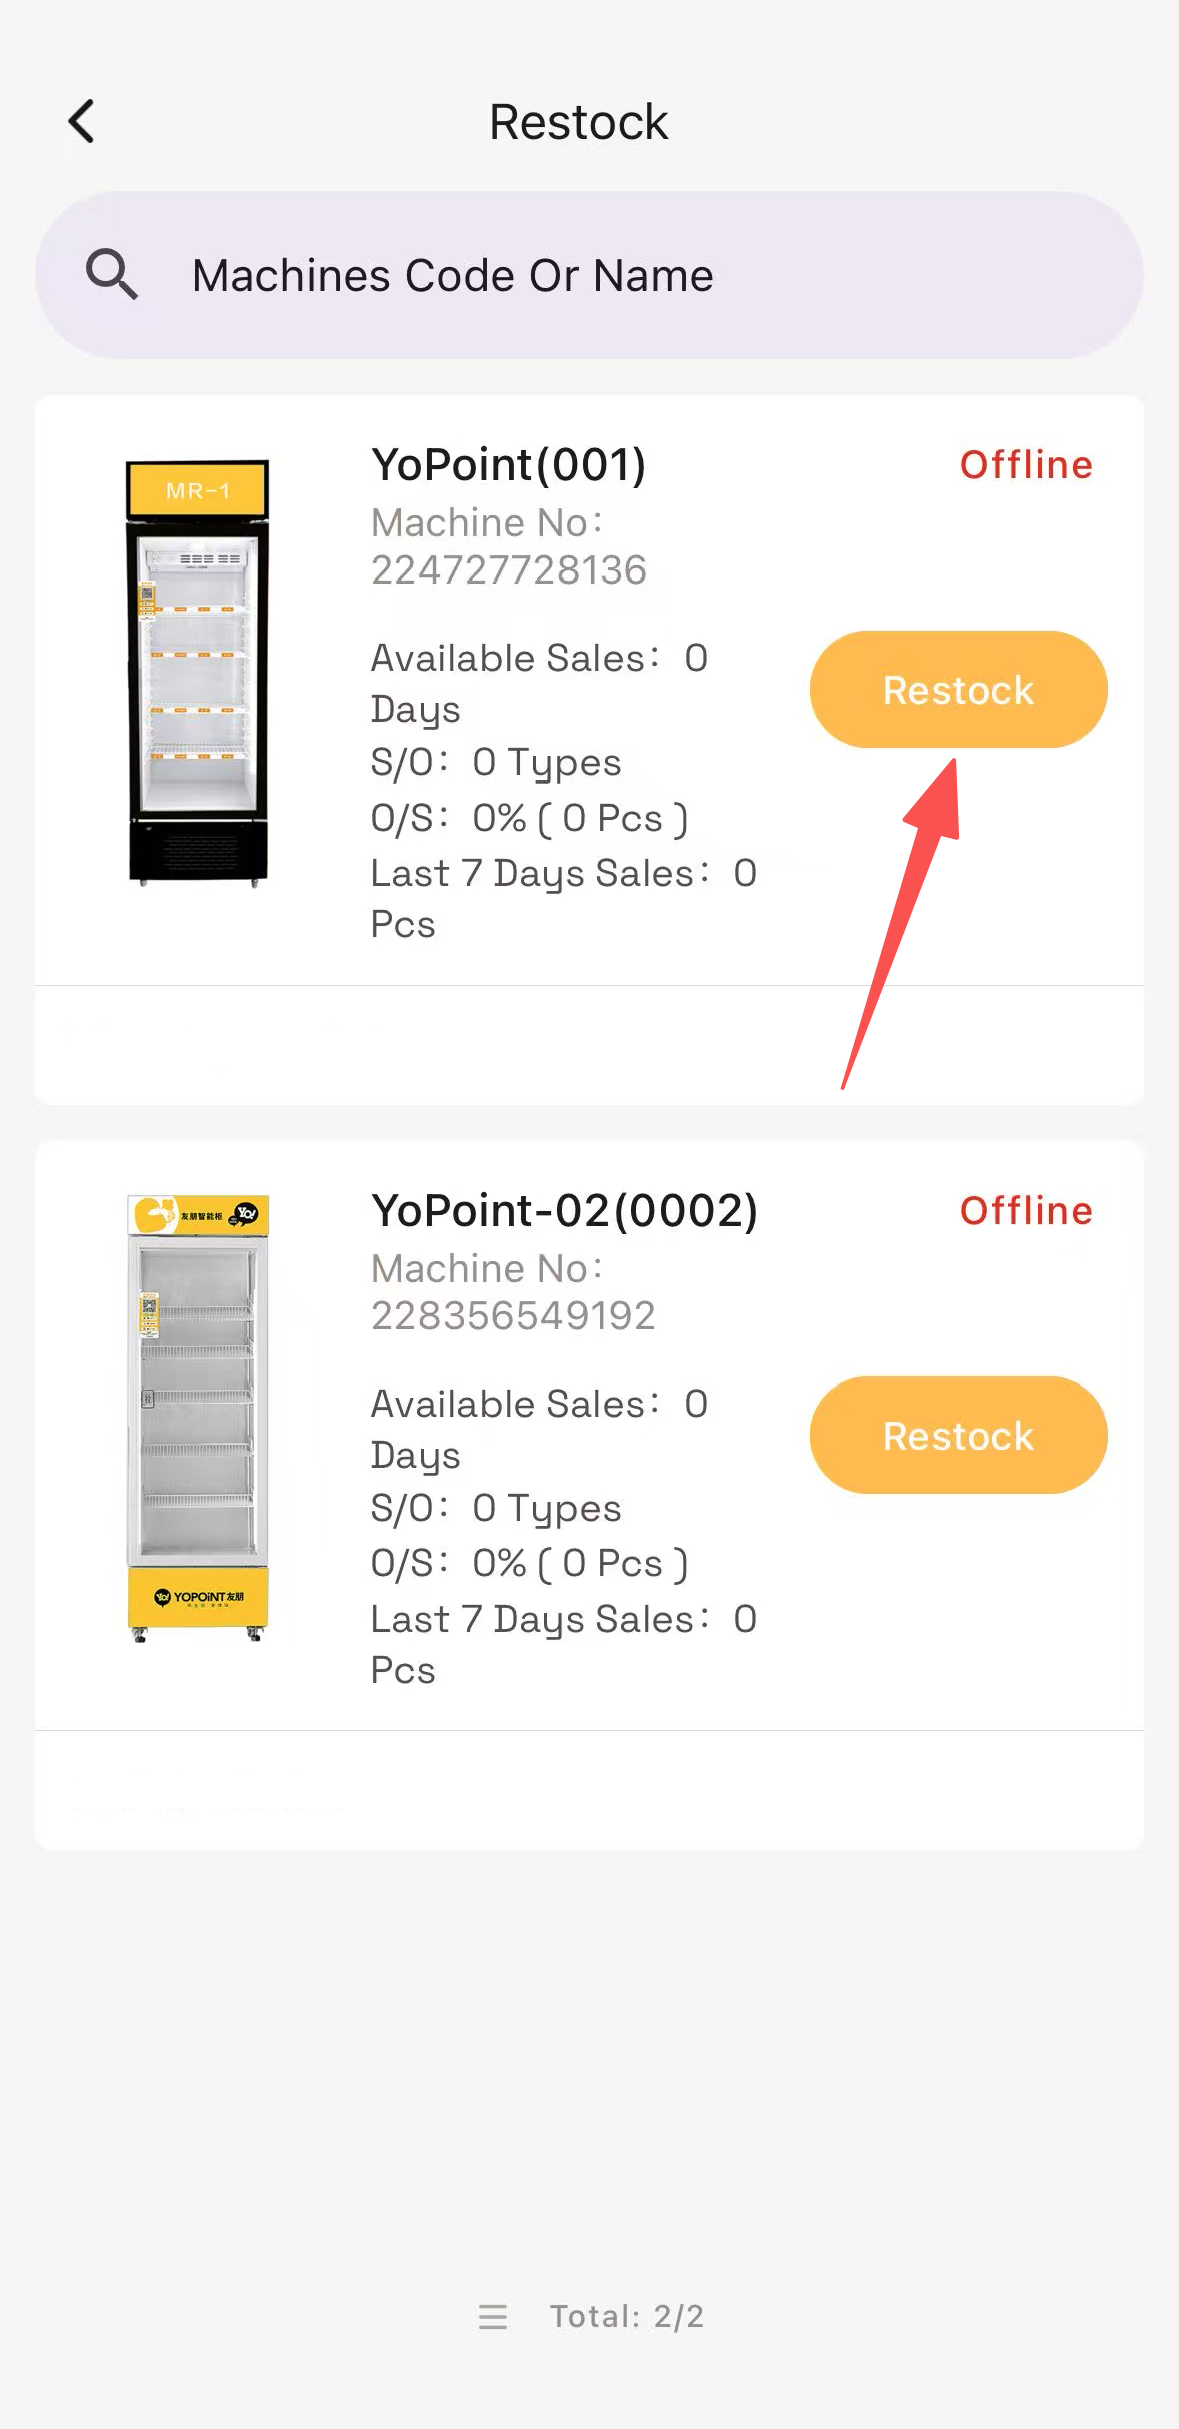
Machine Management.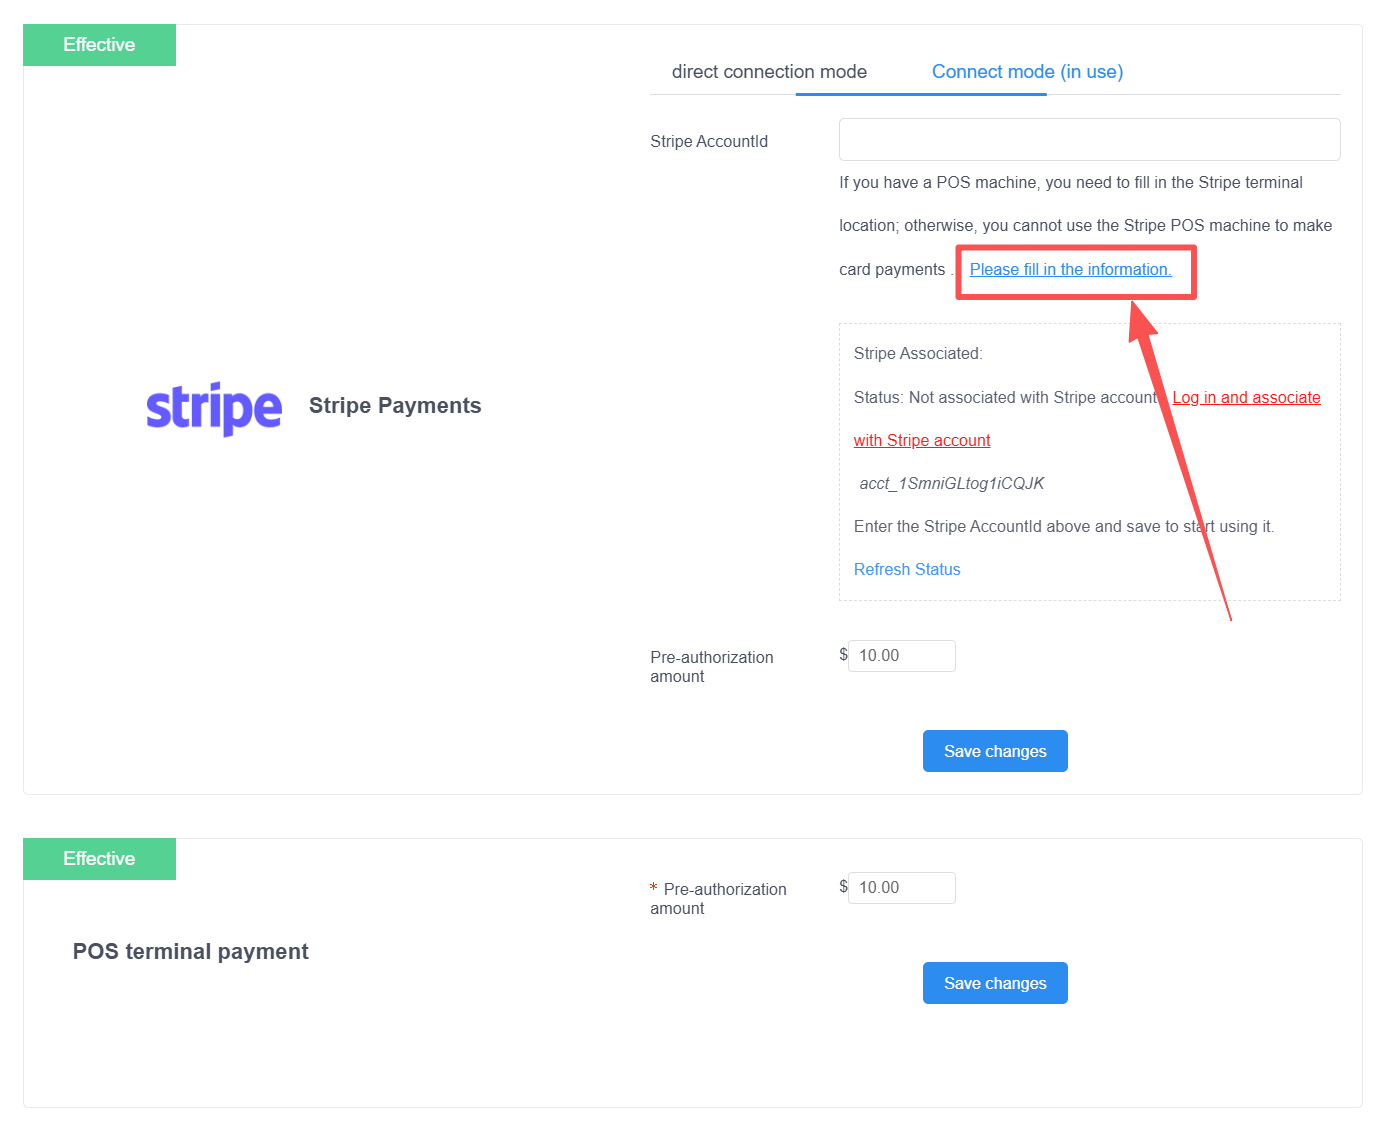

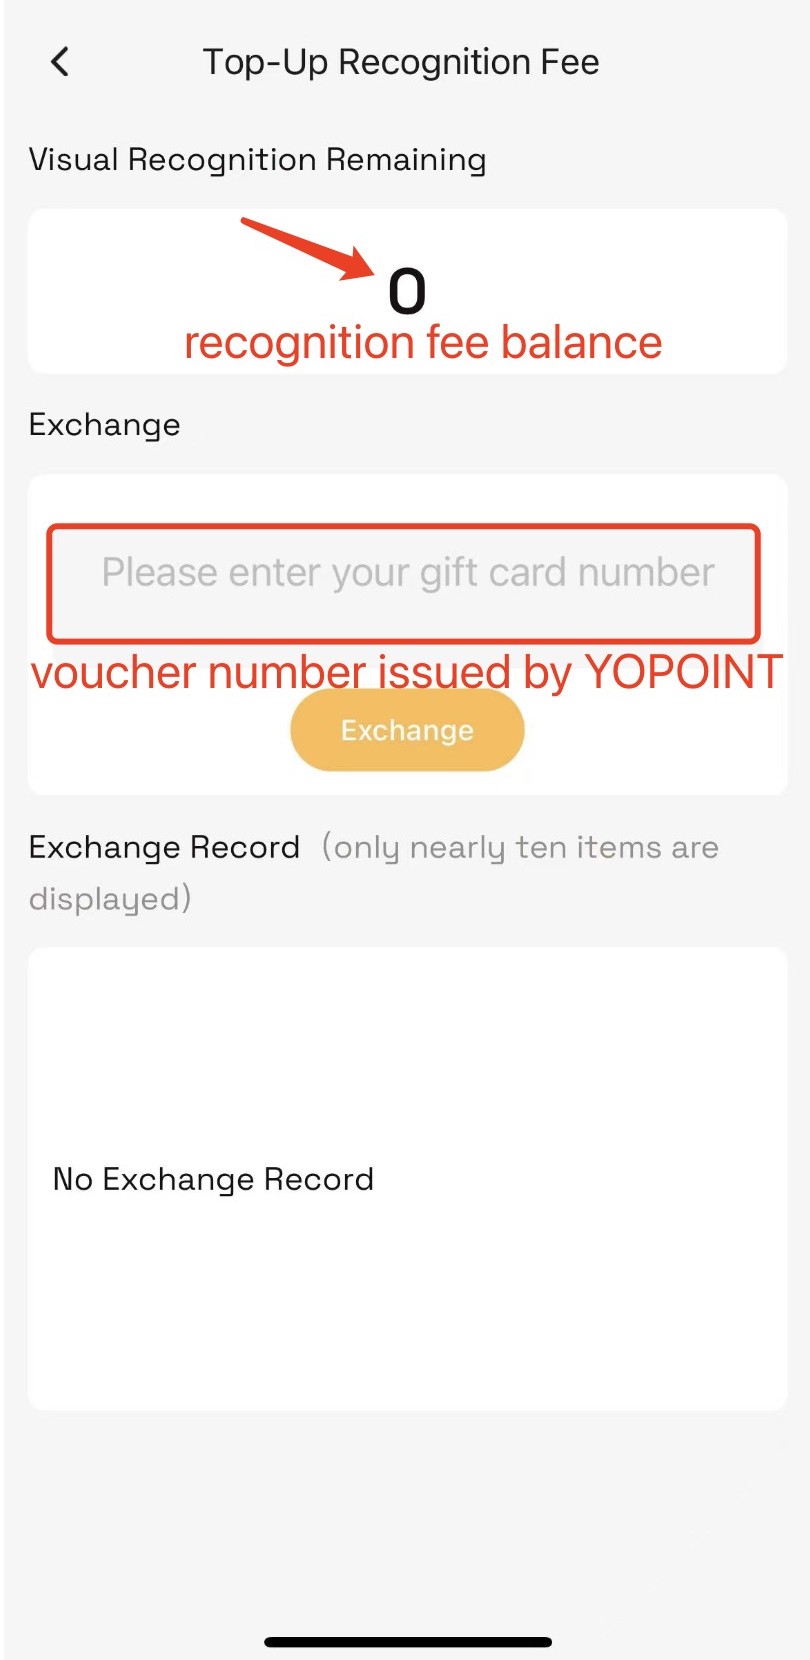
Every successful completed transaction incurs a flat fee of $0.03, regardless of item count. Opening the door without purchase incurs no charge.
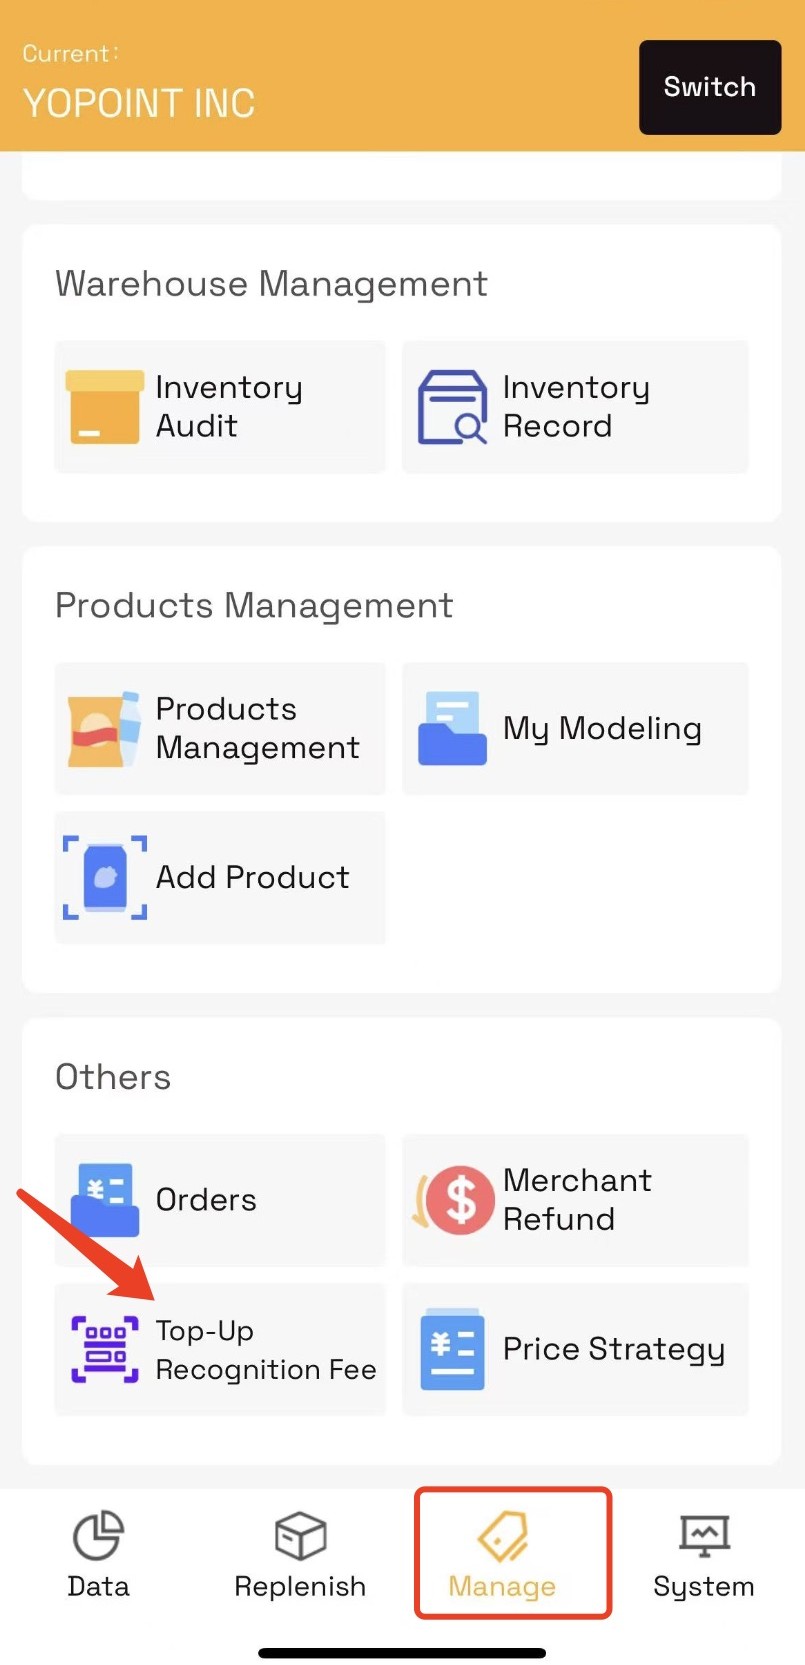
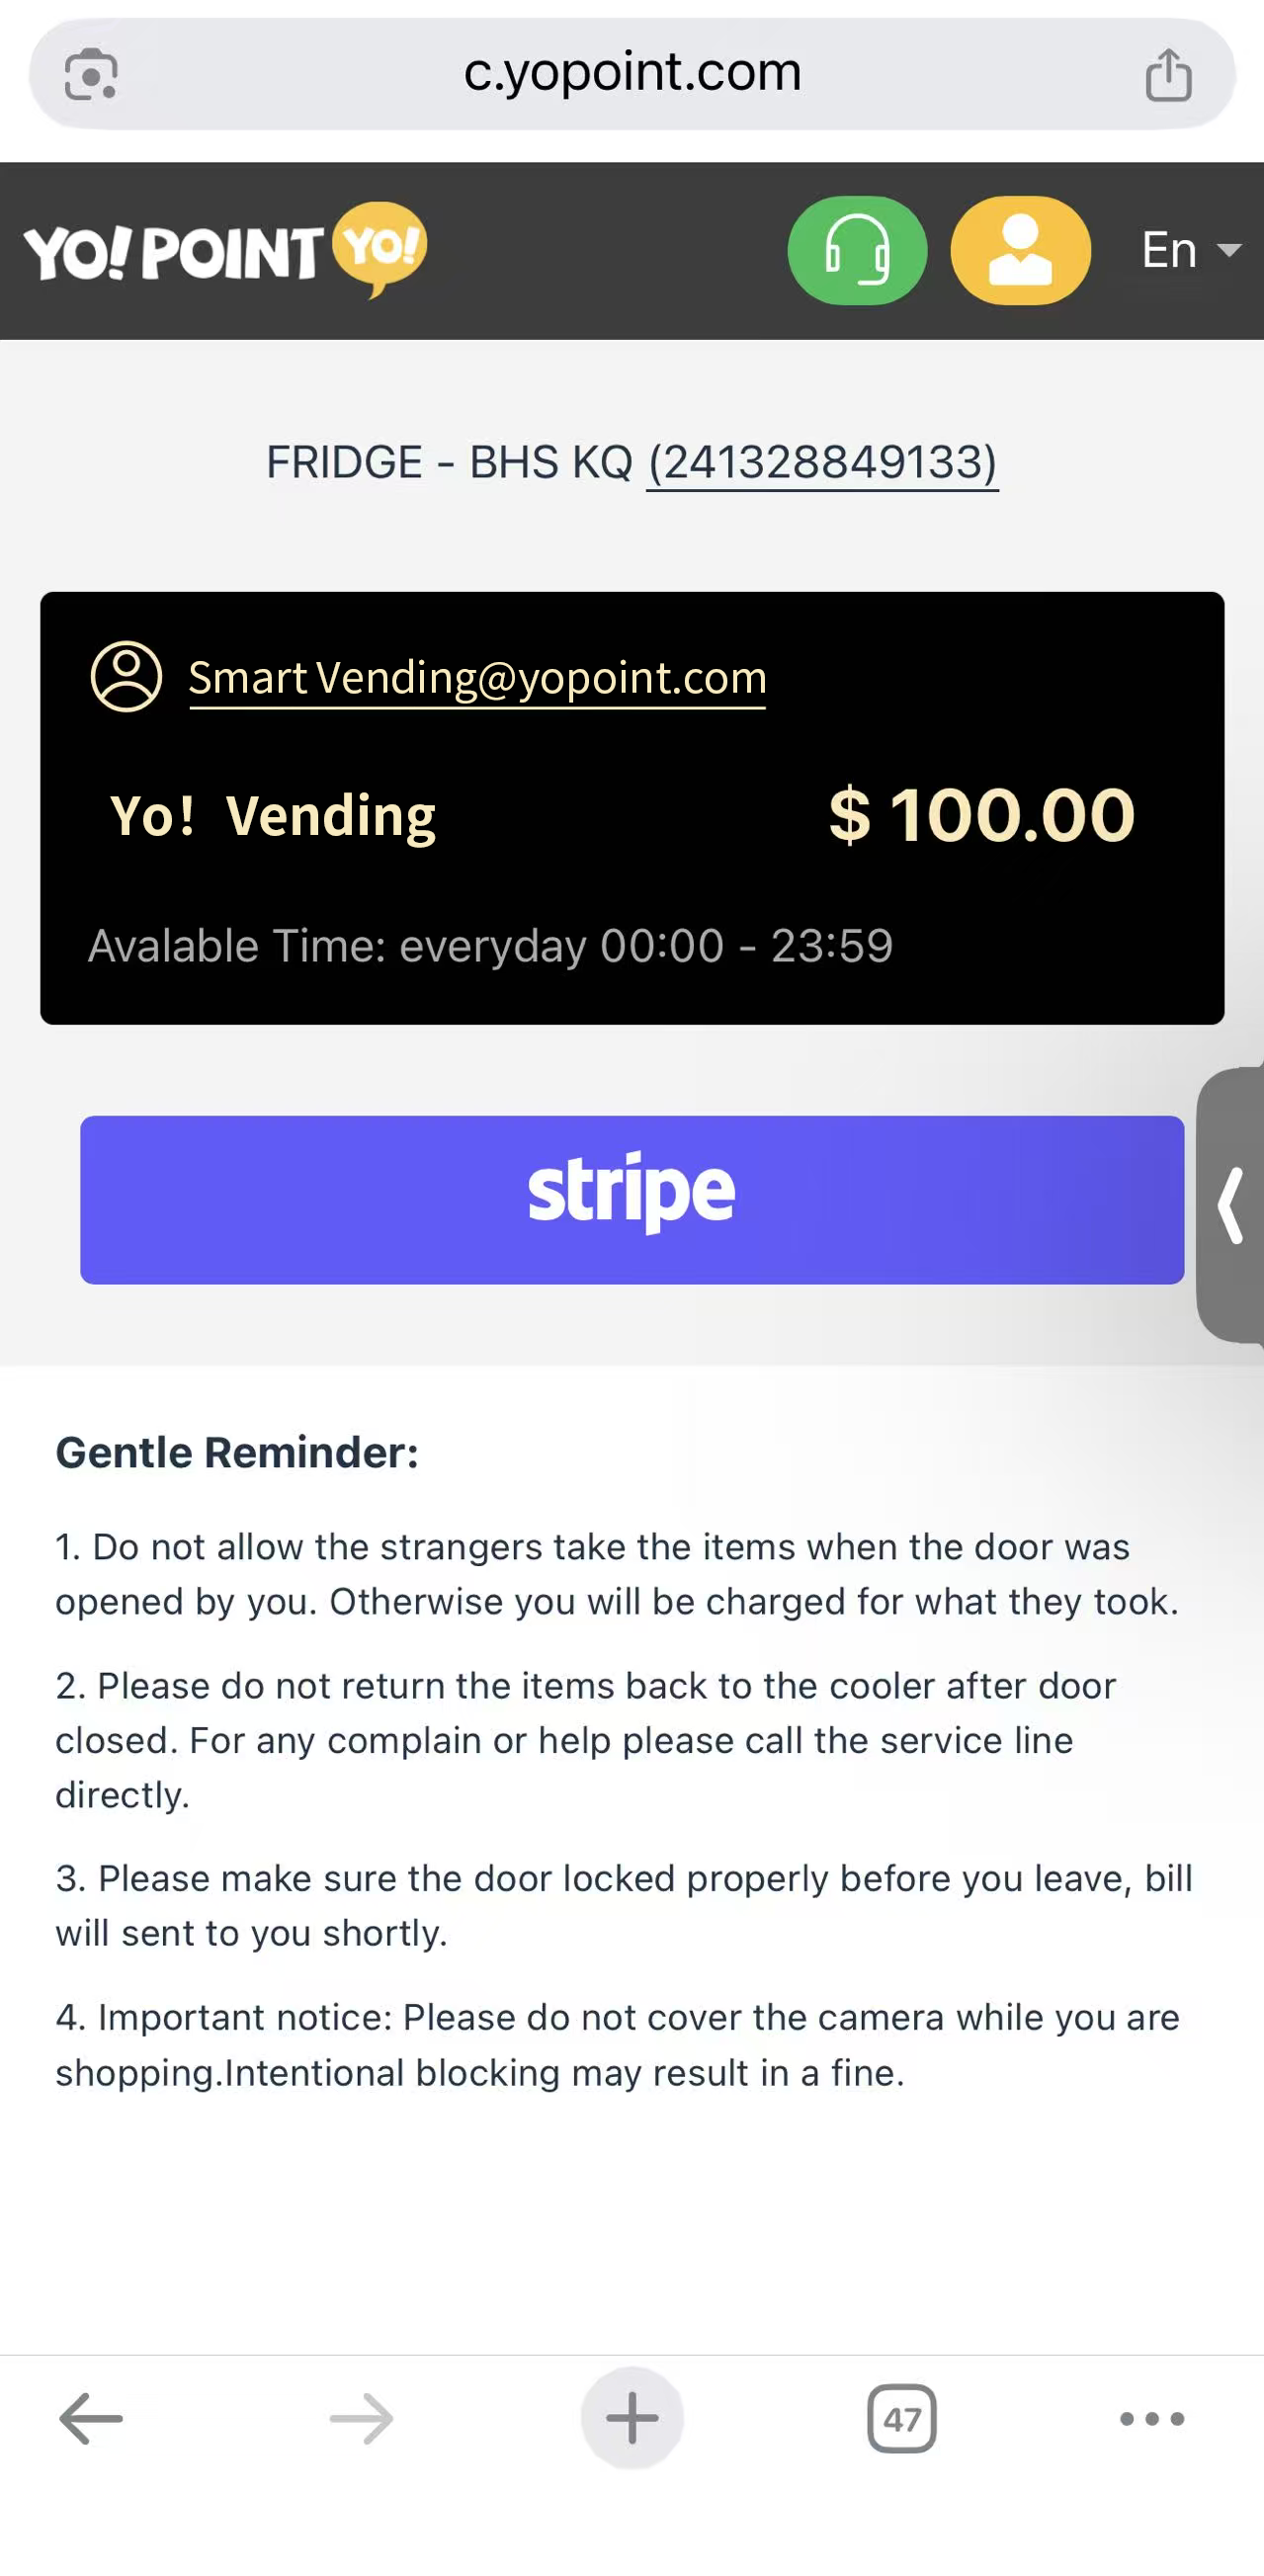
- Pay via the Stripe Top-Up link above.
- Customer service converts your payment into a Voucher and returns it to you.
- Redeem the Voucher in the system to complete top-up.
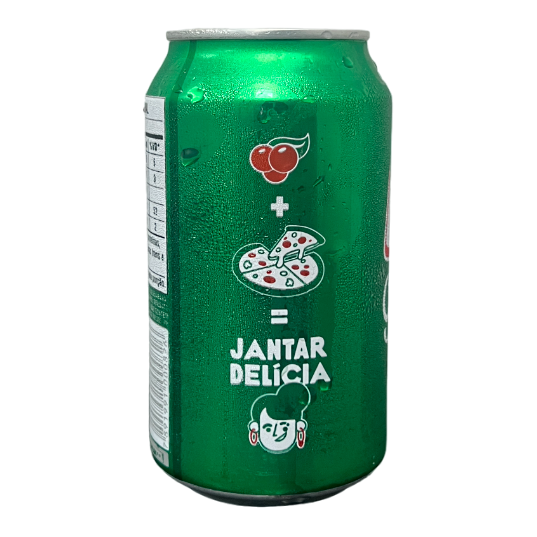
Product photos must clearly display brand name + product appearance for optimal AI recognition accuracy.
If the system automatically displays the product code after scanning, tap Add to confirm.
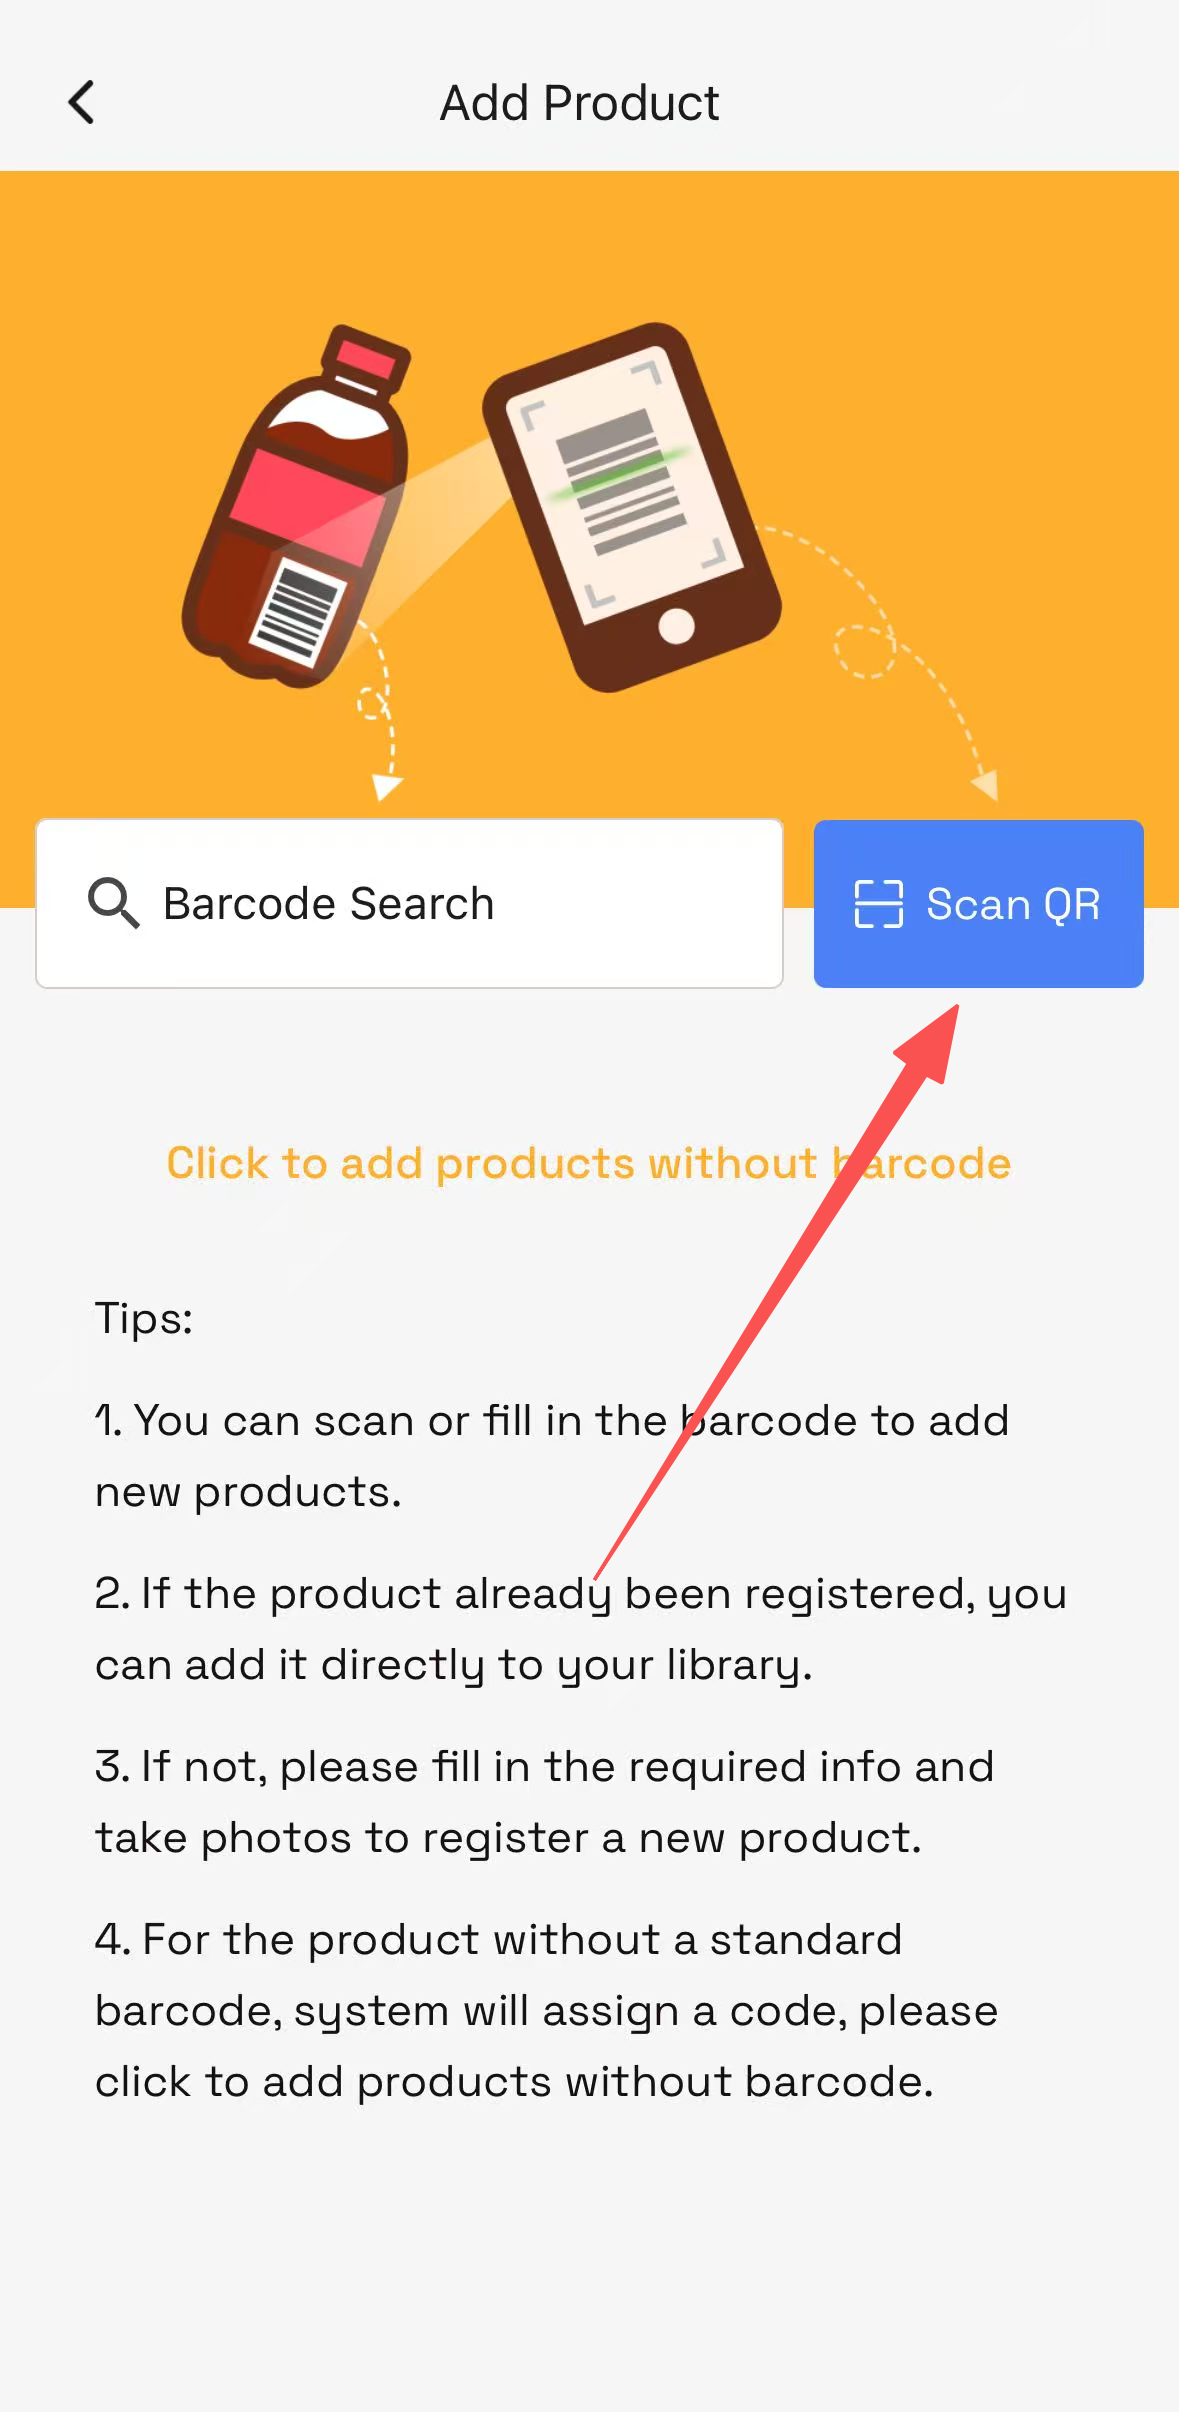
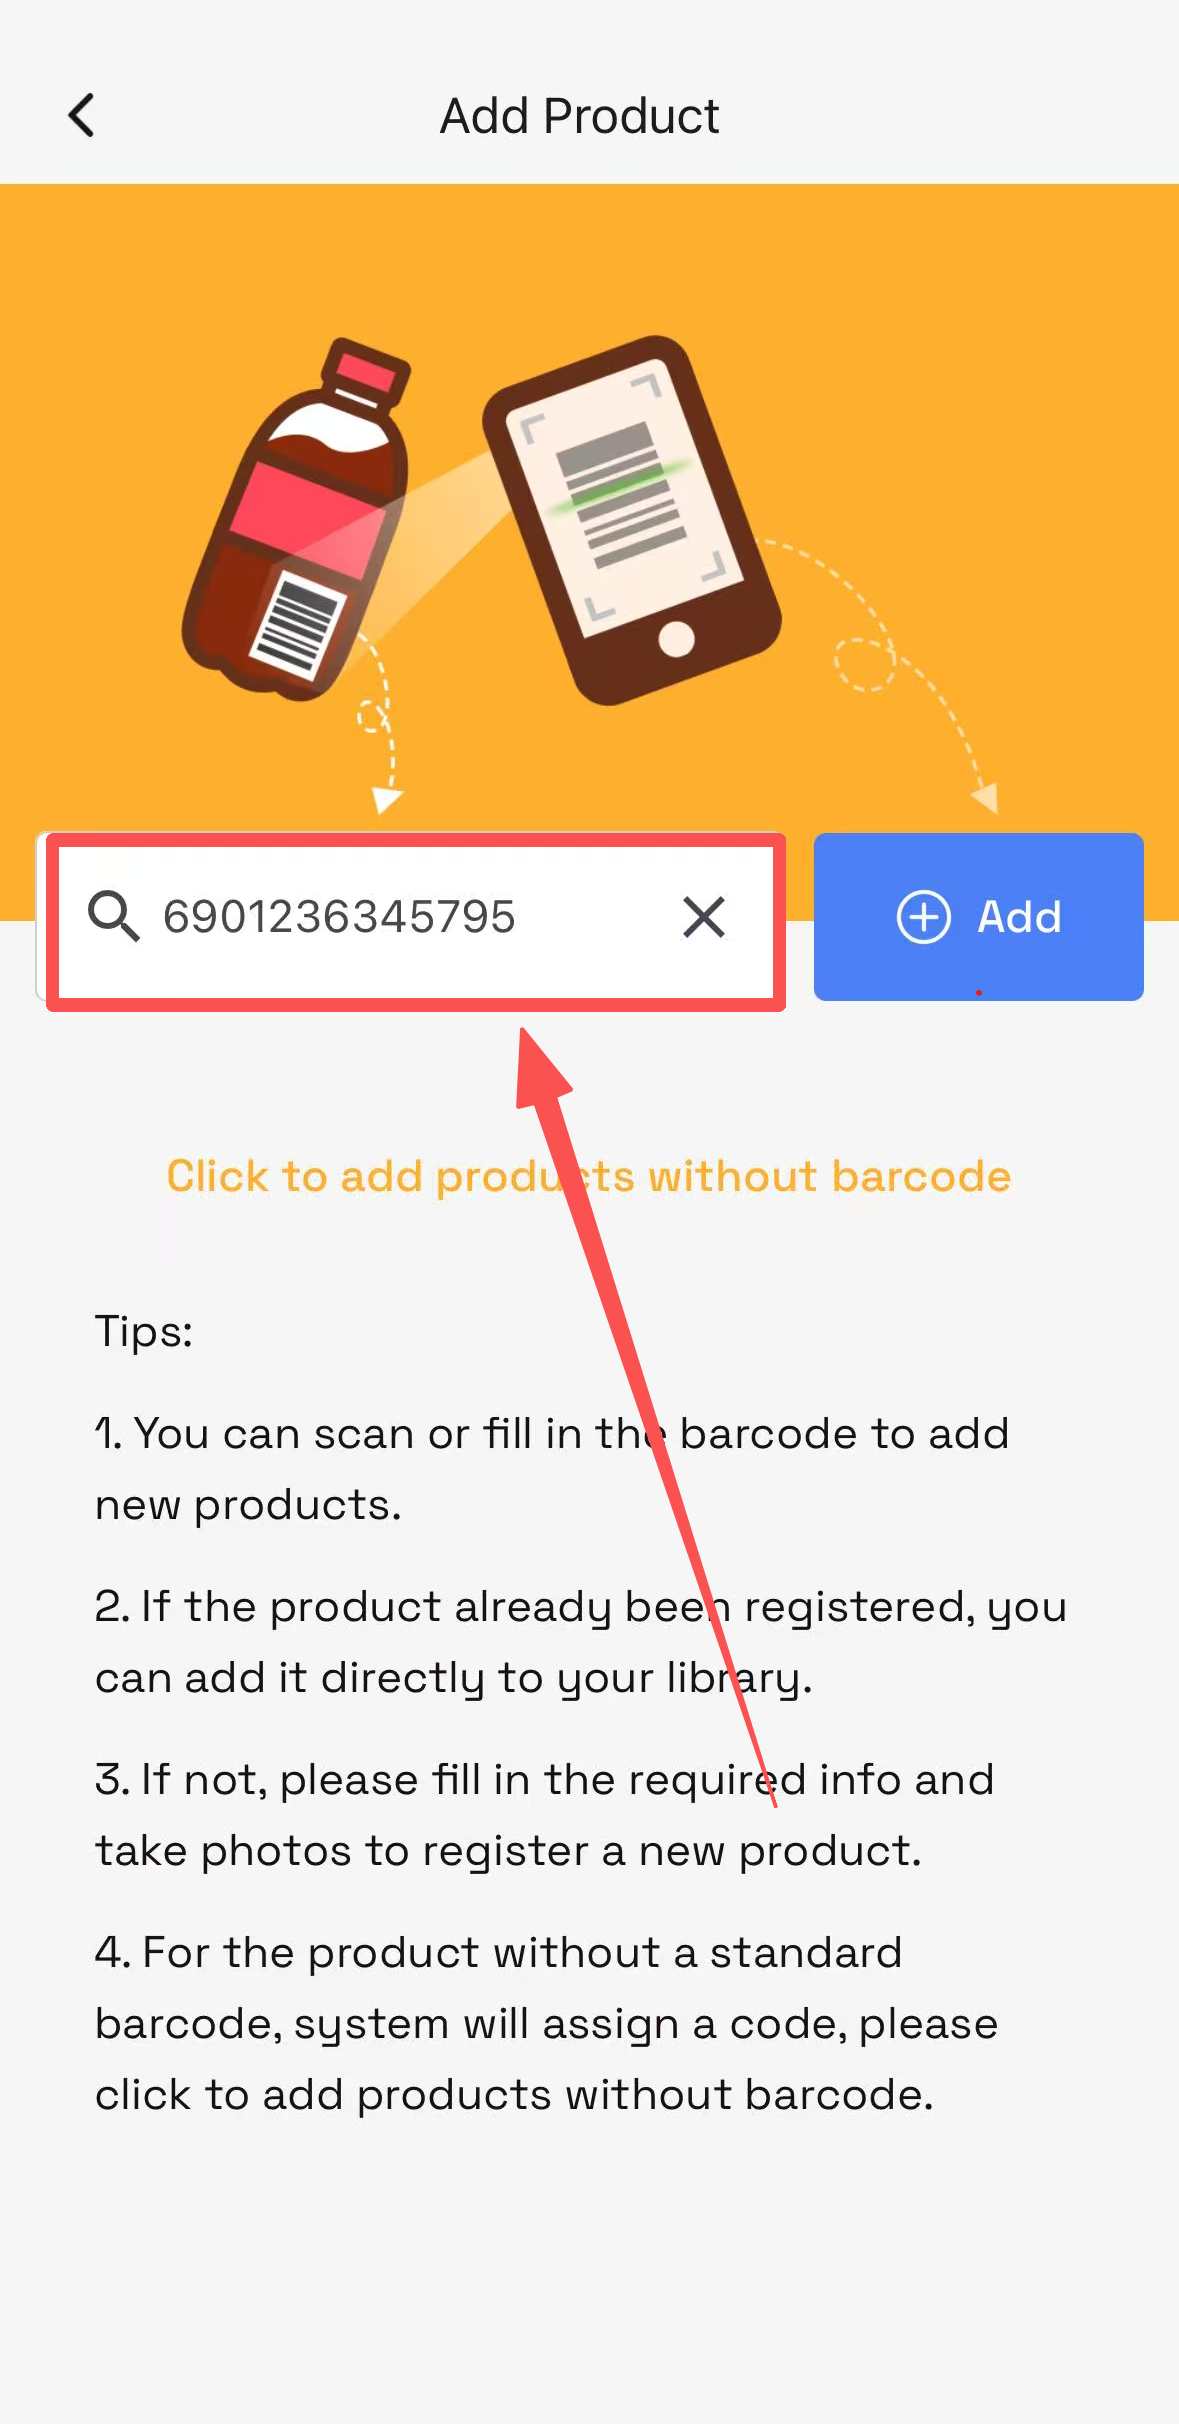
- Tap
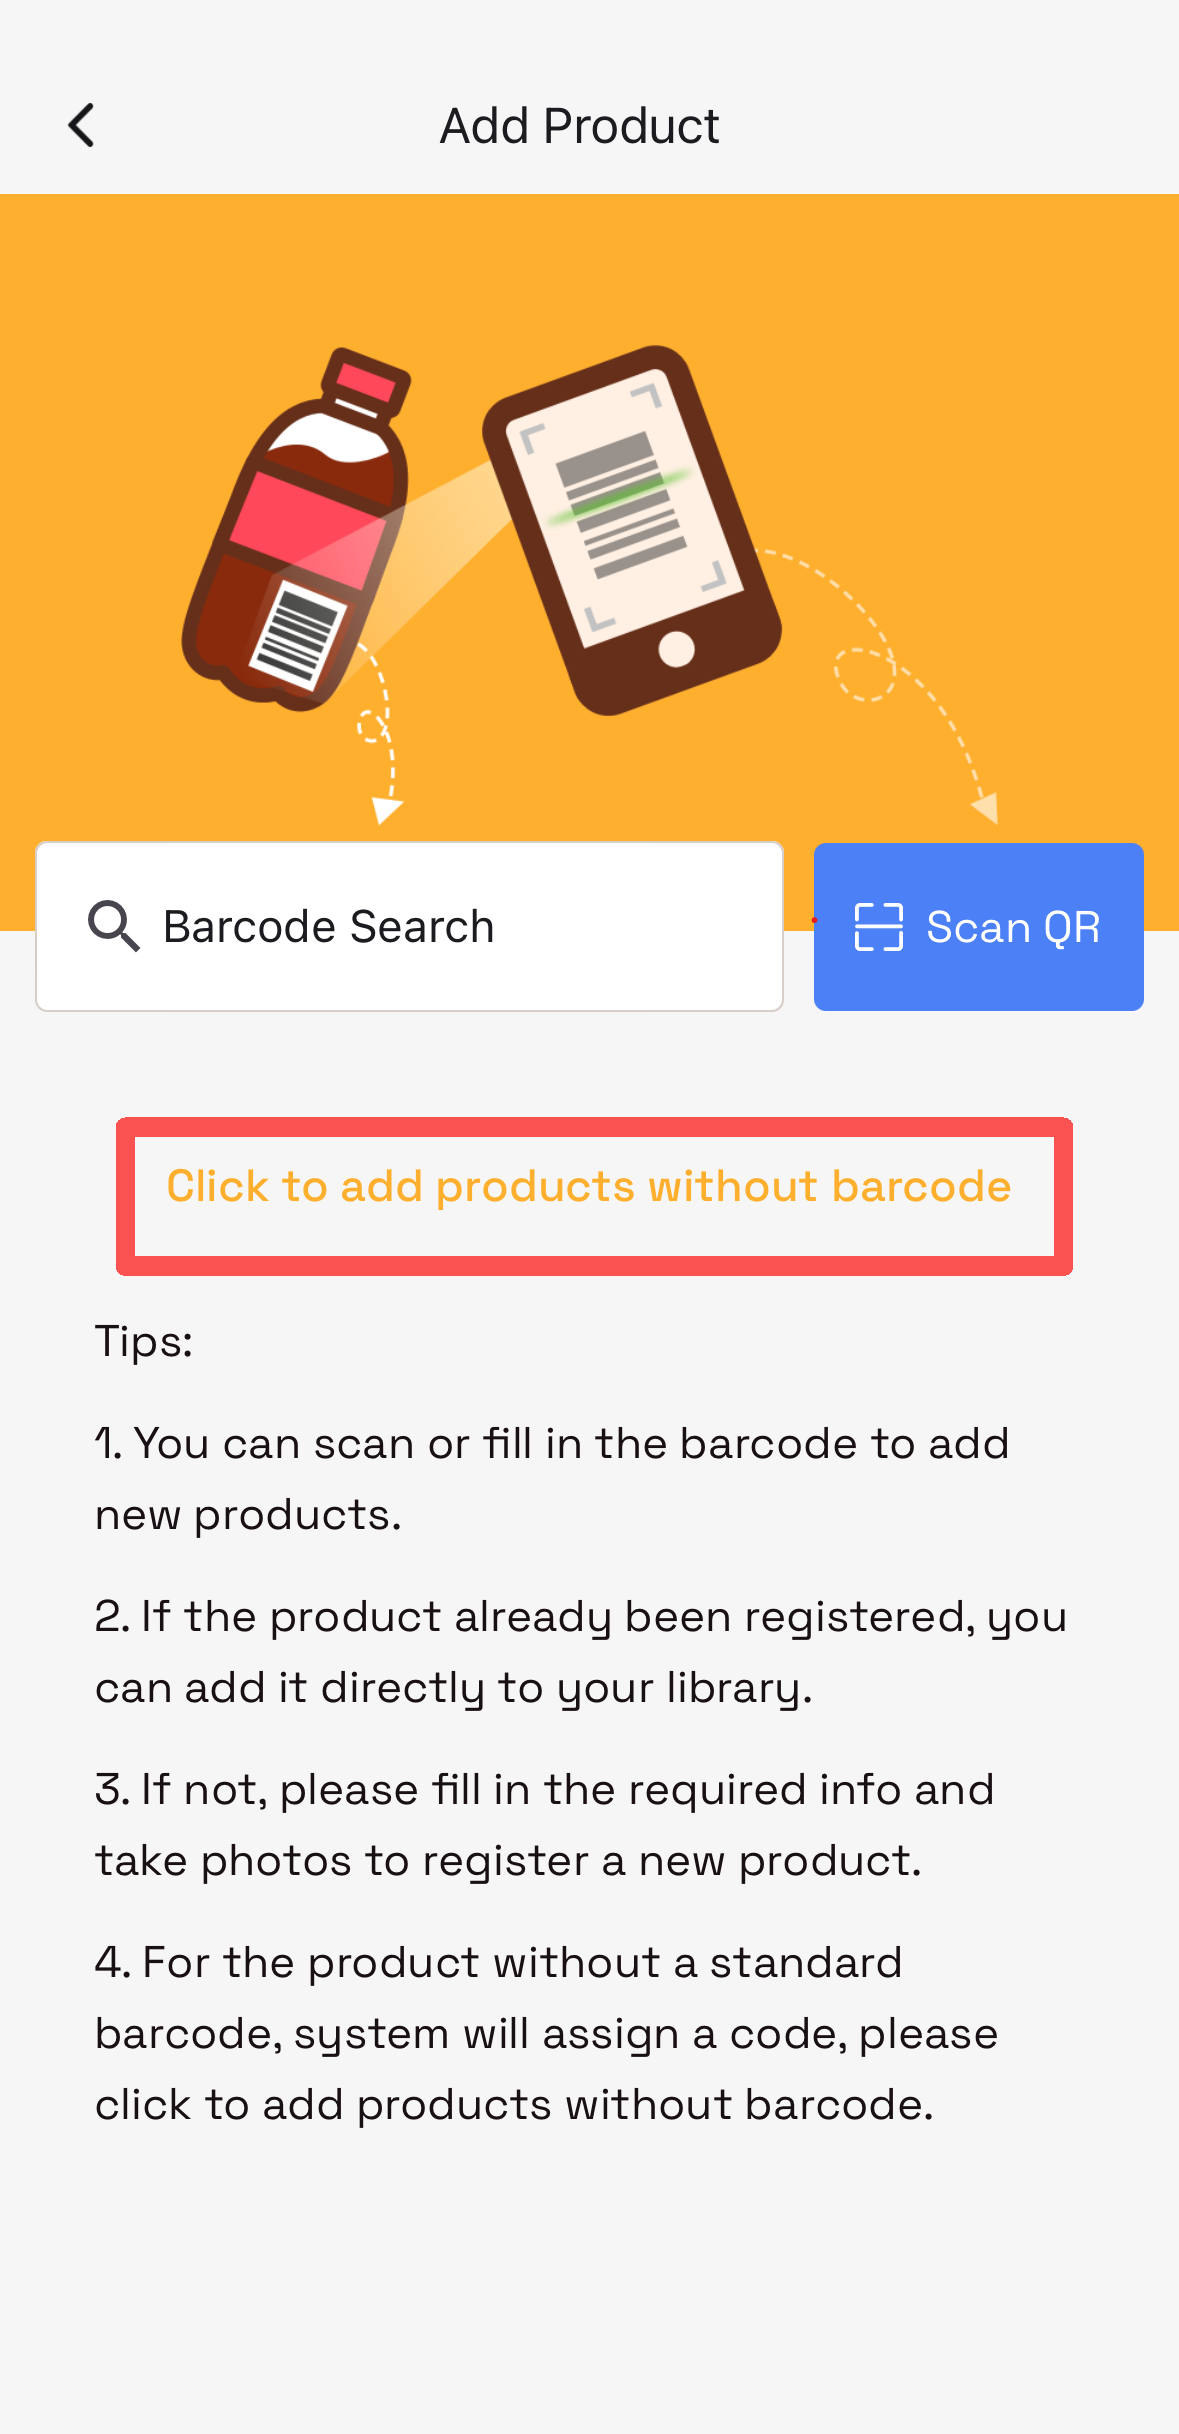
Click to Add Products without Barcodefor manual search and entry. - Complete the
Product Infofields. - Take product photos against a clean white background with bright lighting. Tap "Click here to view modeling picture requirements" for full photo instructions.
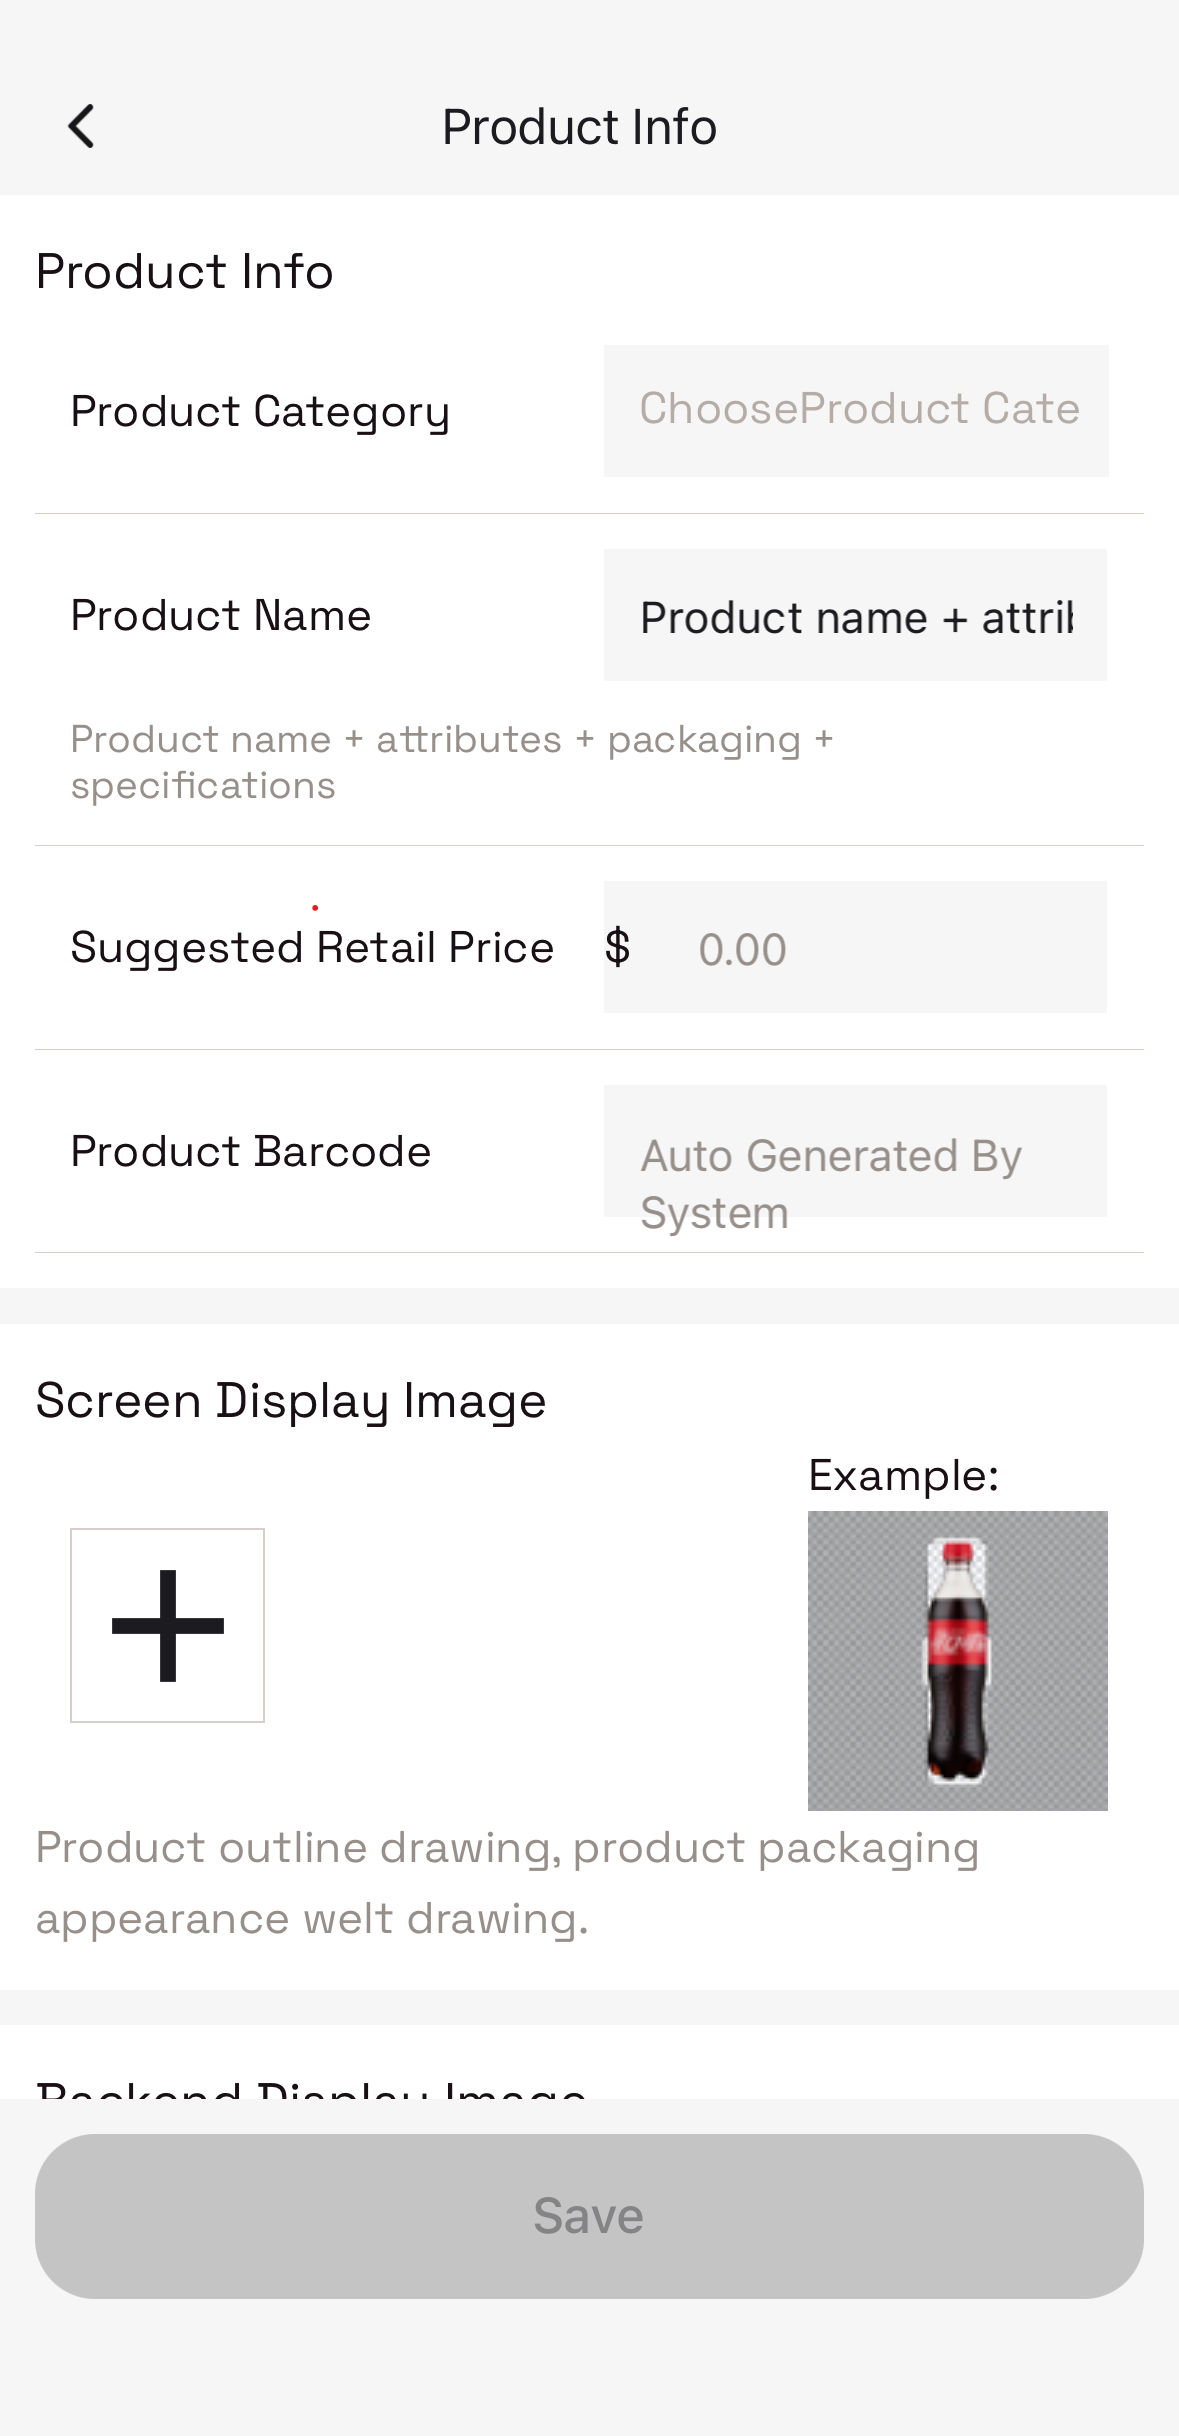
Format: Brand + Product Name + Description + Packaging + Size
Example: Refrigerante Guarana Antartica Can 350ml
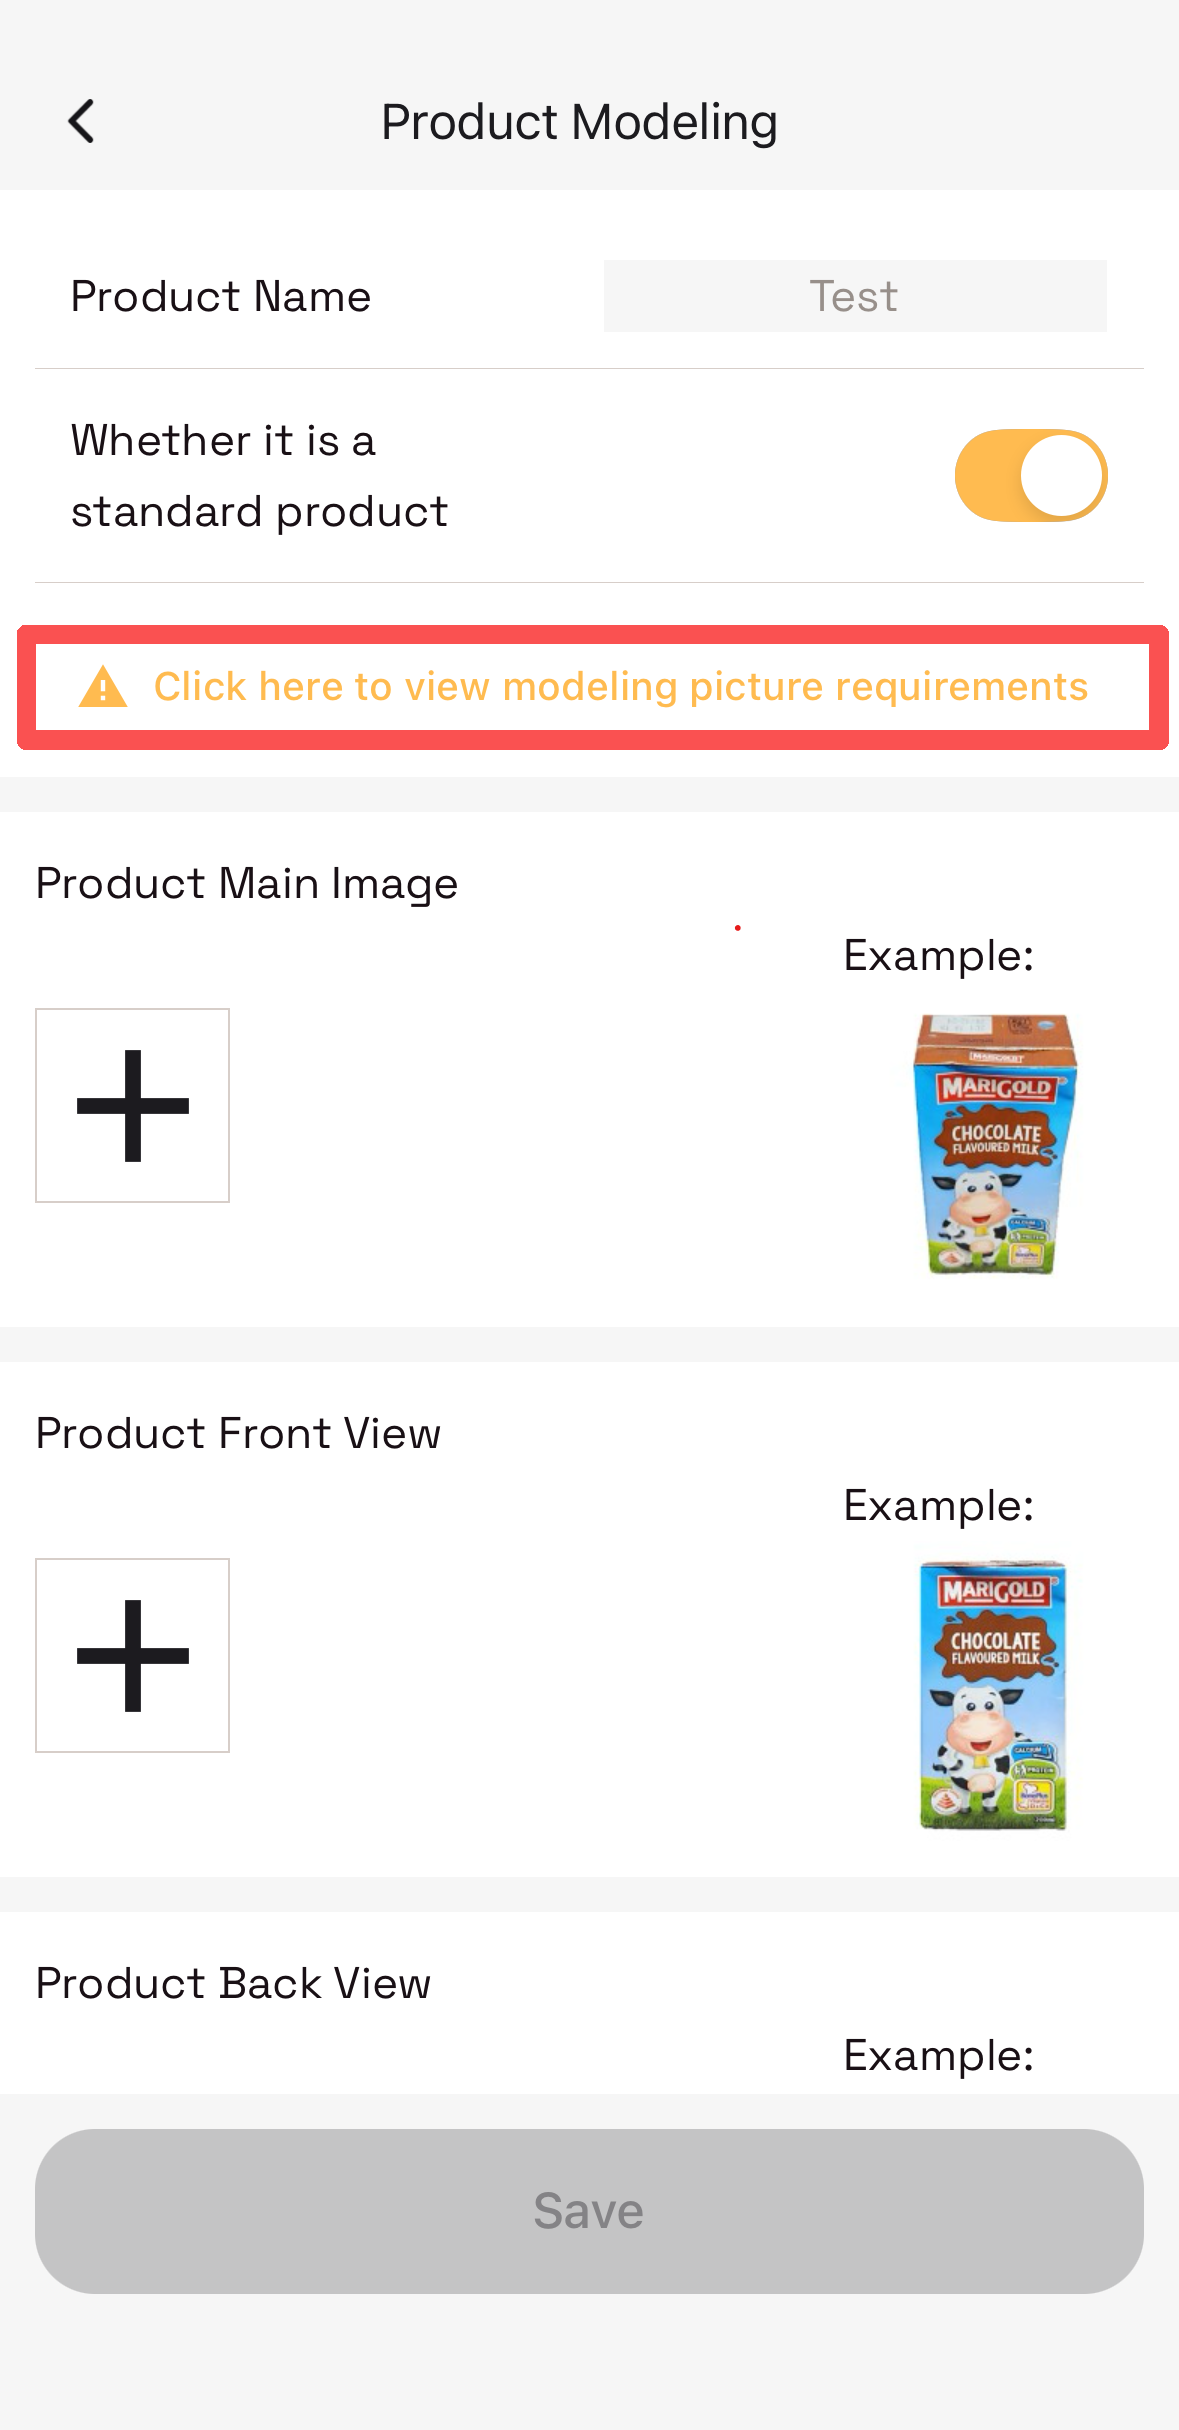
Upload Screen Display and Platform Display images first, then provide these 5 AI training angles:


- White background, bright lighting — no shadows or reflections
- Photos must clearly show brand name + product packaging
- Use
[ + ]in the app to take photos or upload from camera roll
After submission, new product modeling data is reviewed by the YoPoint platform. This typically takes within 16 hours. Track review status under My Modeling. Once approved, the product automatically appears in your Product Management list.
After products are added, your catalog looks like this:
| Category | Product Name | Barcode | Retail Price | Cost Price |
|---|---|---|---|---|
| Carbonated Drink | Refrigerante Guarana Antartica Can 350ml | 7891991000326 | $3.50 | $1.50 |
| Sparkling Drink | Agua Mineral Font Lift Com Gas 510ml | 7898912374028 | $5.00 | $1.99 |
In the Product Management list you can:
- View, edit, or delete any cataloged product.
- Use
Scanto quickly locate a specific item. - Enter a
Cost Priceper item to enable cost tracking and margin analysis.
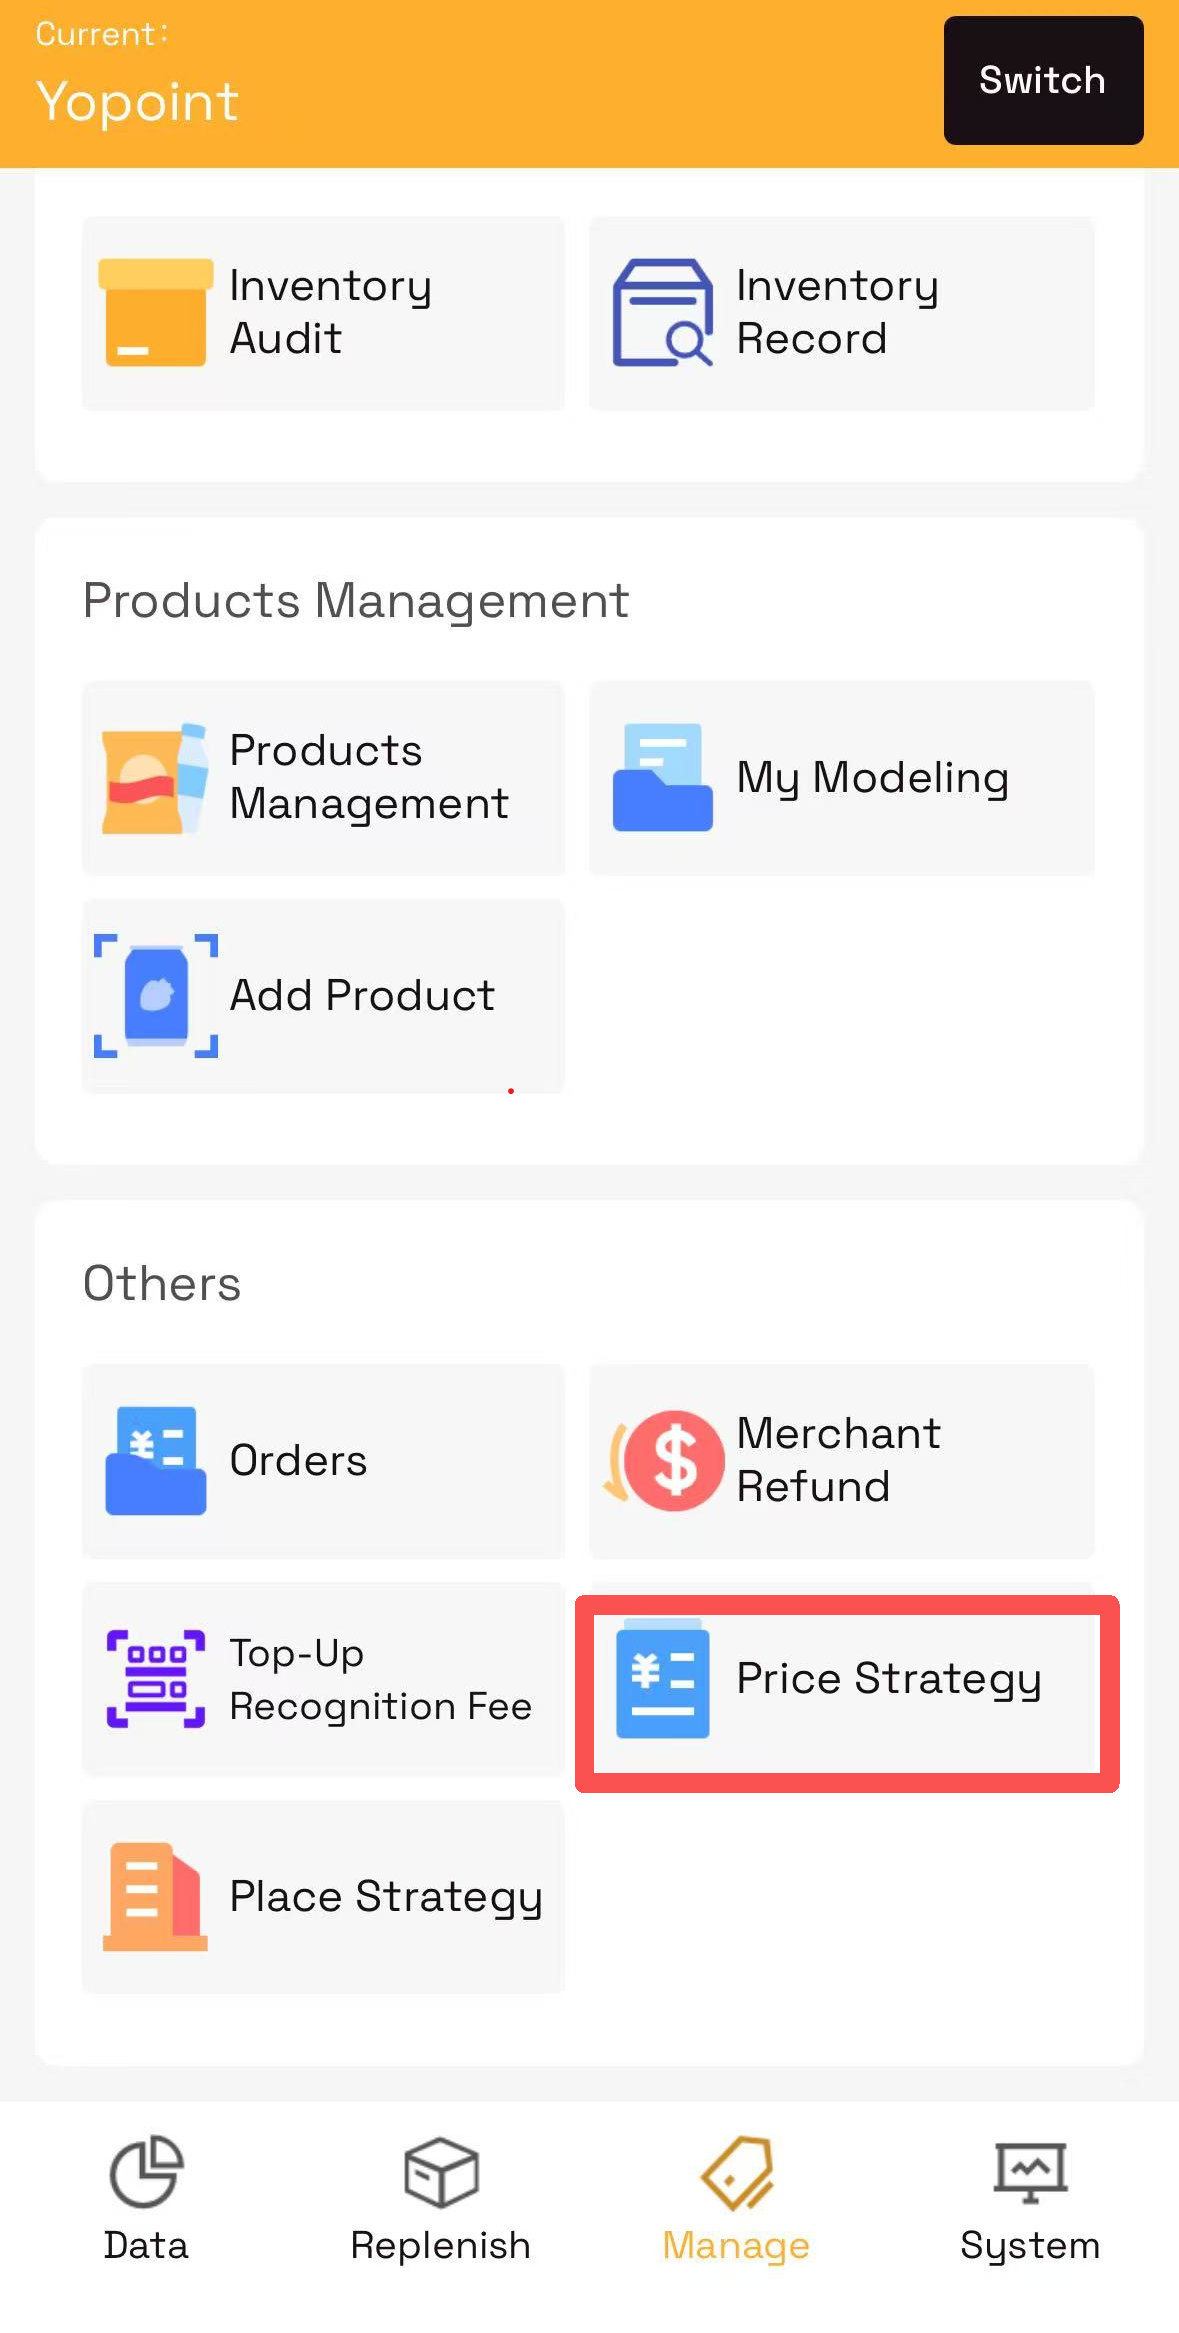
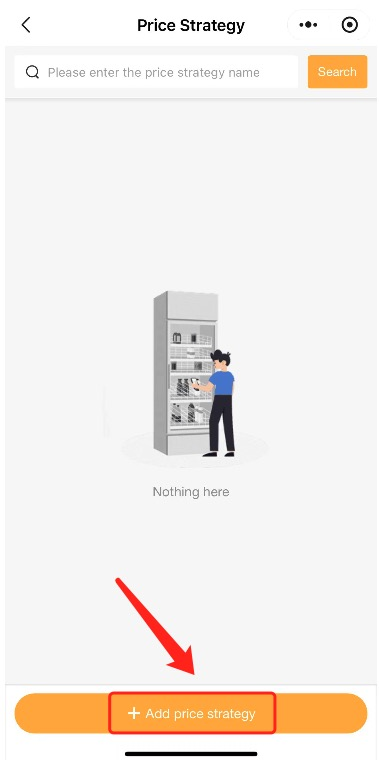
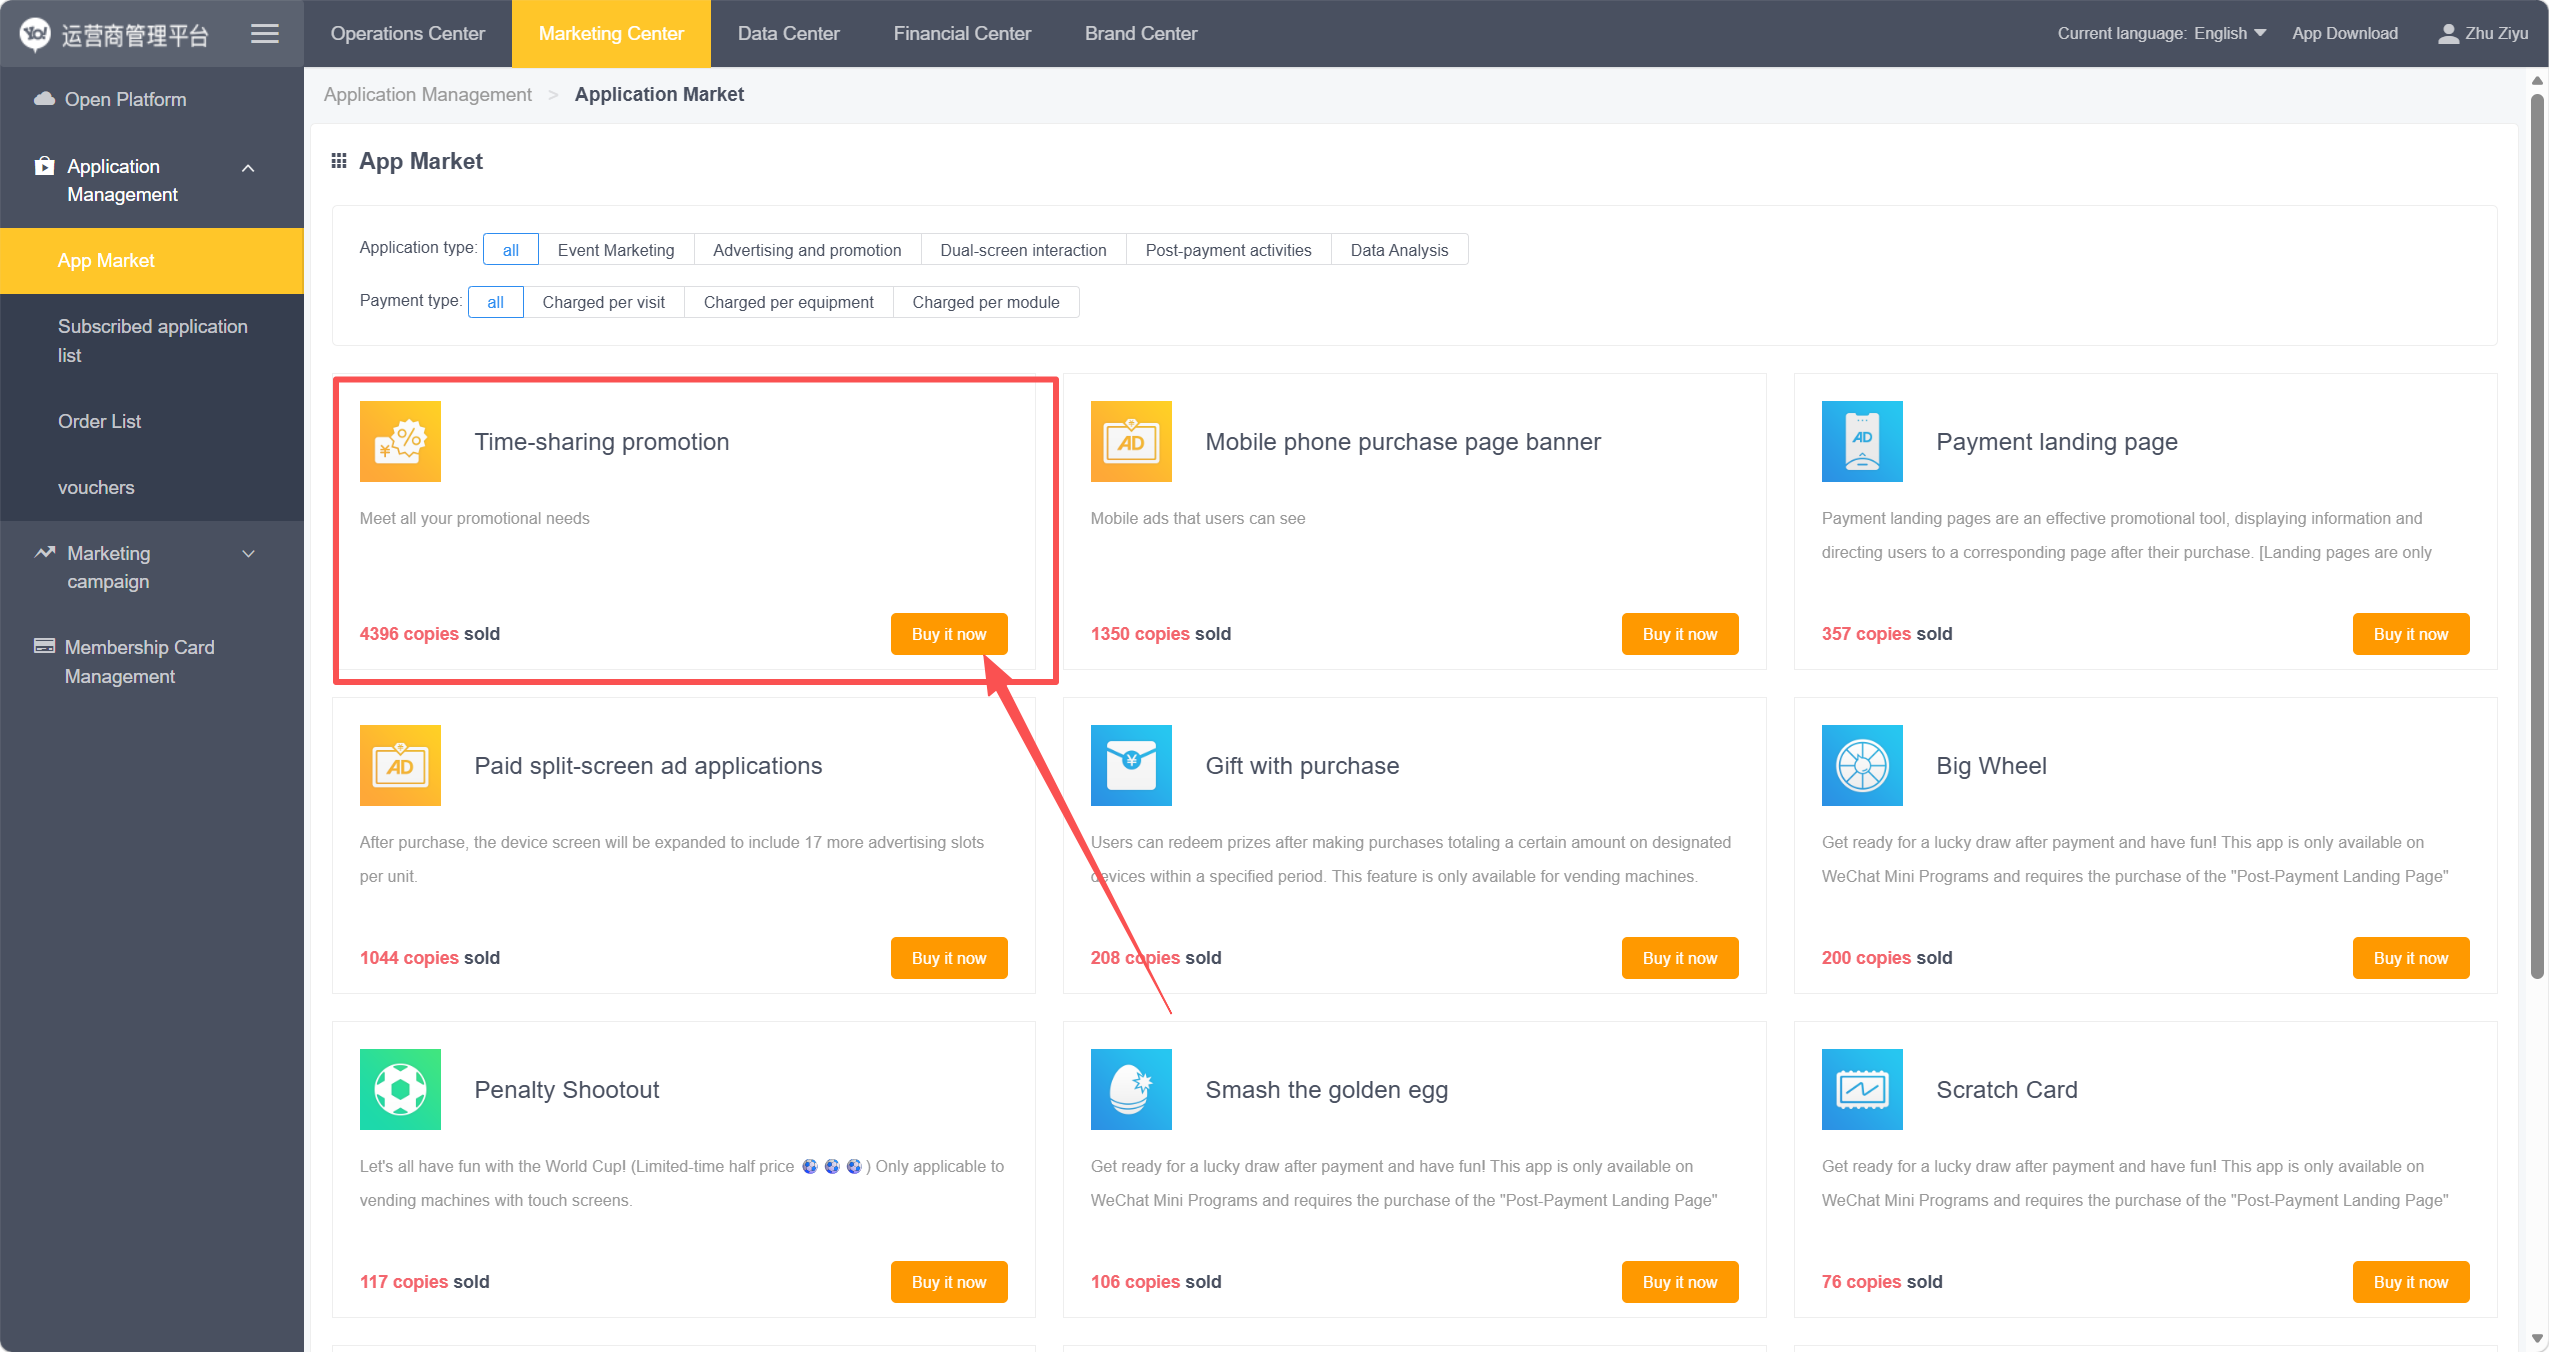
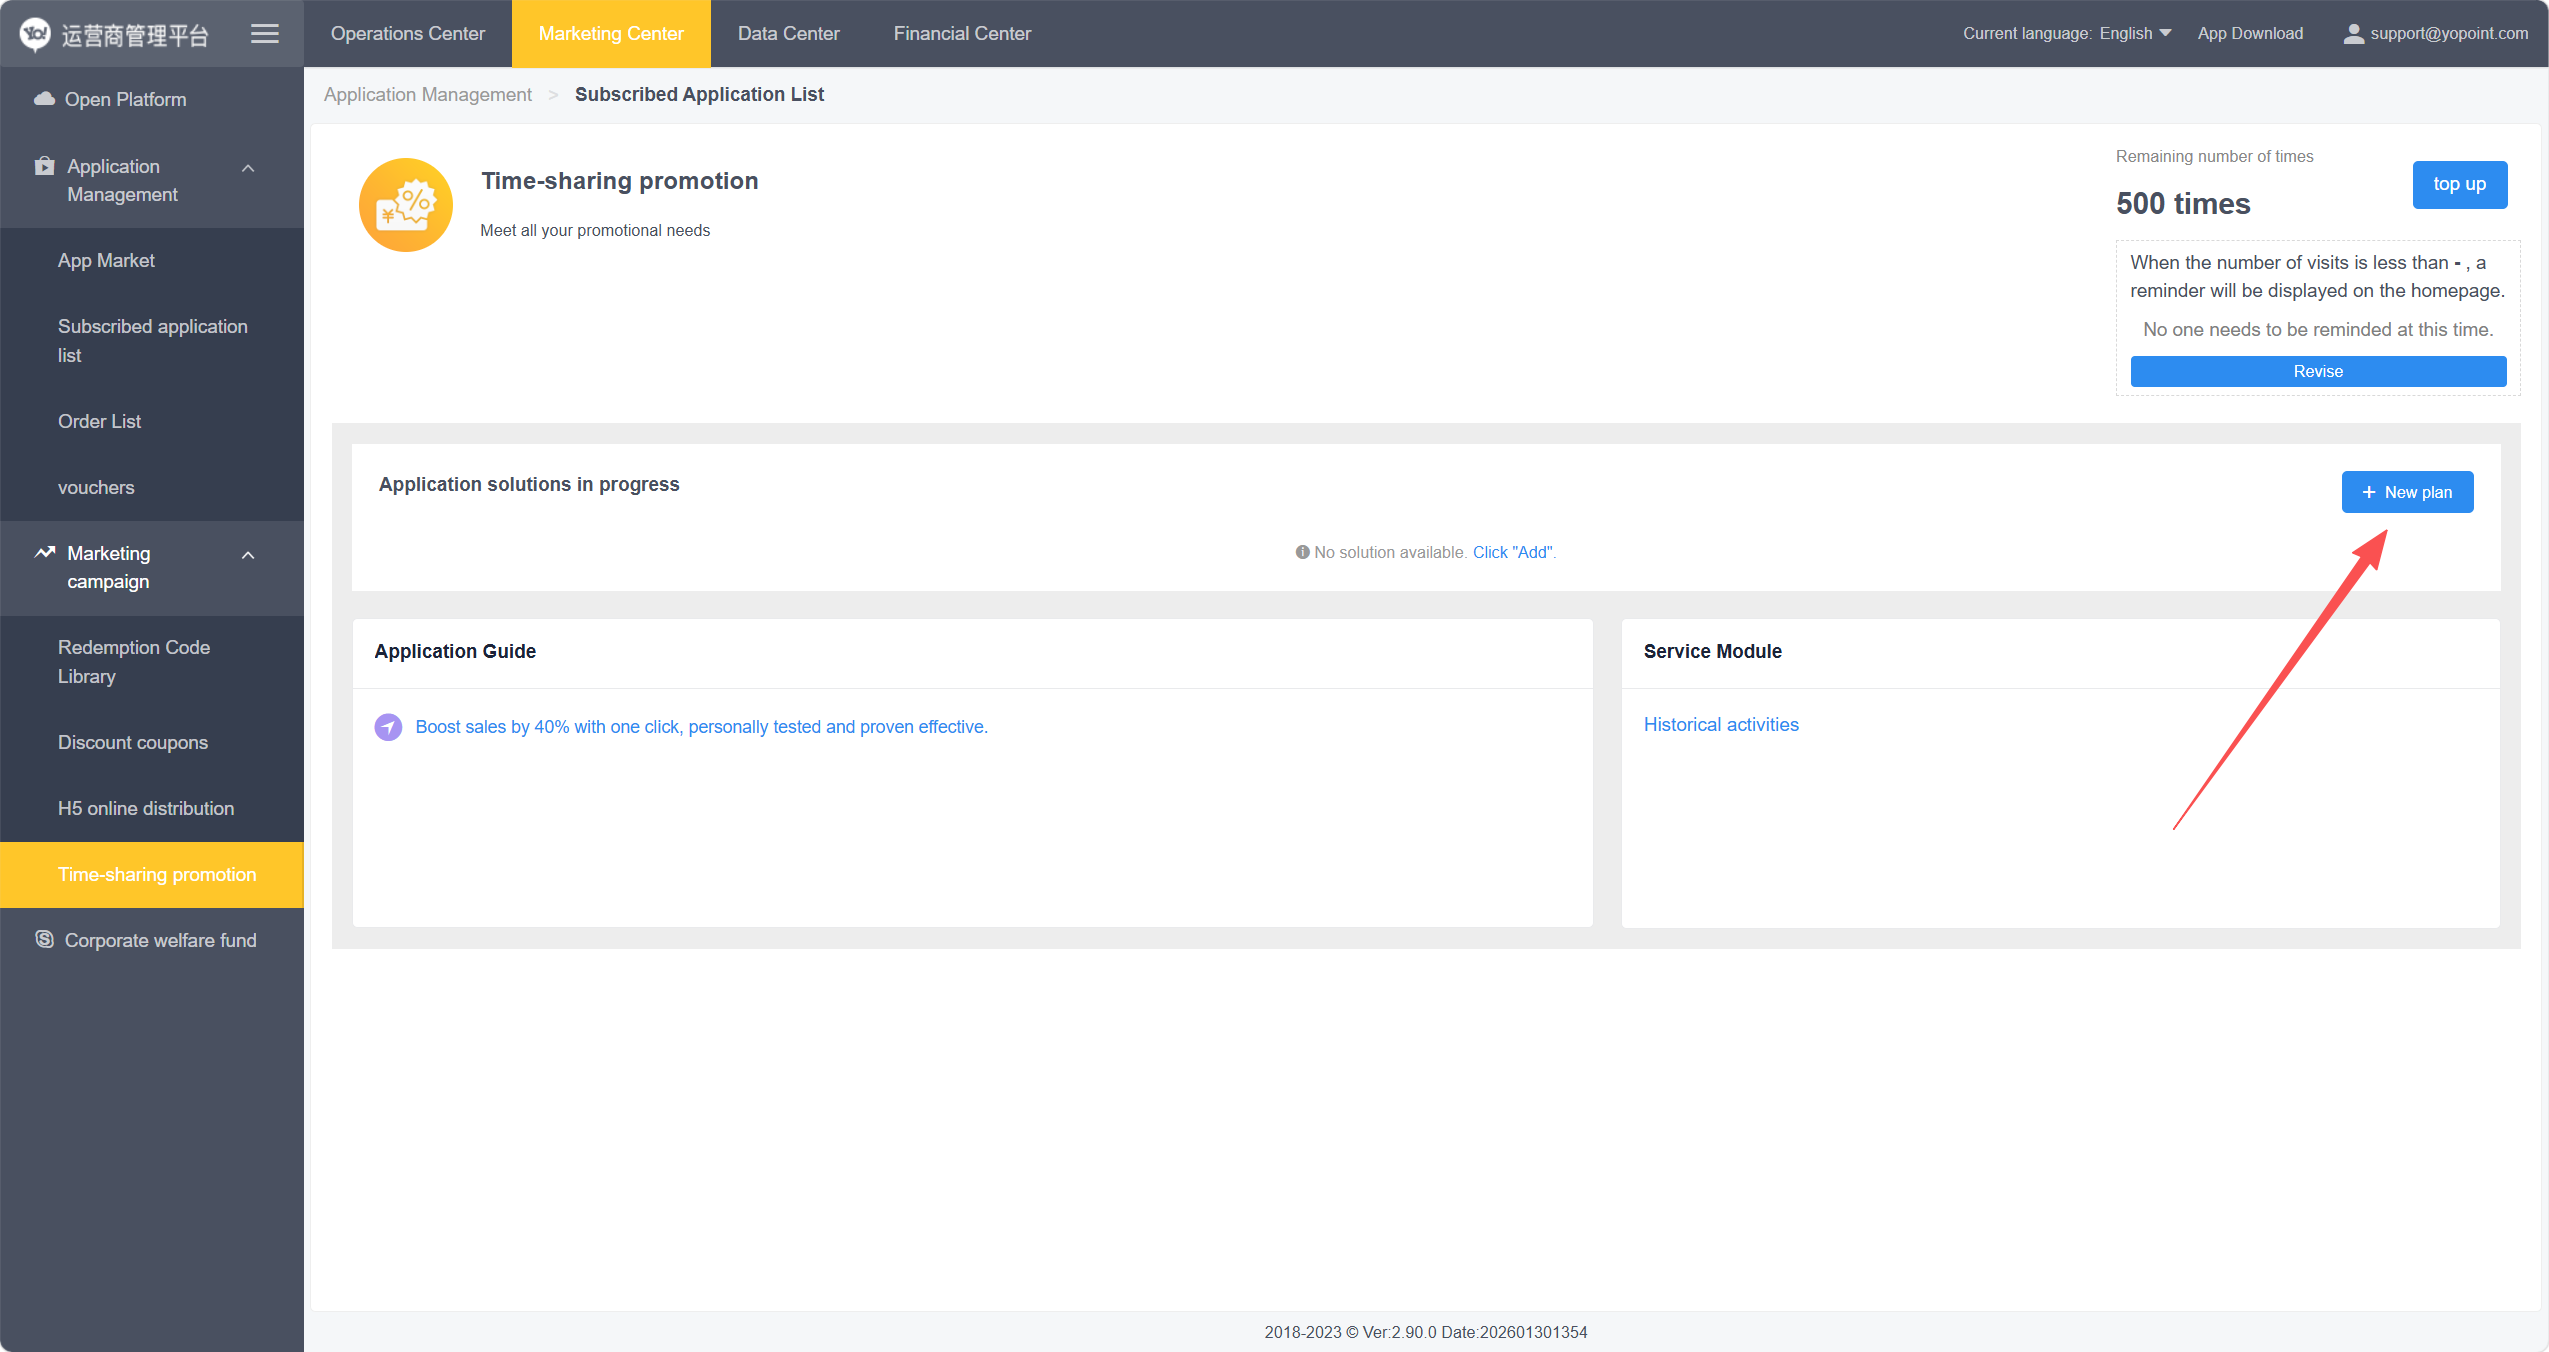
The Price Strategy module lets you create and manage multiple pricing schemes to meet sales needs across different machine locations.
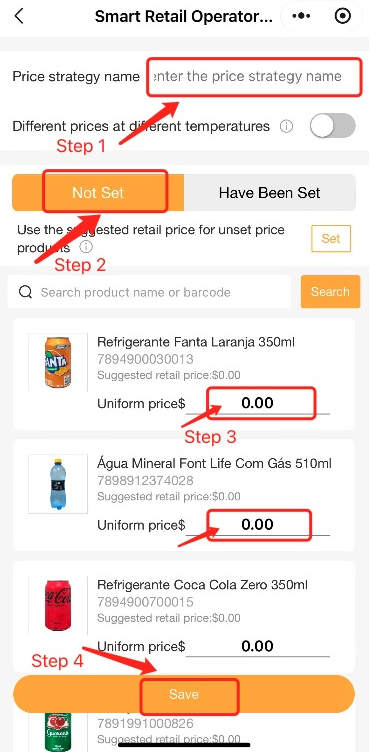
Example: The same cola, two very different prices
Set Price Strategy A → Cola retail: $2
Set Price Strategy B → Cola retail: $8
- Differentiated pricing: Same product, different price in different locations.
- Scheme reuse: When a new machine also serves the "University Dormitory" context, bind it to "Price Strategy A". The price of cola — and all other products in that strategy — automatically sync.
Complete these steps on-site after the machine is delivered.
[Manage] → Machine Management- Use a SIM card from a reliable local carrier for optimal signal stability (at your own expense).
- Record the SIM card number and expiration date before activation for future reference.
to reach top of machine
from local carrier
- Use screwdriver to remove the top cover.
- Insert SIM card into the designated SIM slot, then restart the machine.
- Tighten all screws and close the top cover.
- Retrieve the antenna — may be stored upside down inside the top cover, or behind the rear lid.
- Place antenna on top of the unit, connect it, and secure in place.
For a guided installation walkthrough:
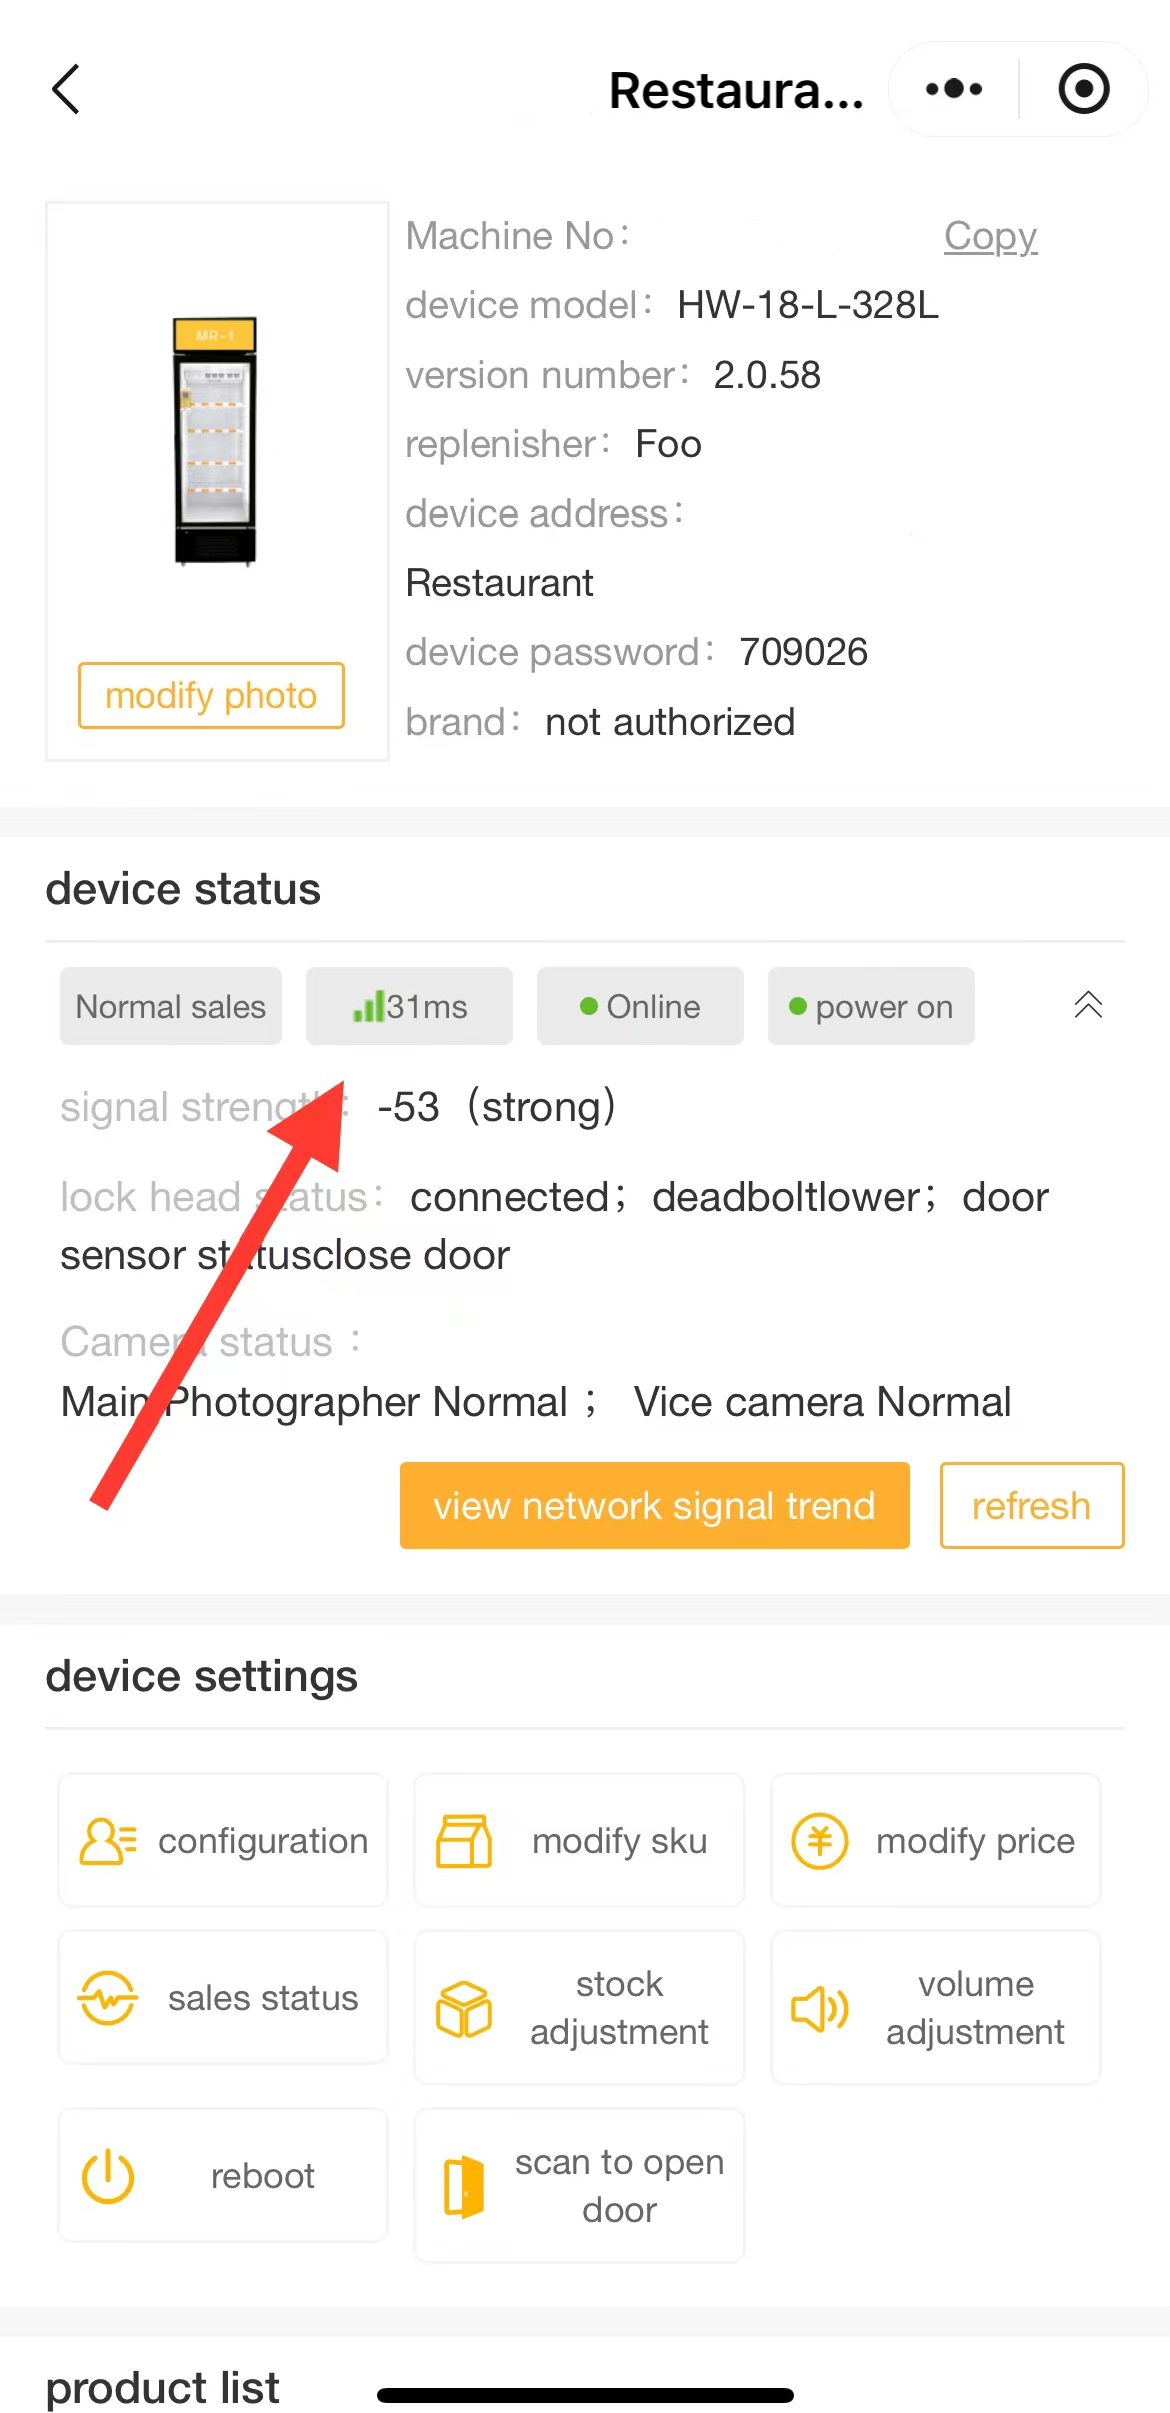
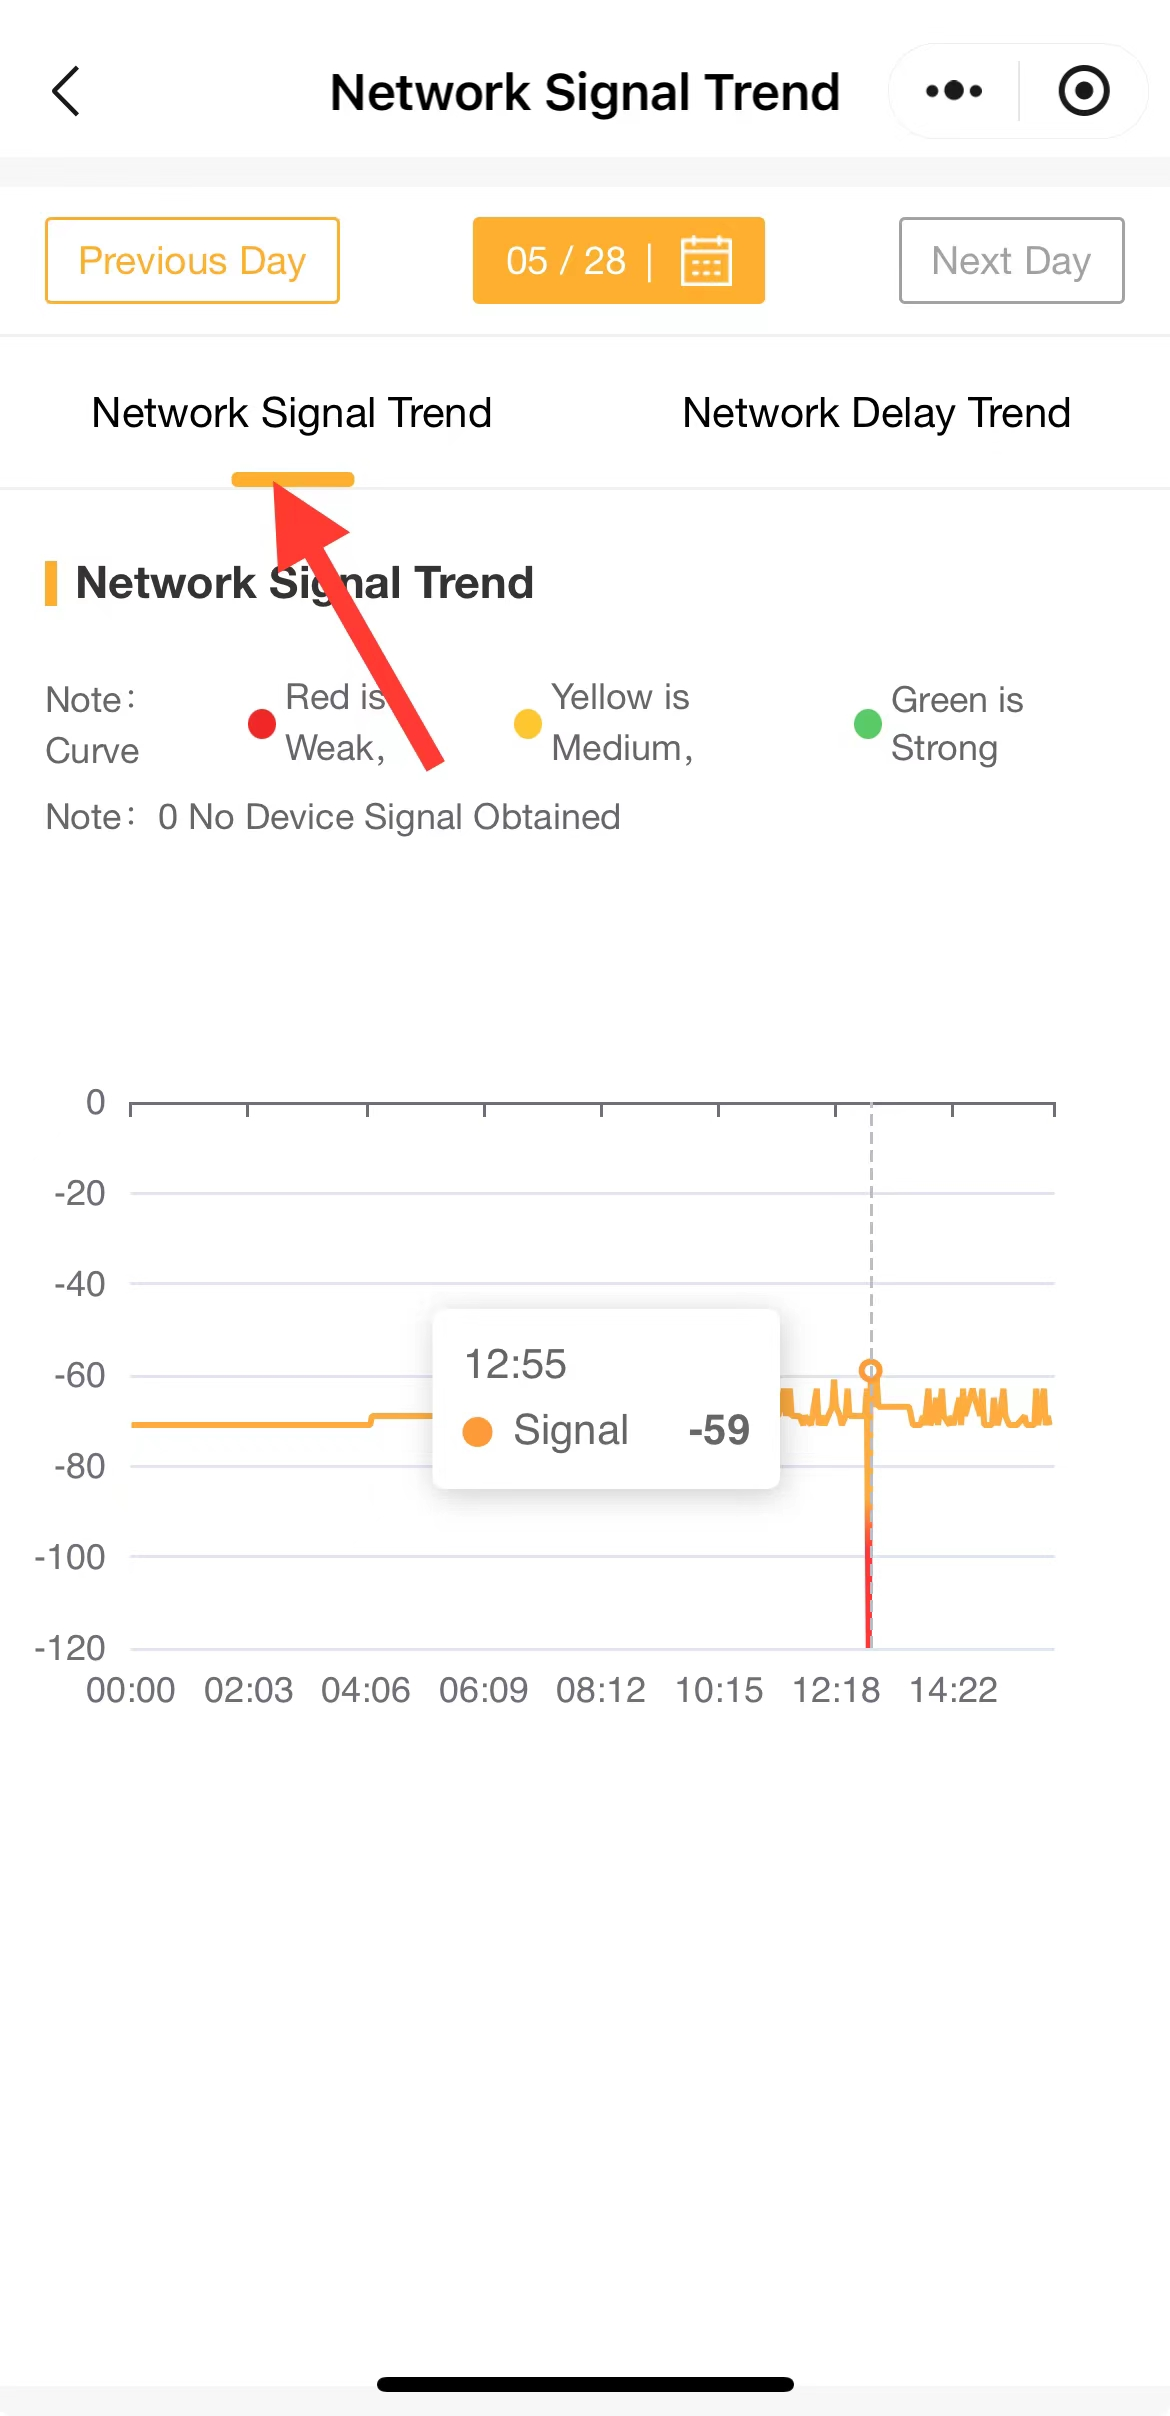
This is one of the most critical steps in warehouse-free mode. Navigate to Machine Management and select the device to check connectivity status.
Signal strength and network latency directly affect machine response speed and transaction success rate.
Tap View Network Signal Trend to check historical signal fluctuations.
Only machines that have been activated and bound to the system will be recognized and managed by the platform.
Use Activate Machines and scan the QR code sticker on the machine.
Carefully fill in all machine information fields after scanning:
| Setting | Description & Notes |
|---|---|
| Machine Name / No. | Use an easily recognizable location-based name e.g., "XX Building – Lobby – 01" |
| Detailed Address | Select the machine deployment location on the map |
| Device Password | Password used to log in to the device POS Terminal hardware platform |
| Sale Status | All new devices default to "Deactivated" ⚠️ Must be manually changed to "Normal Sales" before deployment — otherwise the cabinet door will not open |
| Replenisher | Assign the restocker account responsible for this device. For one-person business: bind the admin account as replenisher. For multi-person: create a dedicated replenisher account and bind it. ⚠️ One device can only be bound to one replenisher account at a time (to ensure clear management of responsibilities and inventory) |
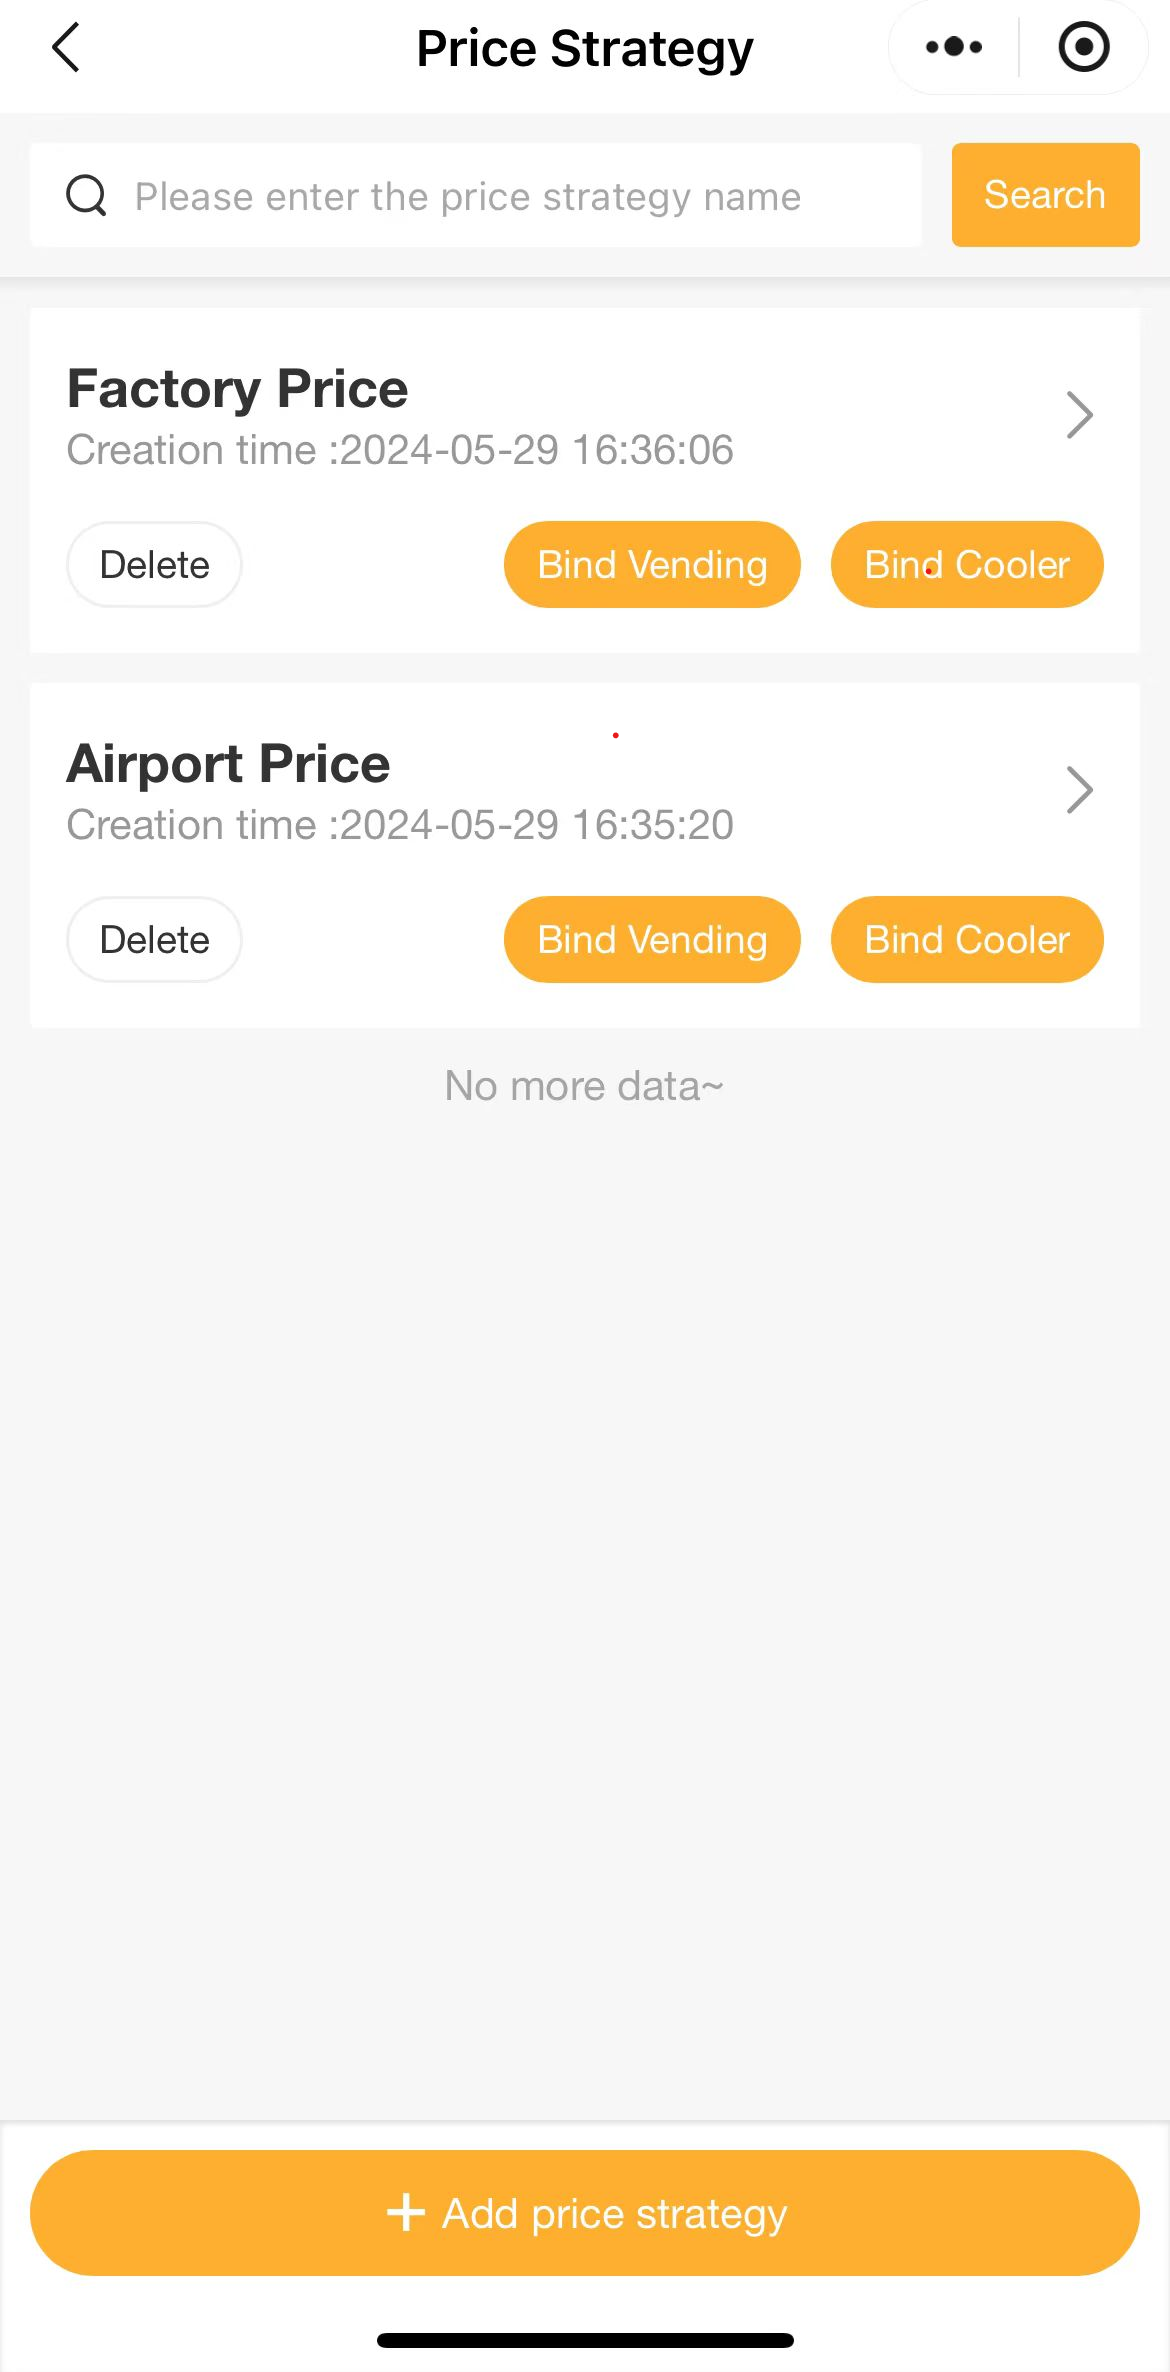
| Price Strategy | Bind a pre-created price strategy. Device will automatically apply the corresponding pricing. |
| Belonging Line | For large-scale management of restockers' individual restock areas and routes |
| Stock-out Alert | ⚠️ Highly recommended to enable Inventory Low Alert (%): Recommended setting: 25–35% System alerts when device inventory falls below this percentage e.g., Total inventory = 400 items; alert at 30% → alerts when 120 items are sold Out-of-Stock SKUs Alert: Recommended setting: 3–5 types System alerts when the number of out-of-stock SKUs reaches this limit e.g., 40 SKUs total; alert at 5 → alerts when 5 SKUs are fully sold out Whichever condition is triggered first will activate the stock-out alert. |
| Pre Authorization Amount | Set an independent pre-authorization amount for this single device. ⚠️ Please ensure the amount is above $0.50. Amounts lower than $0.50 may not be supported by the Stripe pre-authorization protocol, which could lead to failed transactions. |
| Service Phone No. | Primary contact number for this individual machine (displayed to customers) |

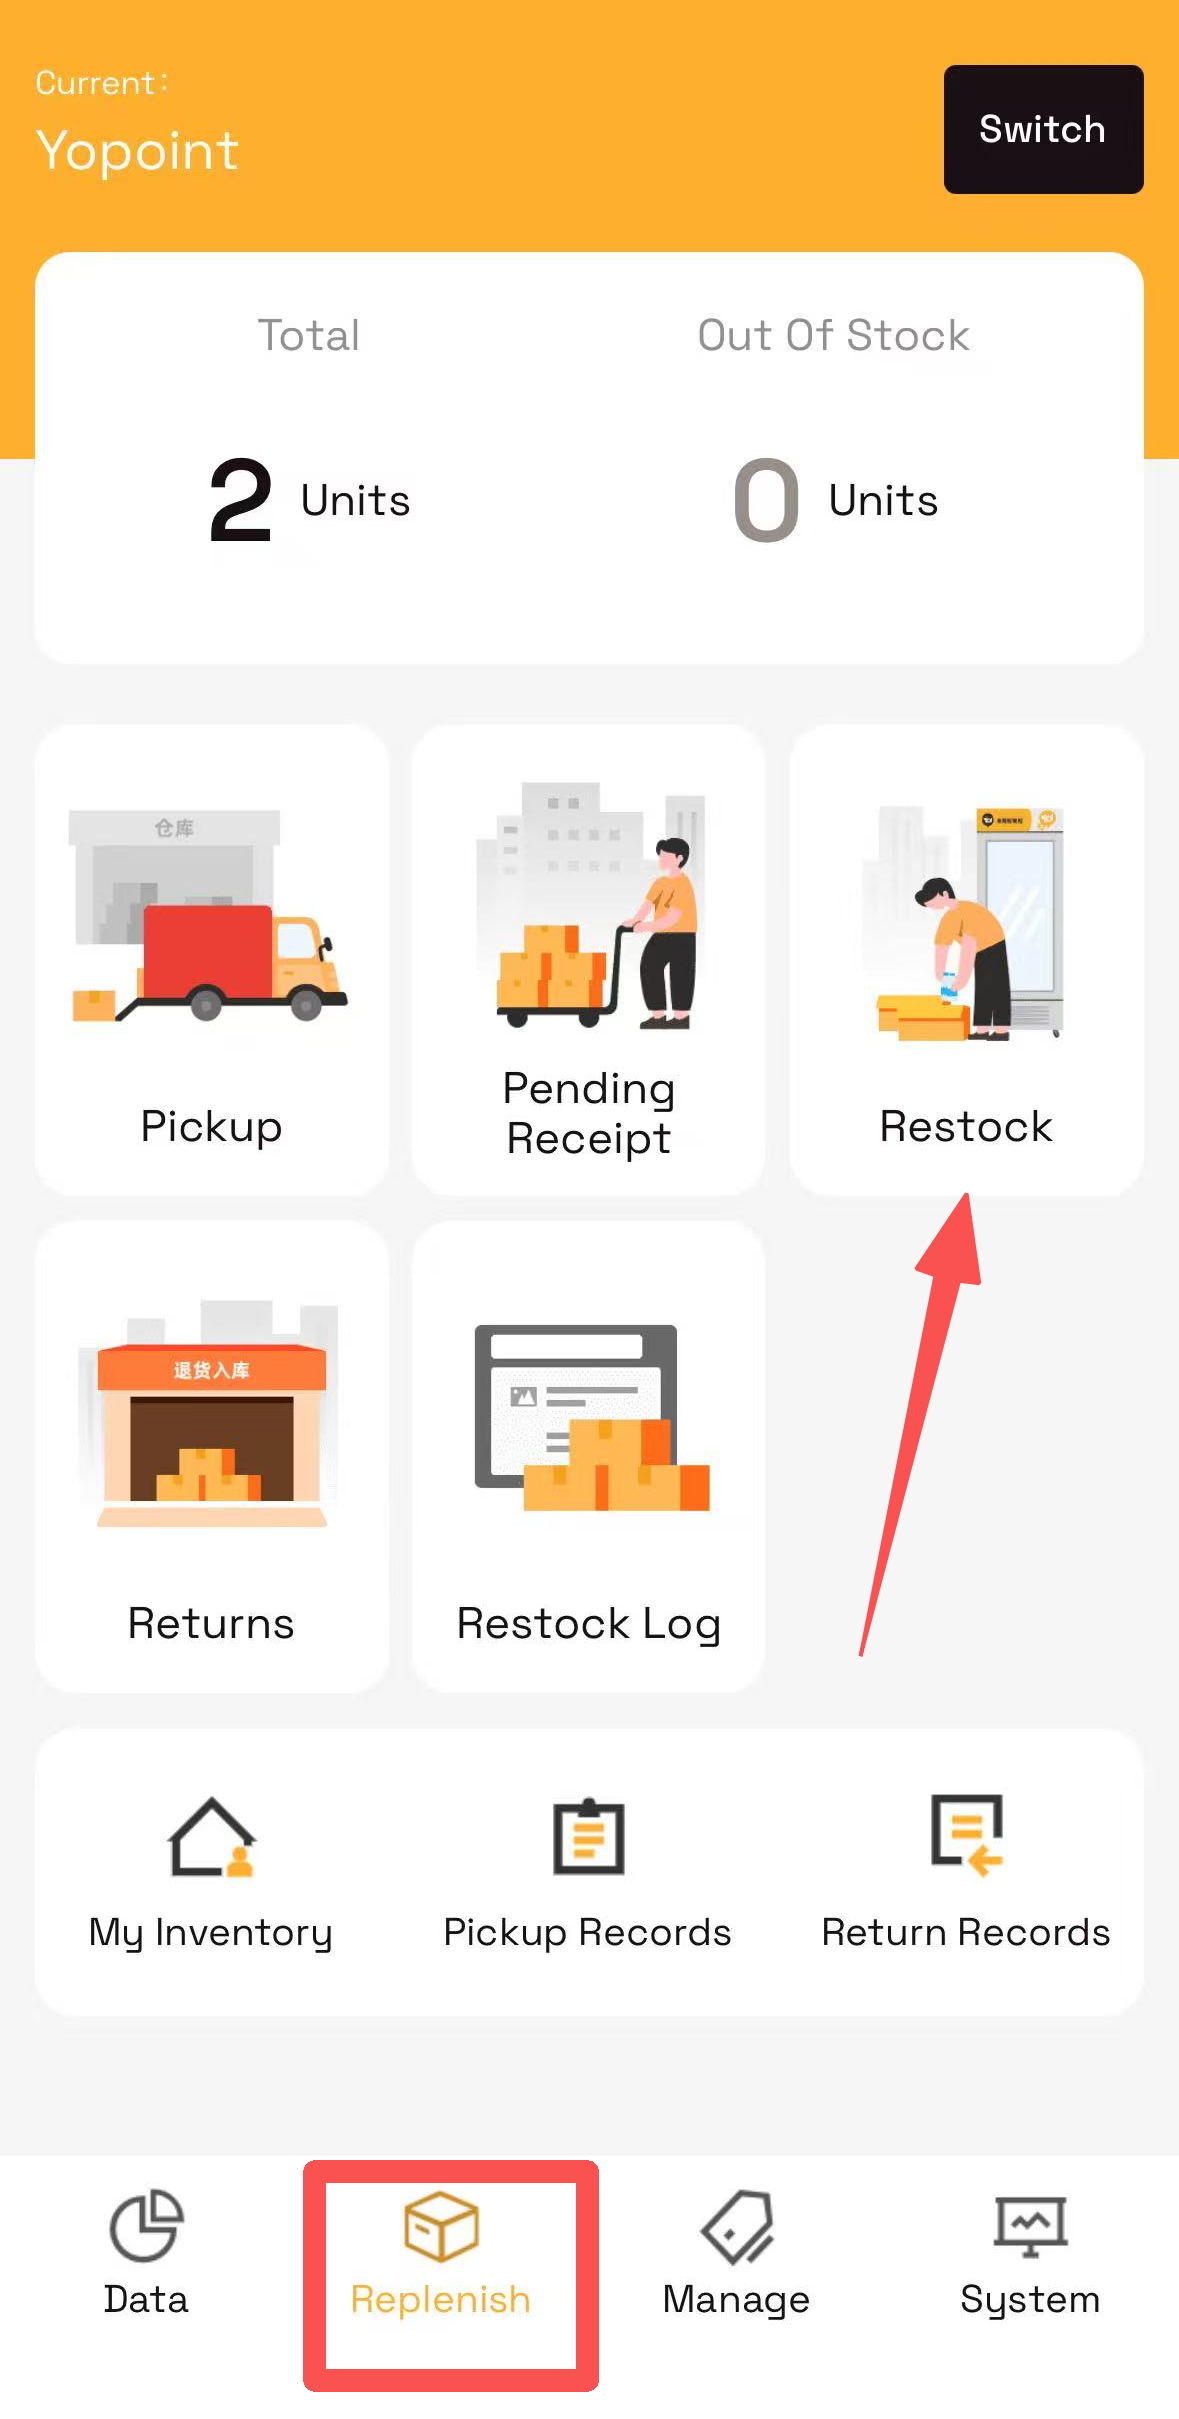
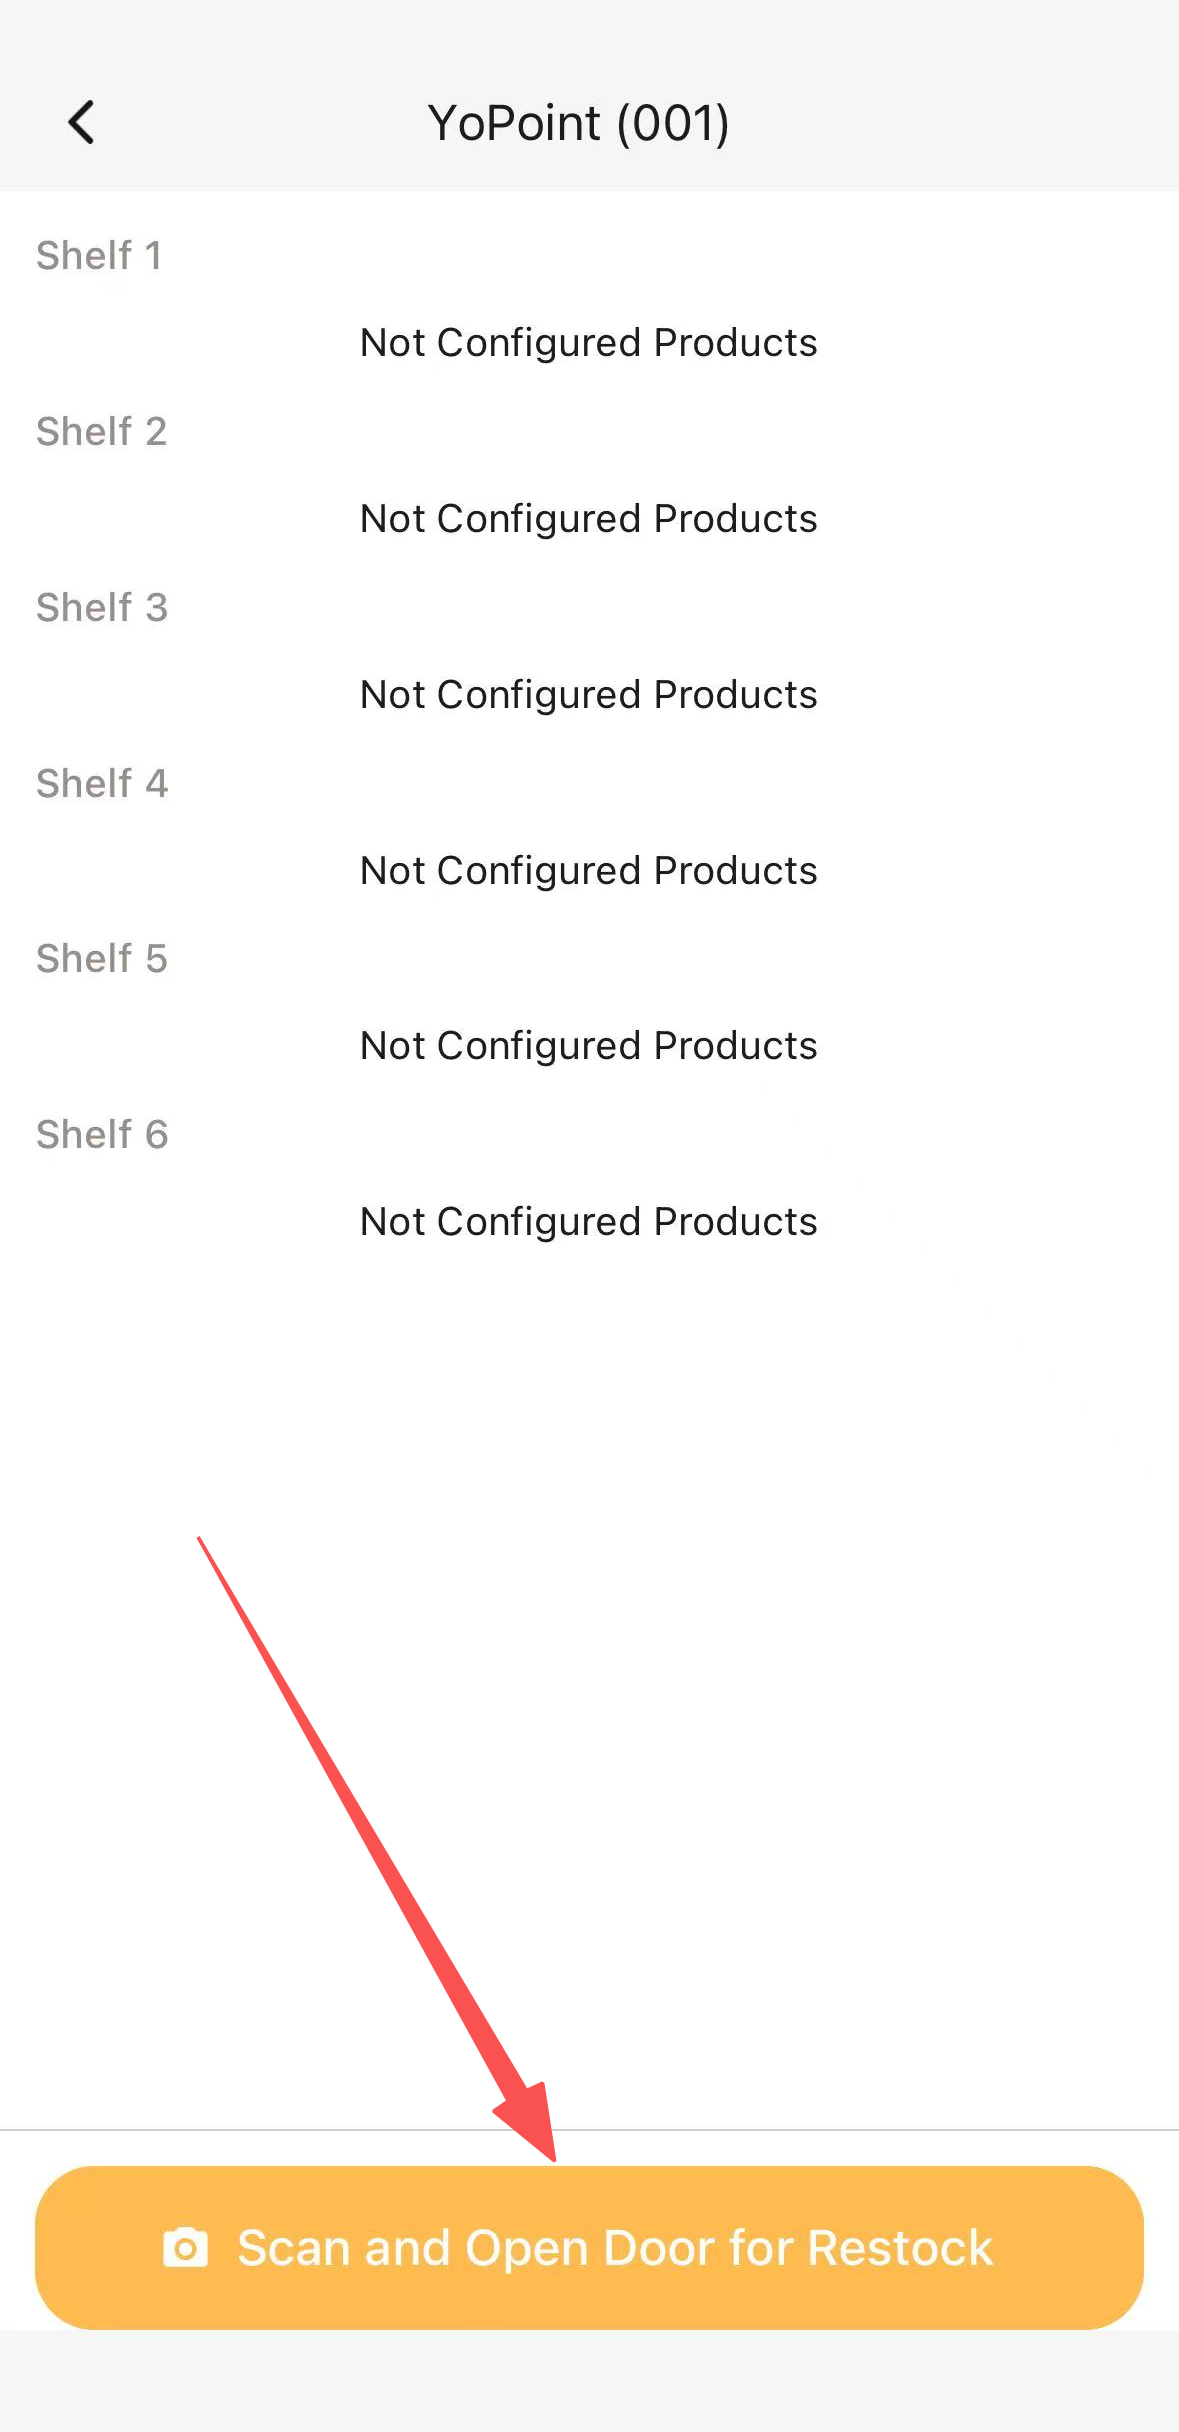
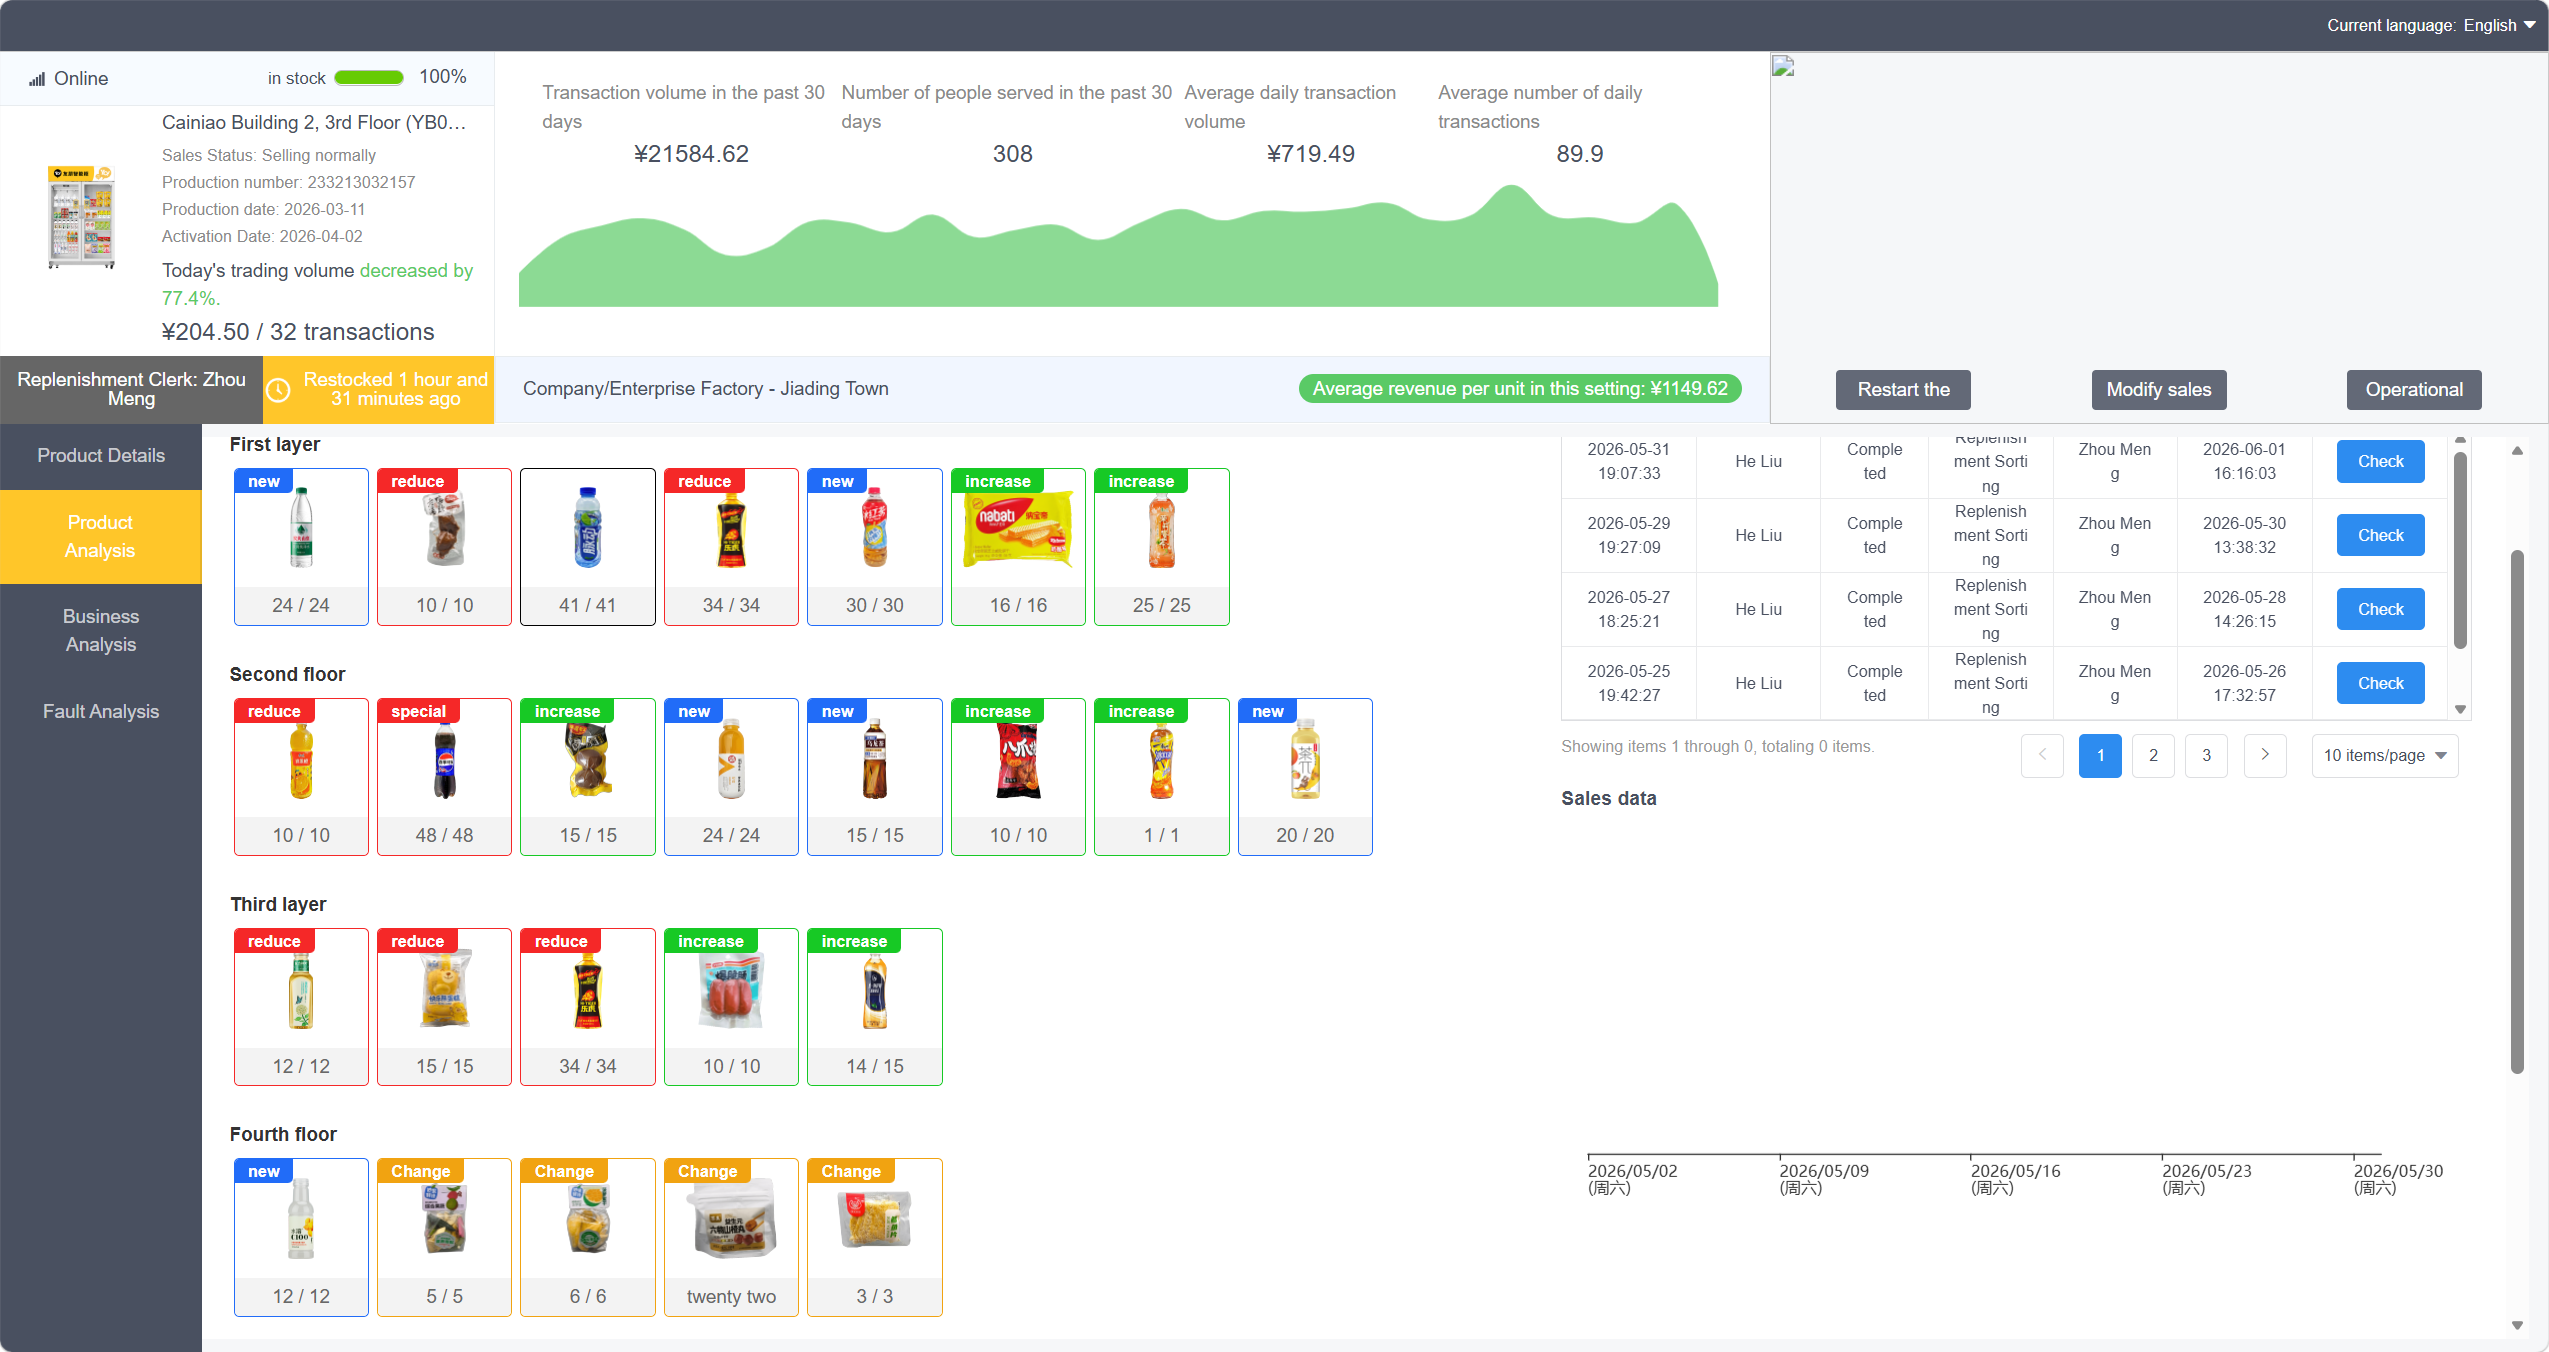
Add products to shelves, then run a live restock test to verify everything works end-to-end before go-live.
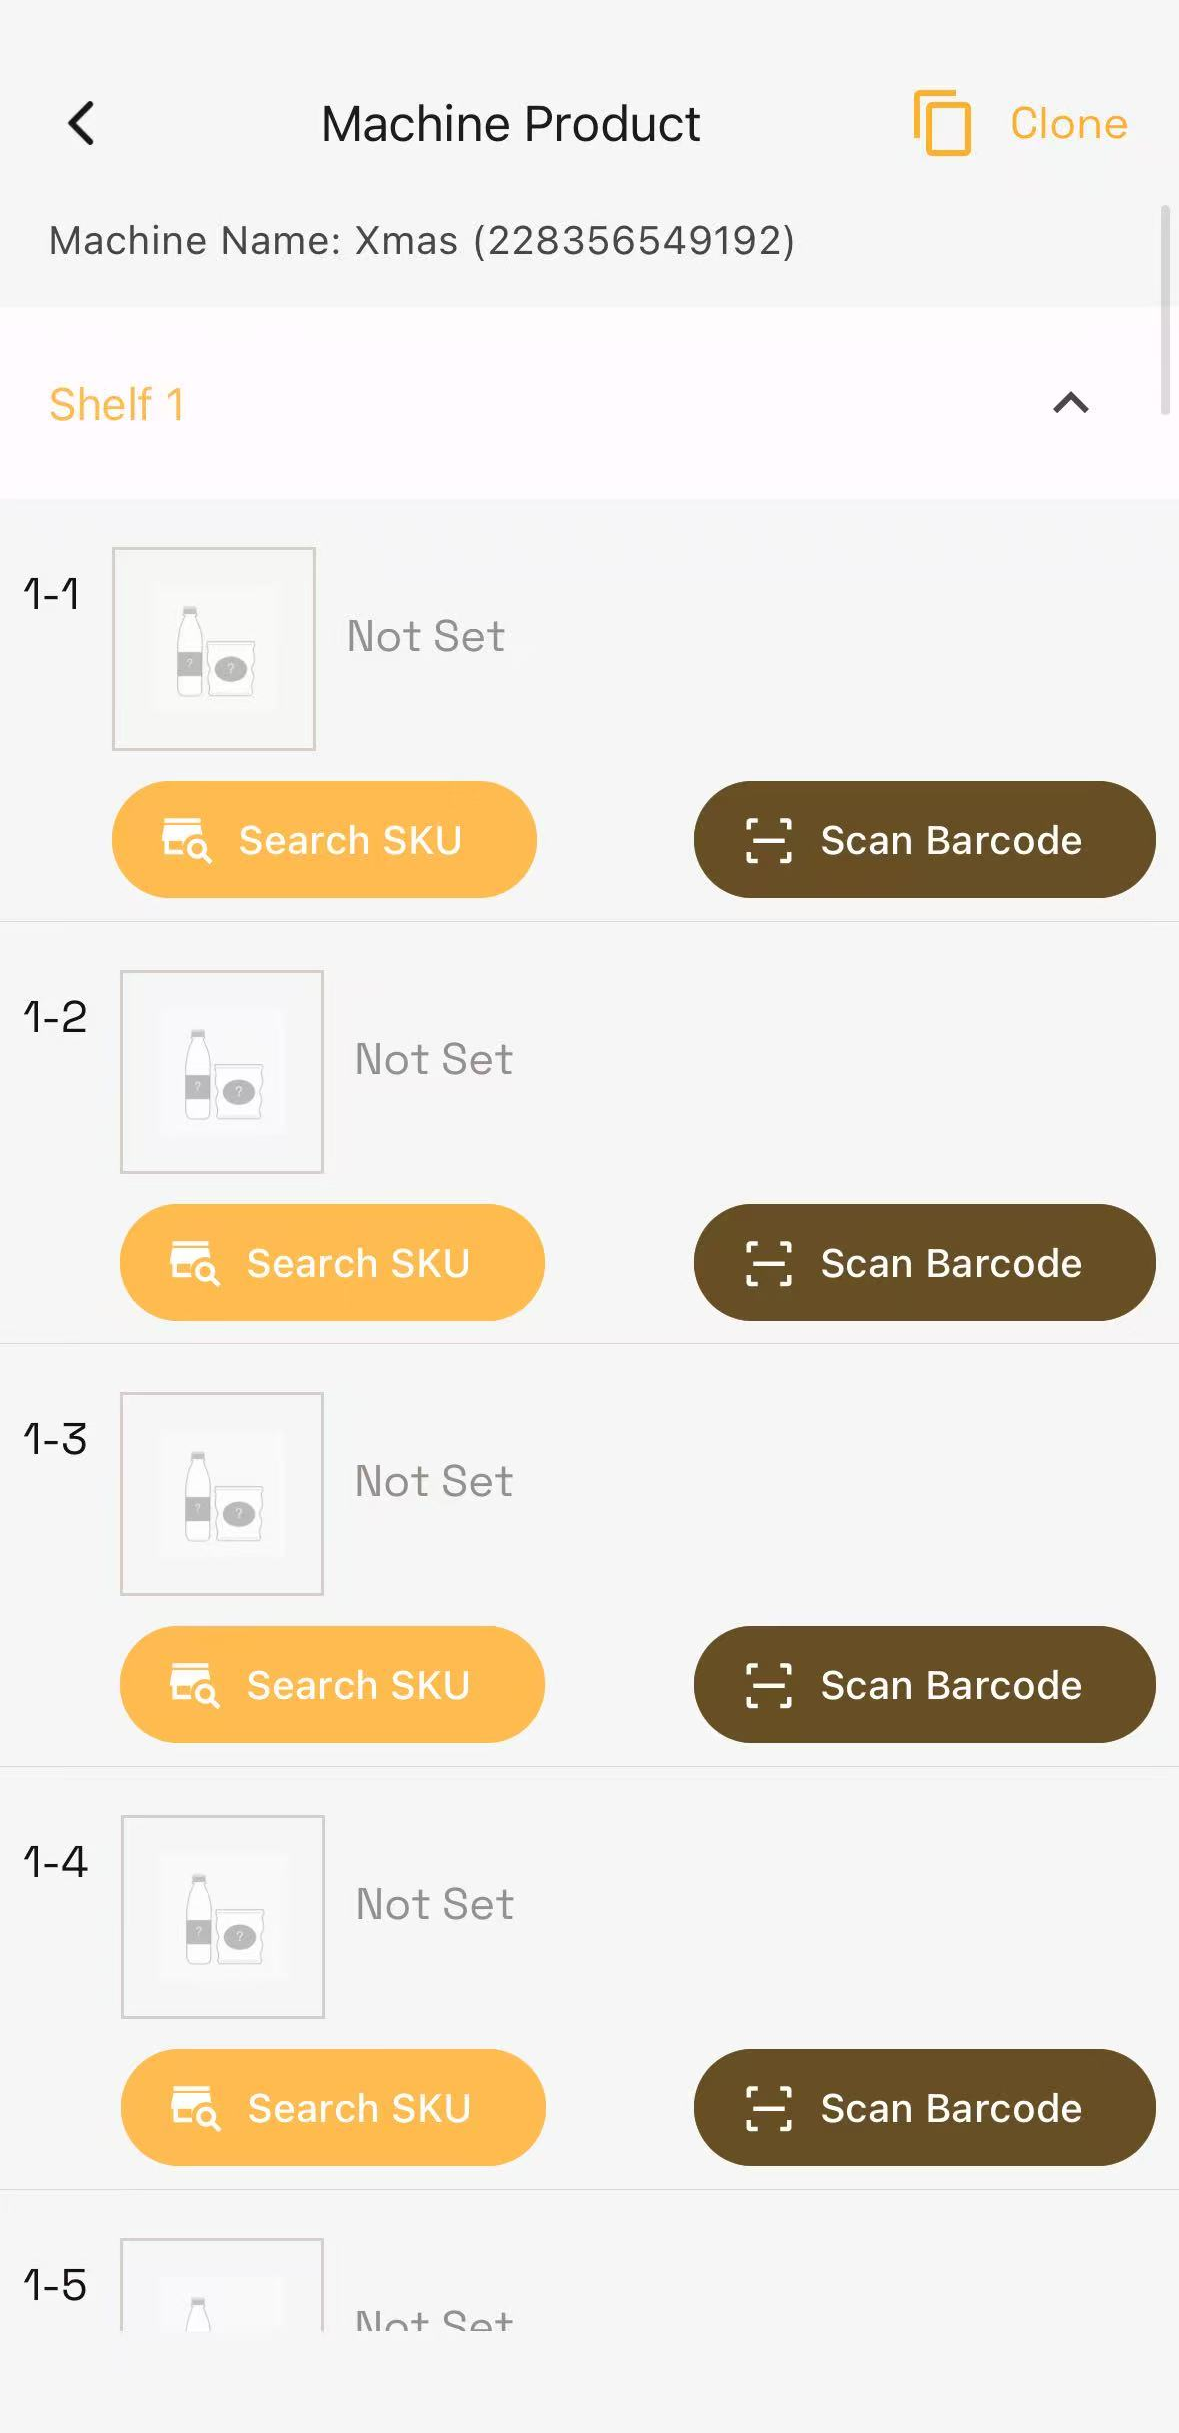
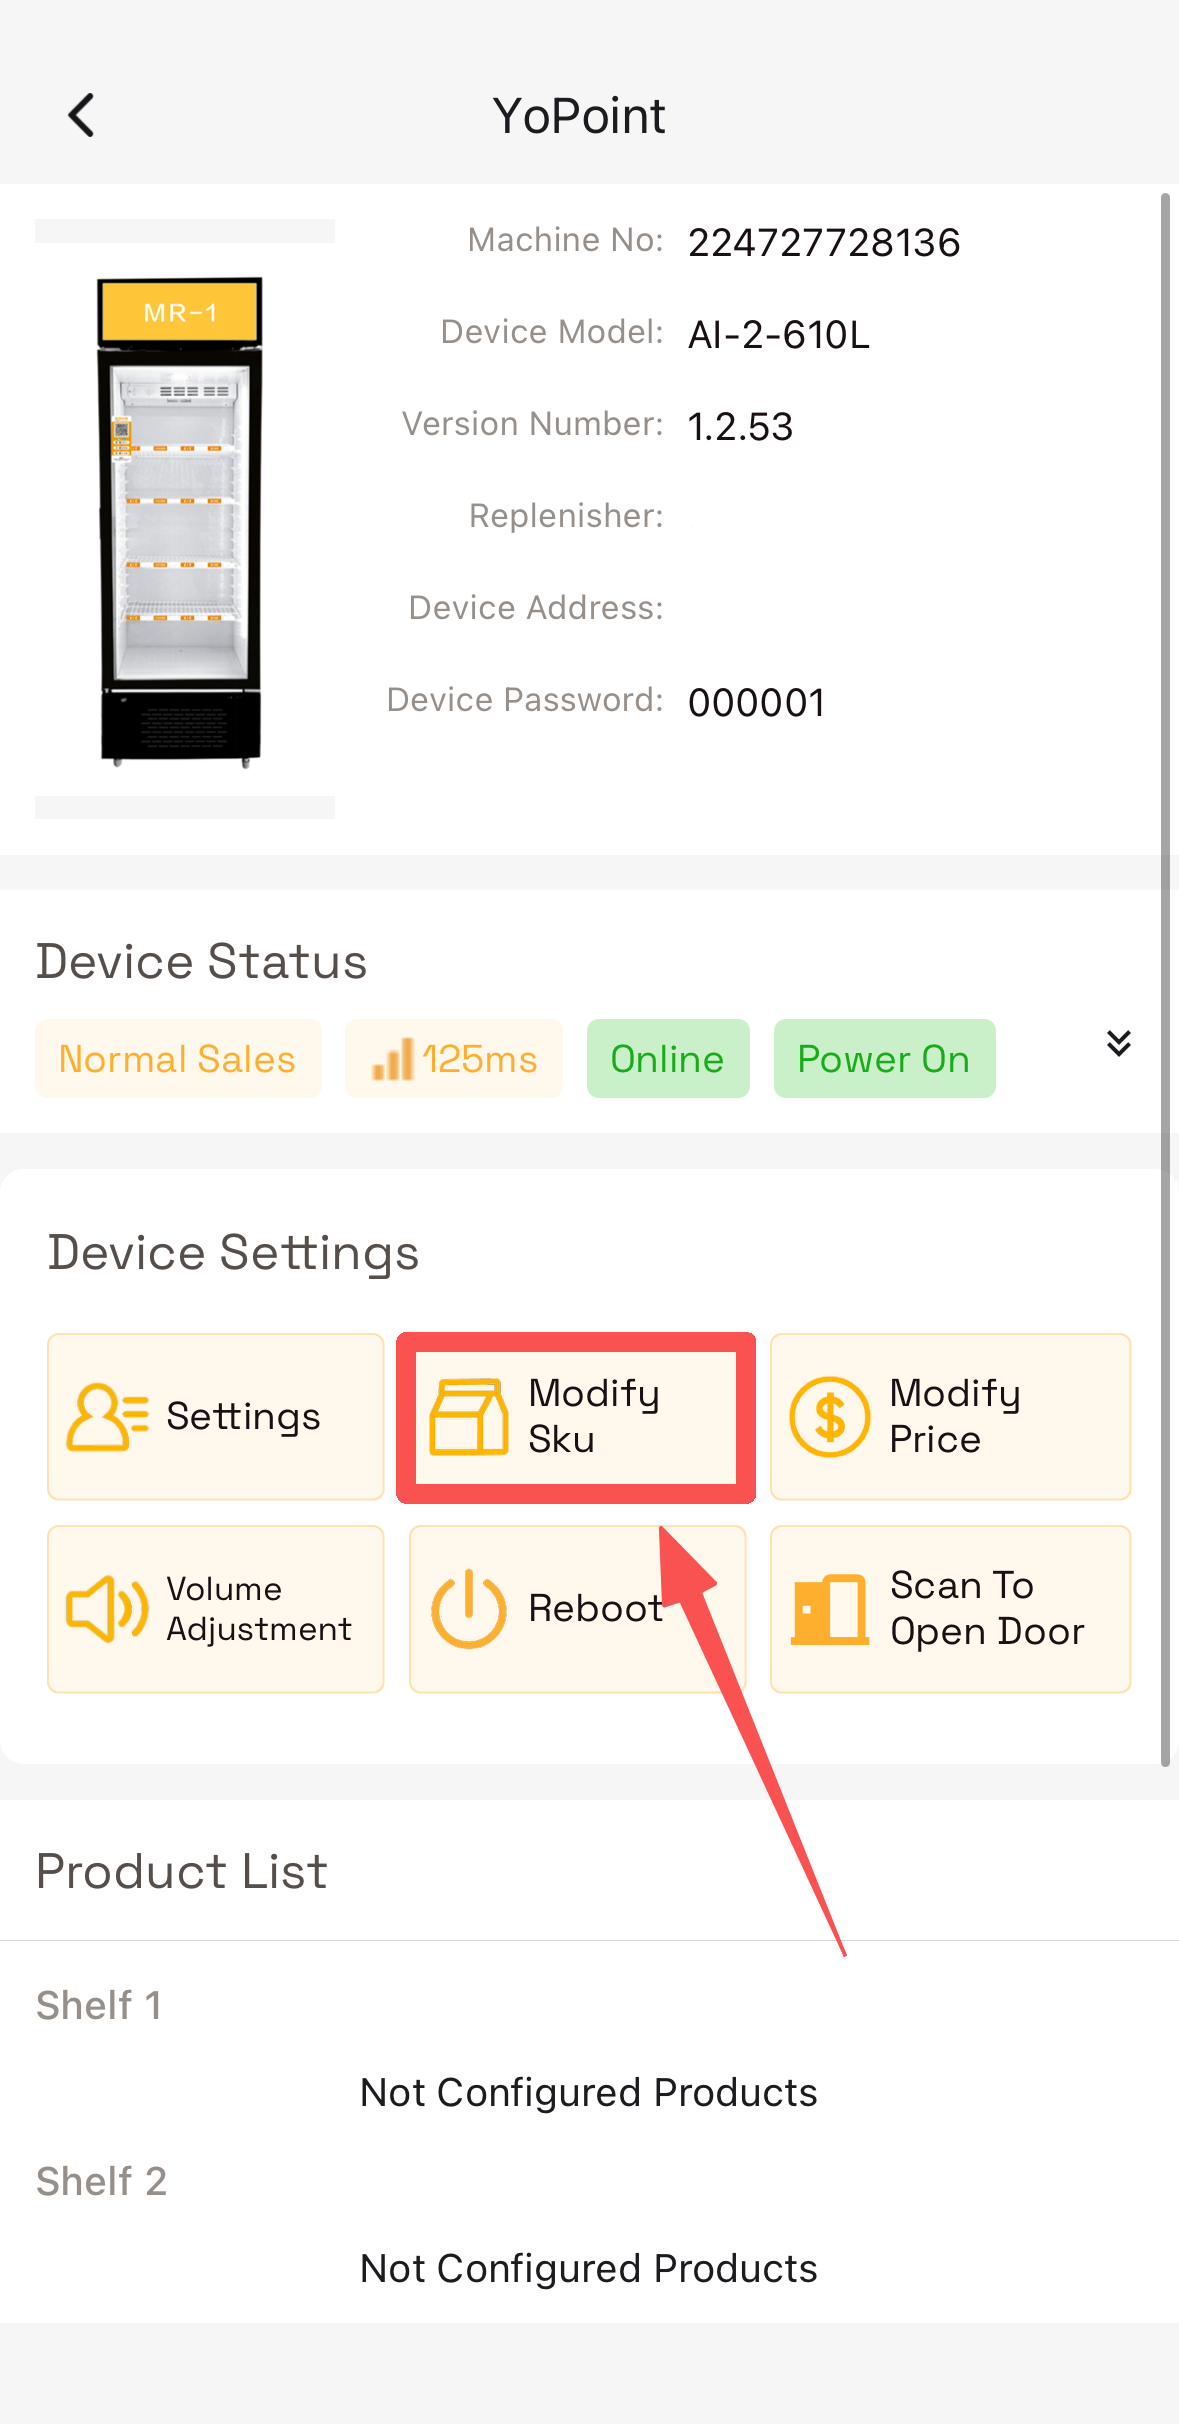
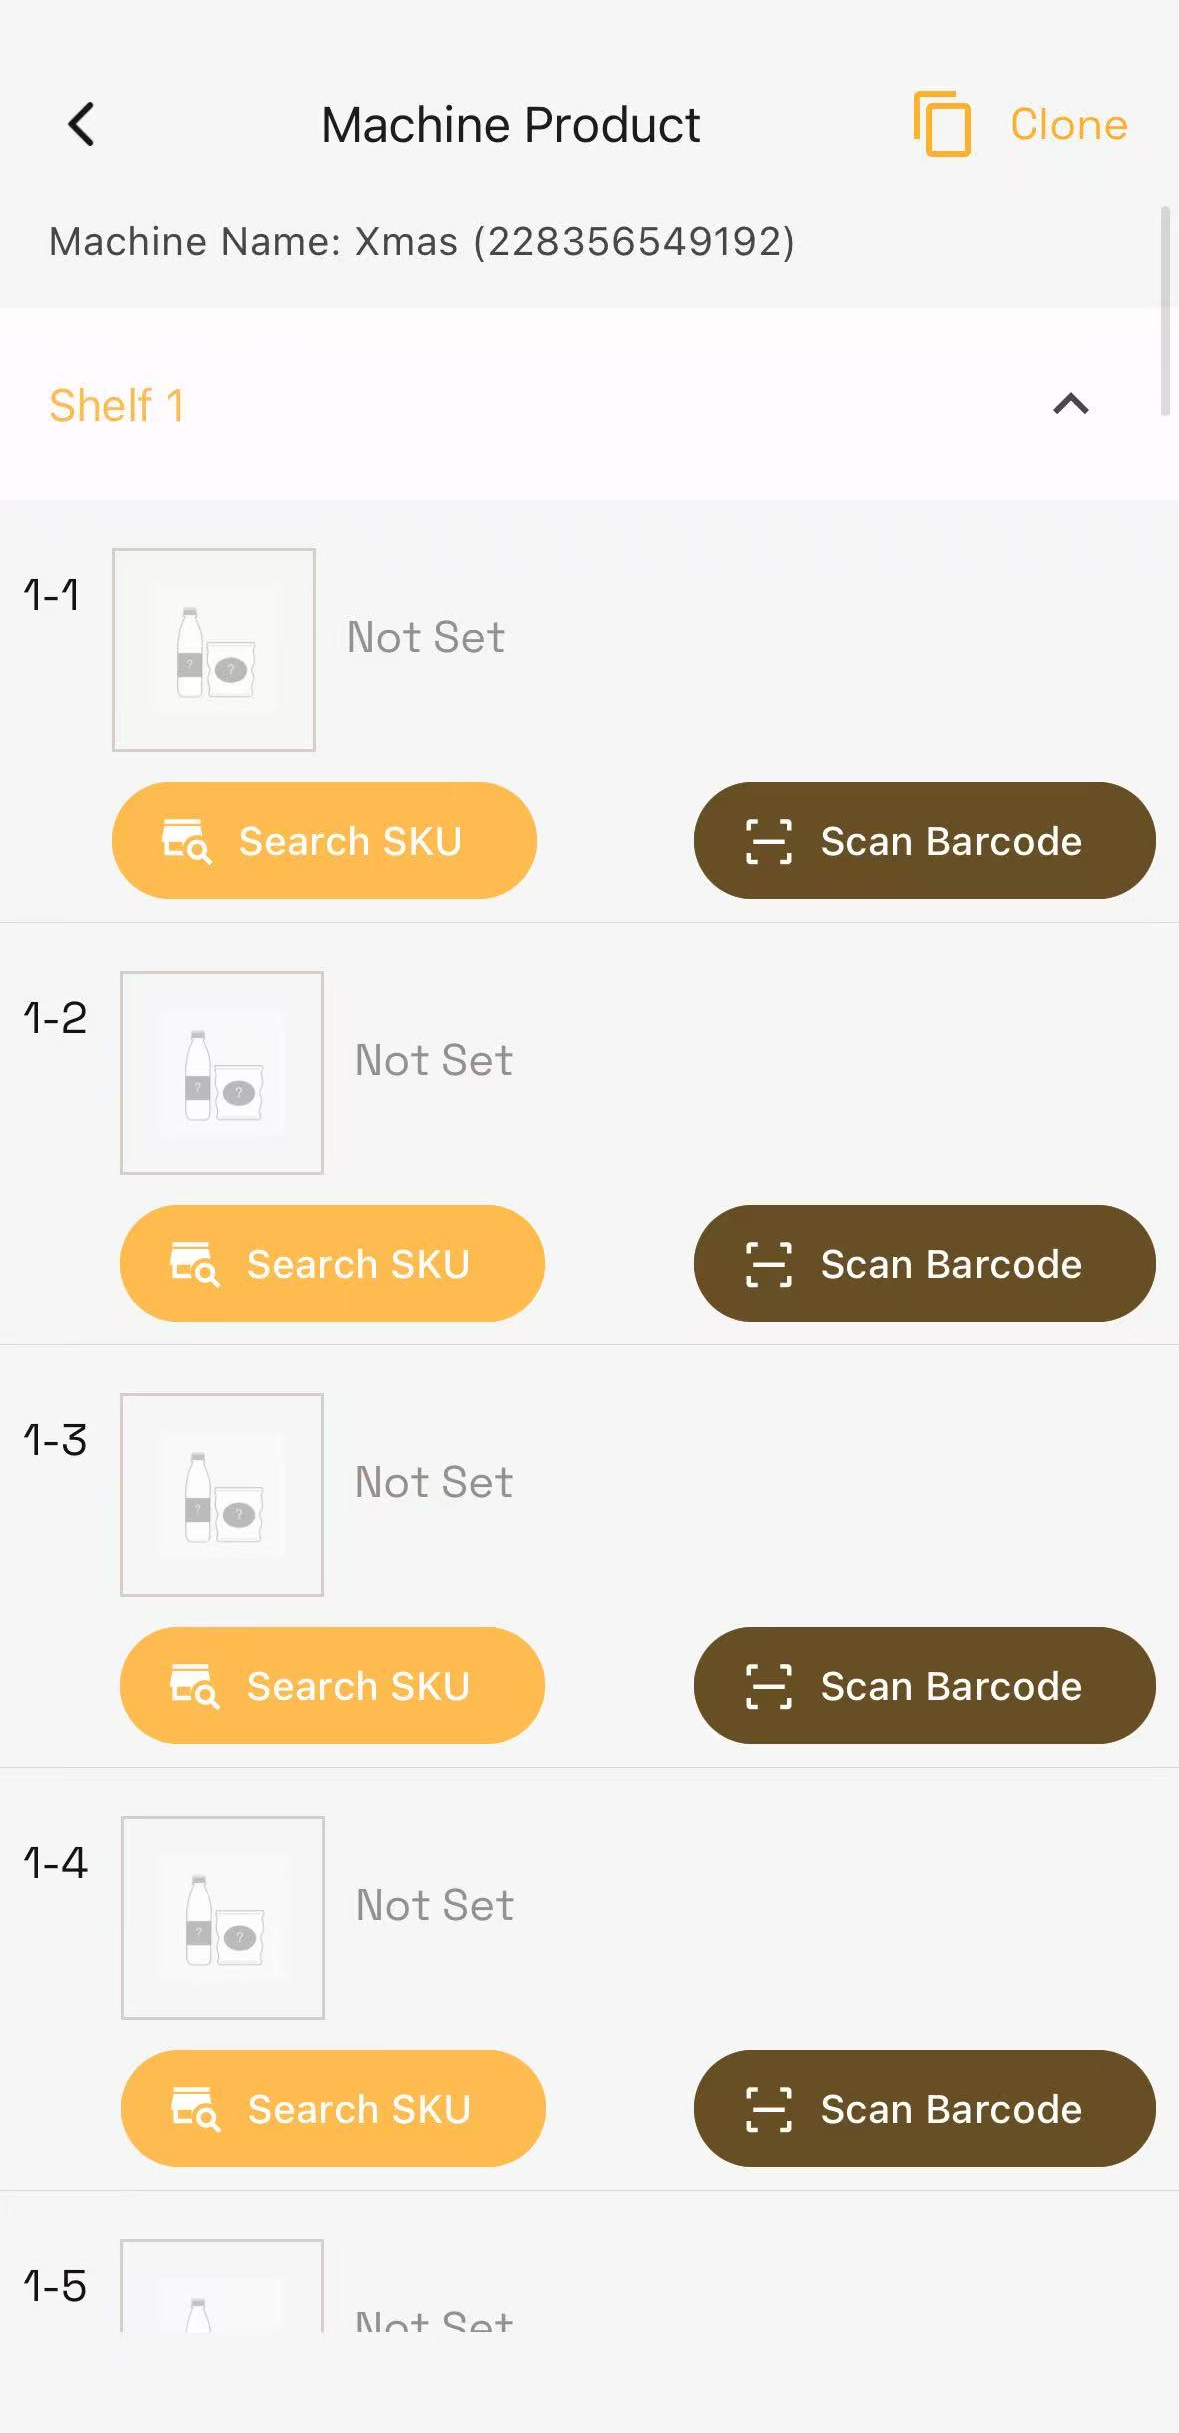
In the machine shelf management view:
Modify SKU → Search SKU / Scan Barcode— add products to shelf slotsRemove— take a product off the shelfClone— copy the product layout from another device (useful for identical machine setups)
Scan the QR code on the device. After the beep sound, the door will automatically unlock.
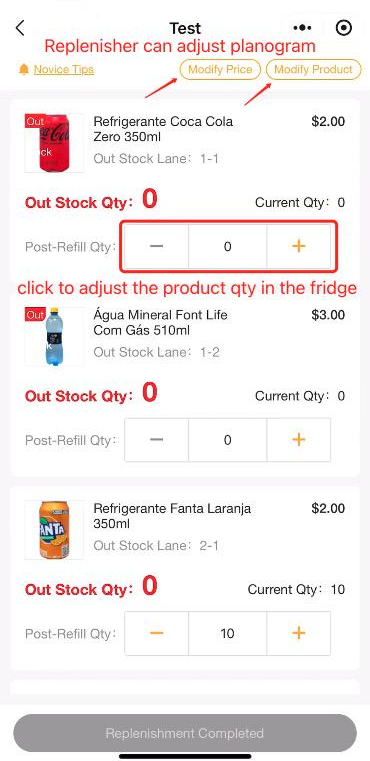
Once the door is open, all listed products and current quantities appear on screen. You can also:
Modify Product— redirects to Product Listing screenModify Price— navigates to Price Strategy page
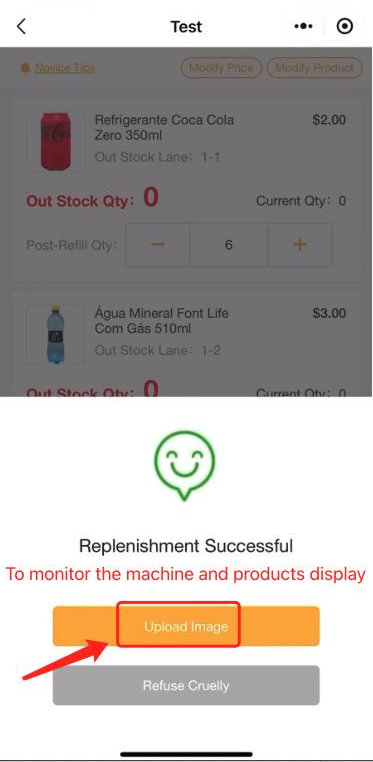
📐 Example: Shelf 1-1 holds max 8 bottles of cola. Out Stock Qty: 3, Current Qty: 5 → Enter "3" in Post-Refill Qty to return to full capacity.
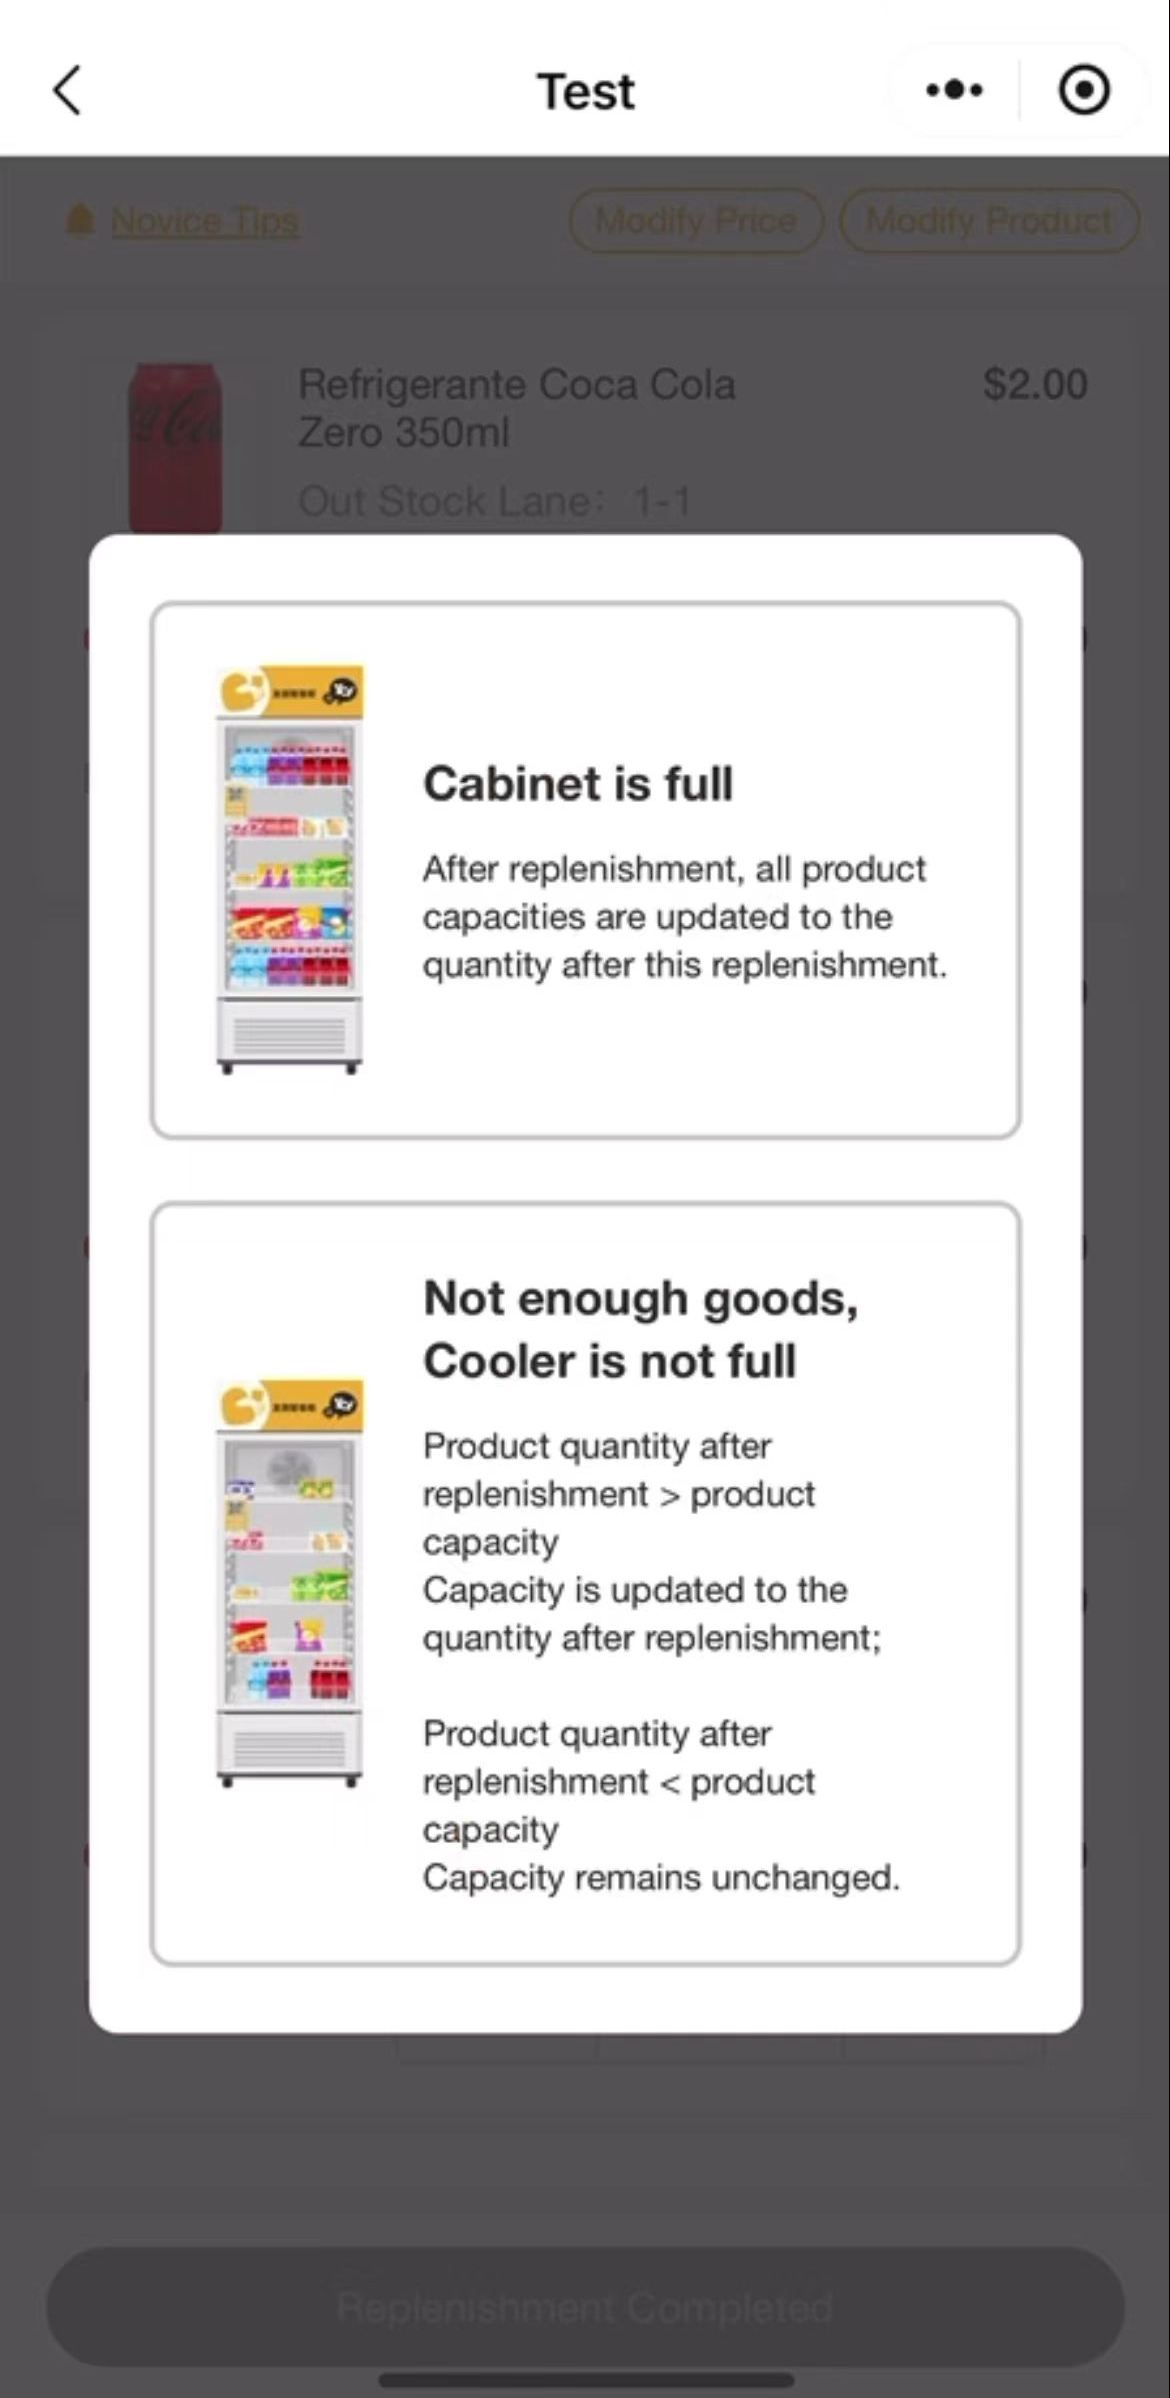
Select Cabinet is full. System auto-fills to max capacity. No manual Post-Refill Qty needed.
Select Cooler is not full. System uses Current Qty + Post-Refill Qty as new stock level, retained until next restock.
To completely remove a product, you must both clear the stock AND delist the product from the shelf.
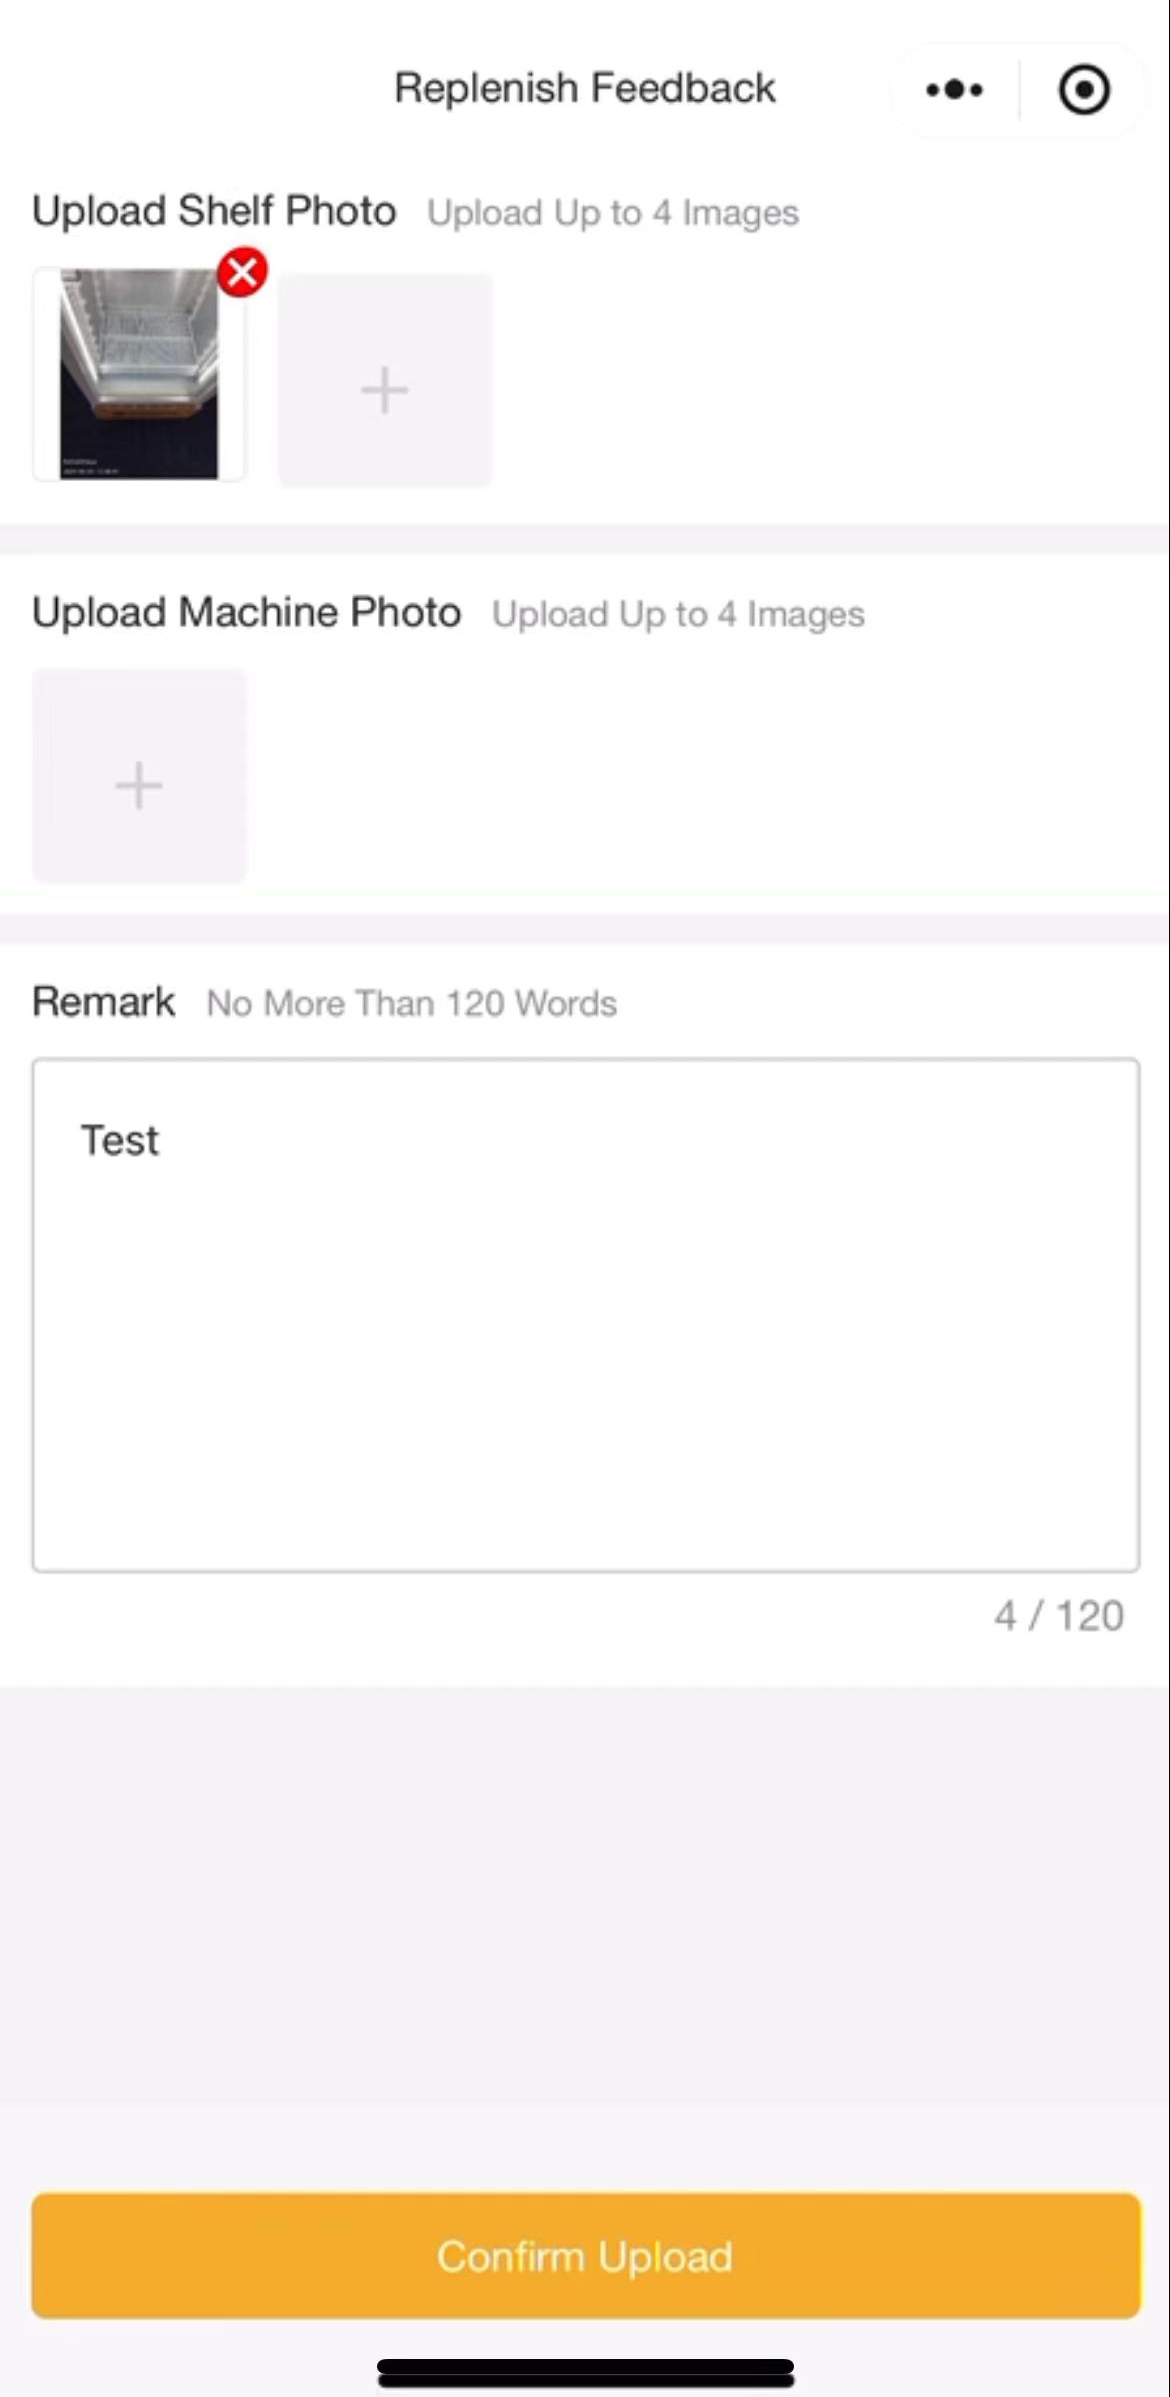
- Photo Upload: Record machine status and product placement.
- Written Notes: Log any abnormalities (unusual noises, damaged products) in the comments field. Timely reporting enables faster support.
Product Placement
- Cola / Water: Bottom shelf — fast-movers, customers know where to look.
- New / high-margin items: Top or middle shelves at eye level.
- Small items (e.g., chocolate): 1st or 2nd shelf for better AI recognition.
Replenishment Rules
- Check and remove any near-expired products on every visit.
- Avoid placing similarly colored products side by side — reduces AI accuracy.
- Max 60 SKUs per machine. Exceeding this causes abnormal order accumulation.
Before deploying the machine, verify every item. Run a full end-to-end purchase test at the customer's end and verify signal strength on-site.
- Has "Sale Status" been changed from "Deactivated" to "Normal Sale"?
- Is at least one valid Replenisher account bound to this machine?
- Have prices been configured for all listed products? Is a Price Strategy bound?
- Is the Out-of-Stock Alert enabled?
- Has the Pre-authorization amount been configured (above $0.50)?
- Does the platform accurately reflect the machine's status and information?
- Is there sufficient Visual Recognition Fee balance?
- Is the SIM card signal stable? Antenna and top panel screws fully tightened?
- Does the door lock and unlock correctly when scanned?
- Is the platform camera feed active and camera functioning?
- Is the machine being transported upright?
- Is the POS terminal operational? Are product prices displaying correctly?
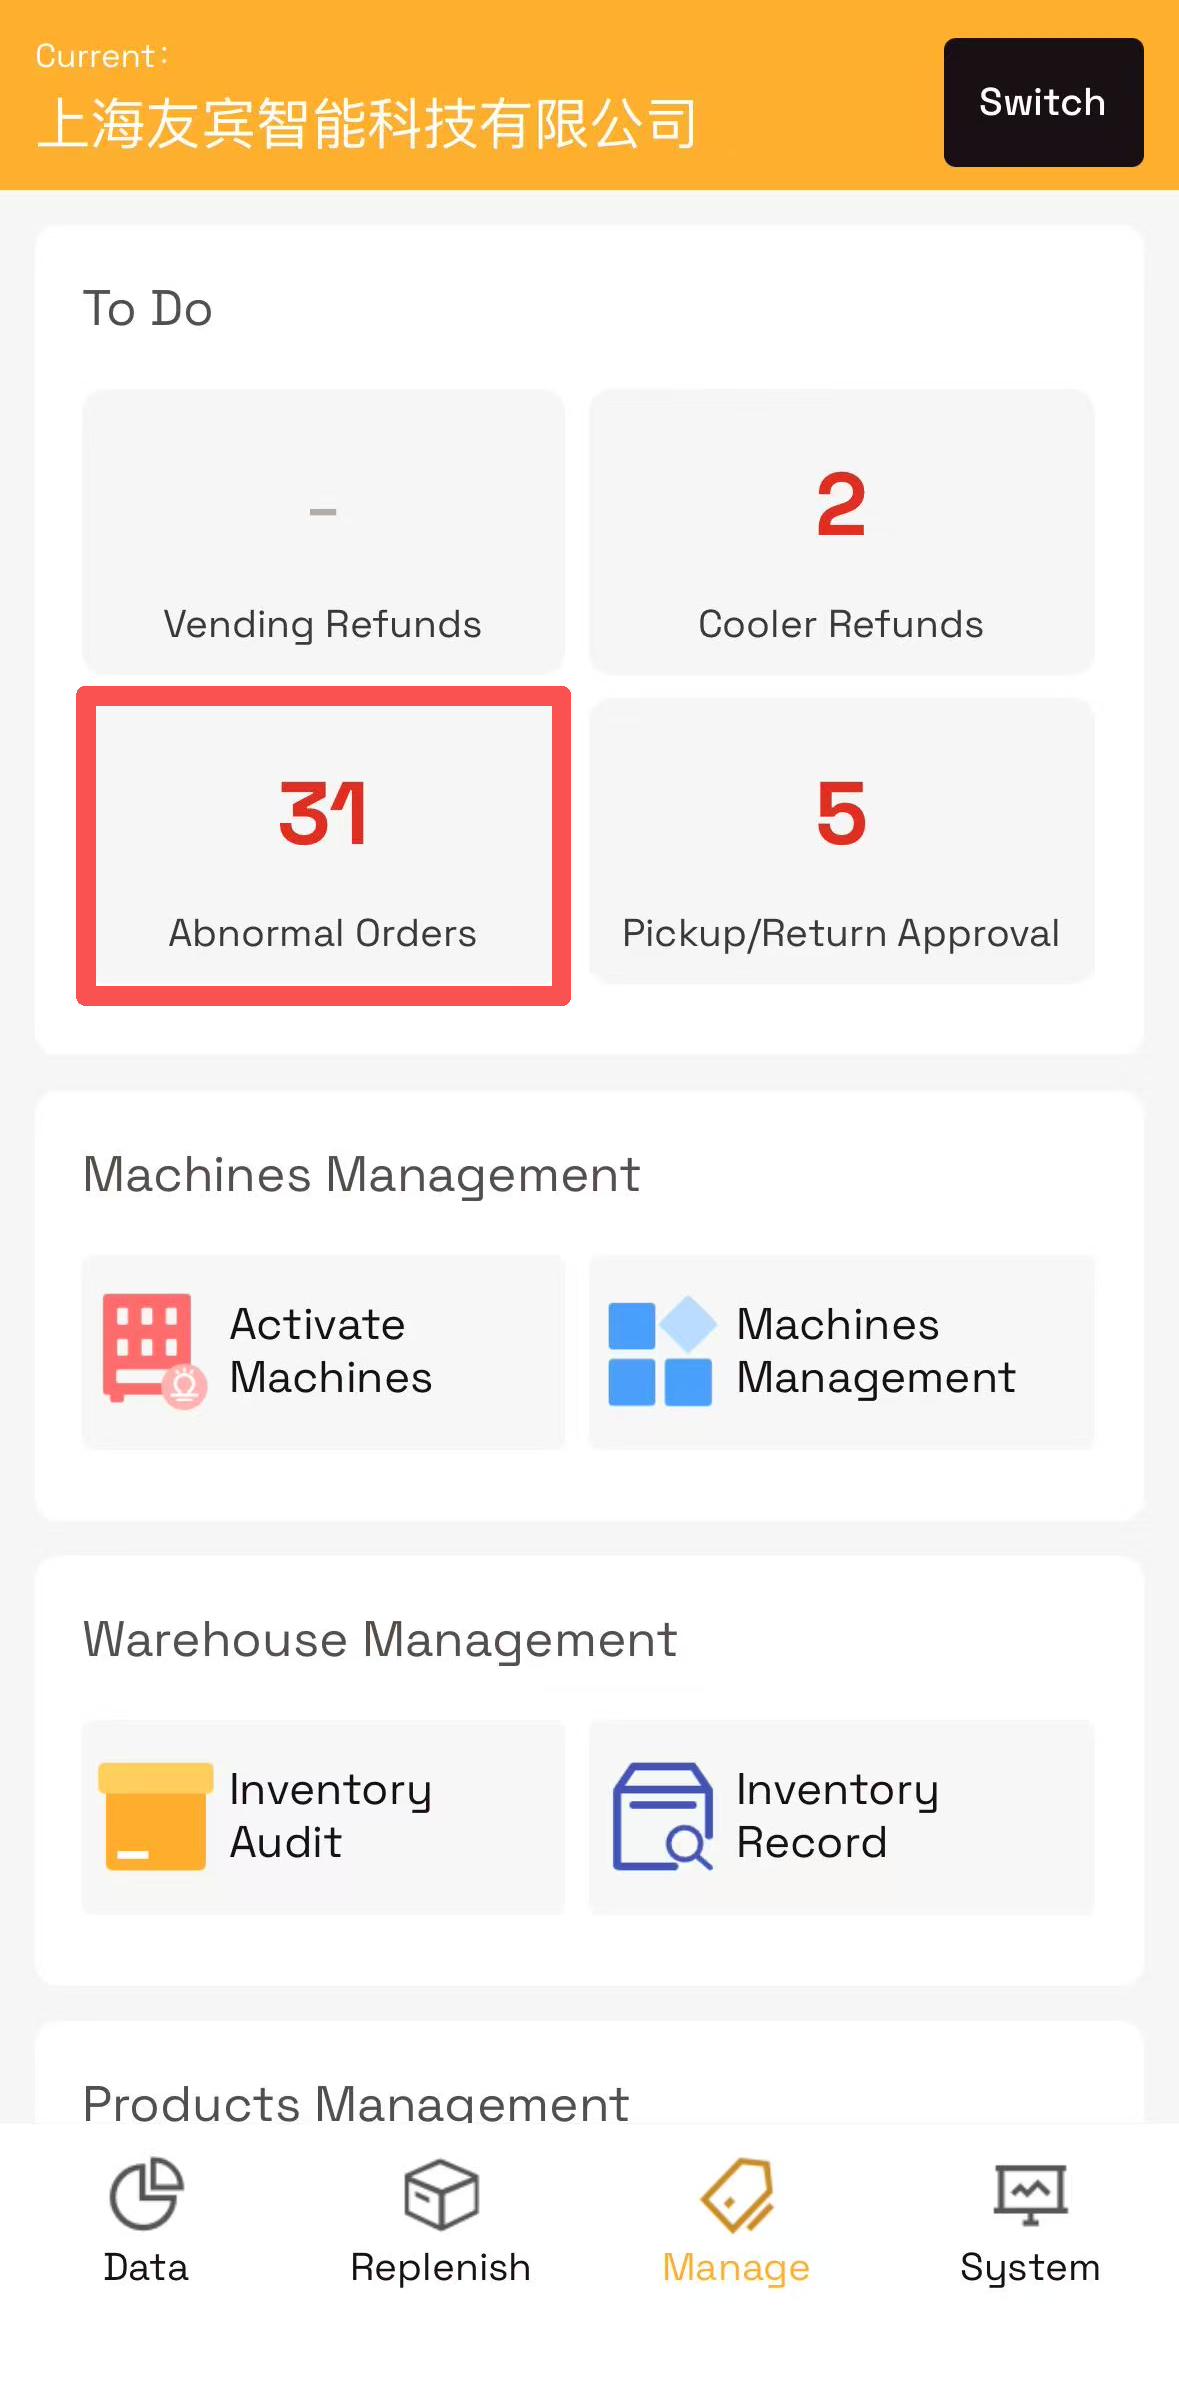
Core tools for managing machines, monitoring data, handling orders, and running promotions after go-live.
Machine Management is the central hub for managing devices in warehouse-free mode — four main modules:
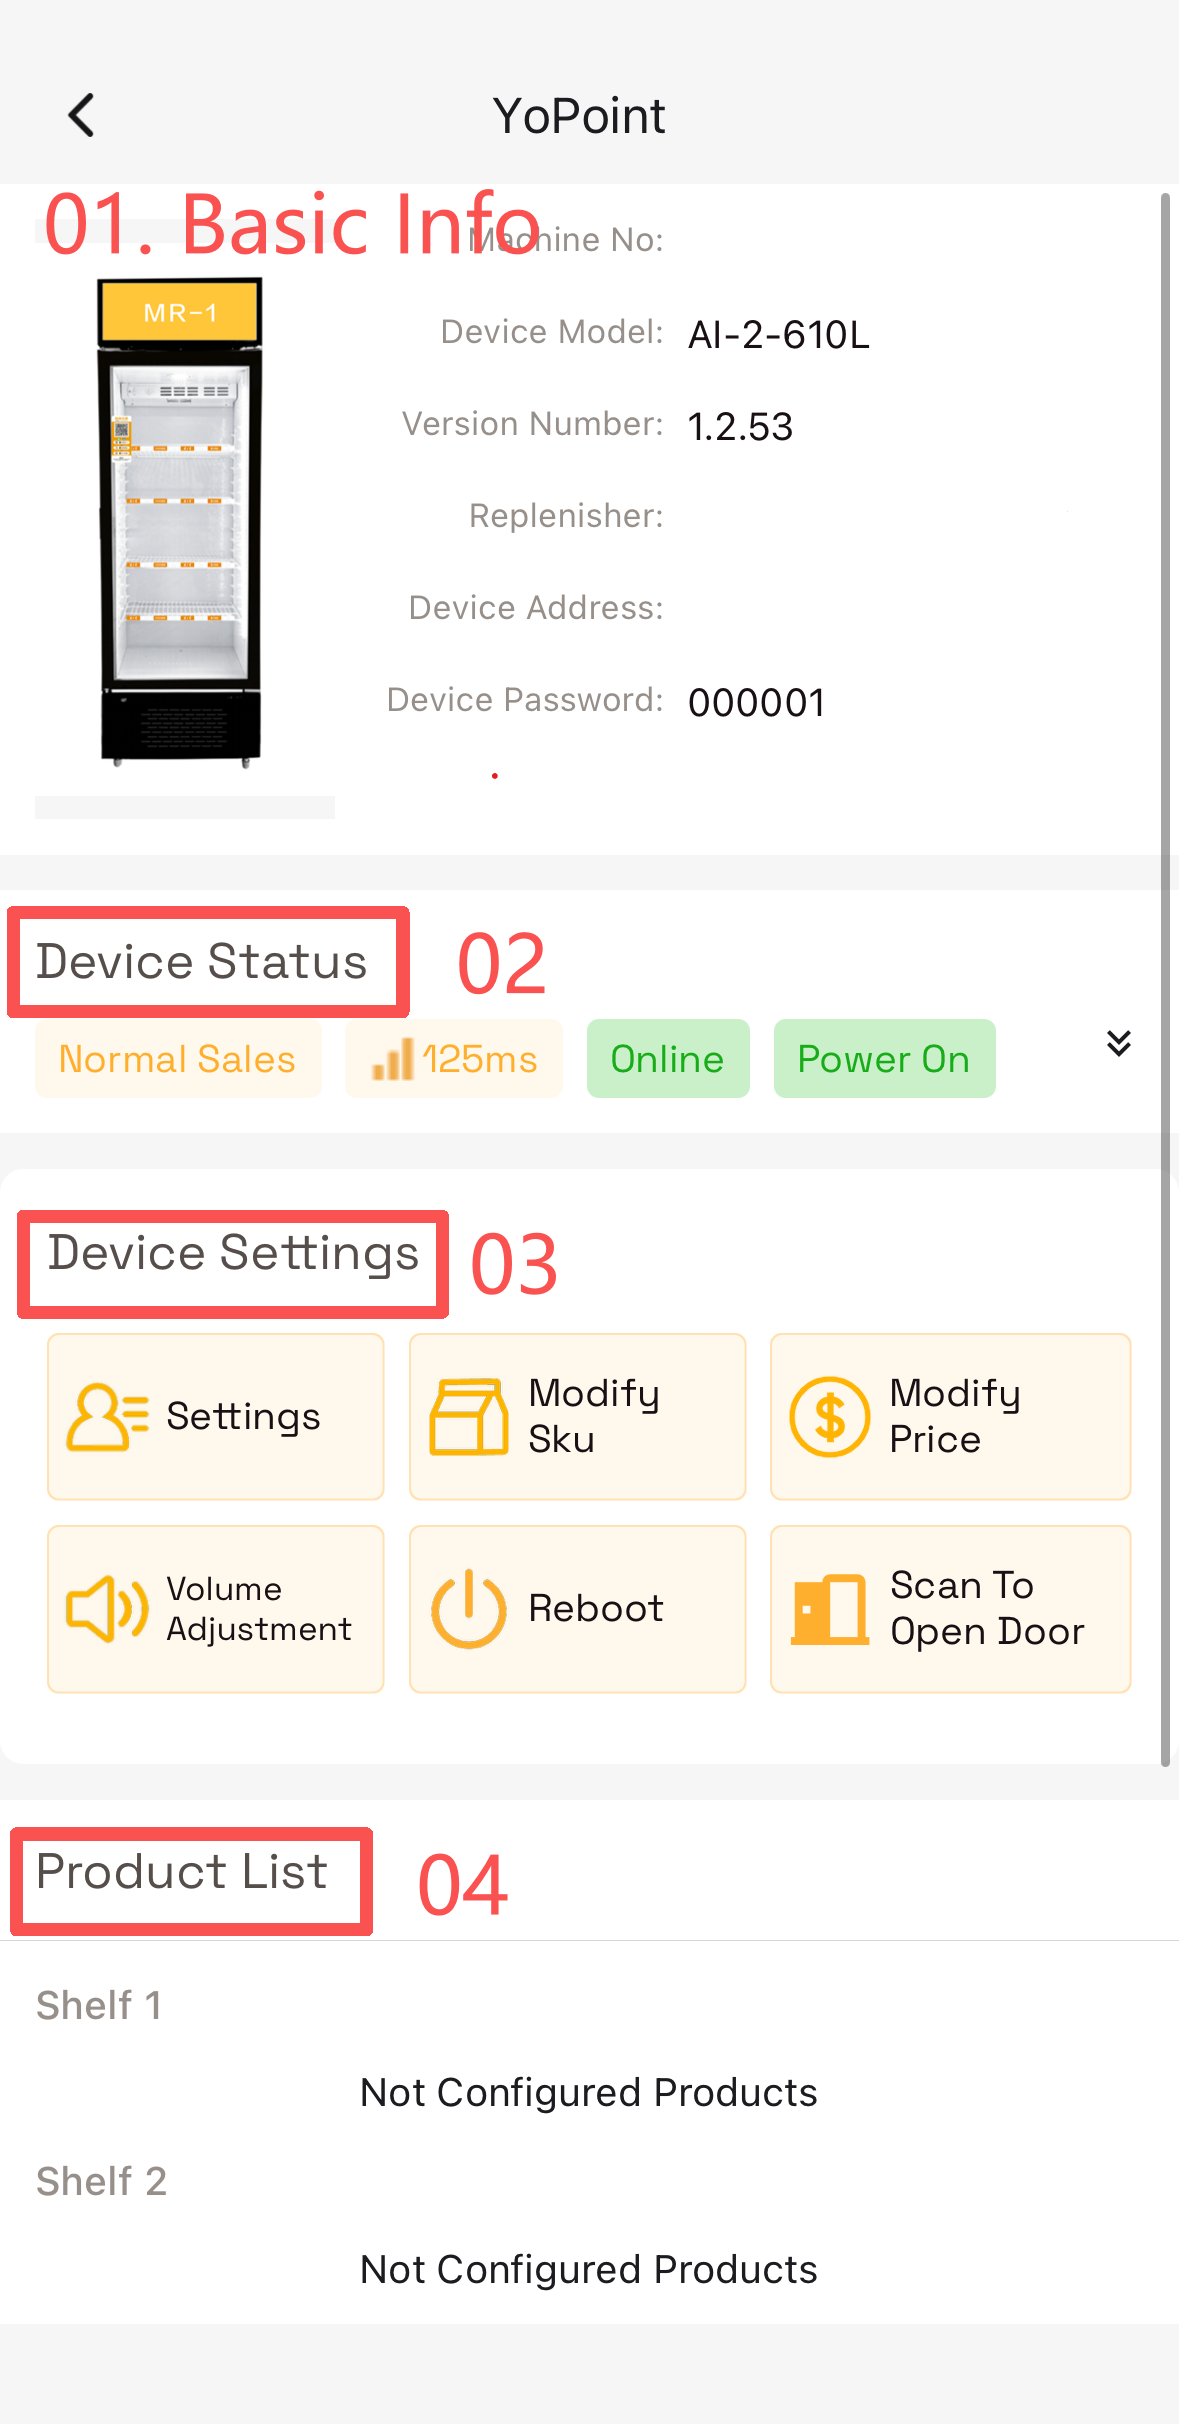
- Device ID: Matches QR code on machine; used to locate equipment in the platform.
- Device Password: Used to access the local hardware platform.
Always check here first when any device abnormality occurs.
Modify SKU — scan/search to add or remove products from shelves.
Modify Price — adjust pricing strategy or jump to Price Strategy page.
Reboot — if the machine has an unresolved issue, try restarting.
Scan to Open Door — for door access only, not restocking. Use in emergencies.
Additional machine operations are available on the PC portal.
Email support@yopoint.com to schedule a live walkthrough.
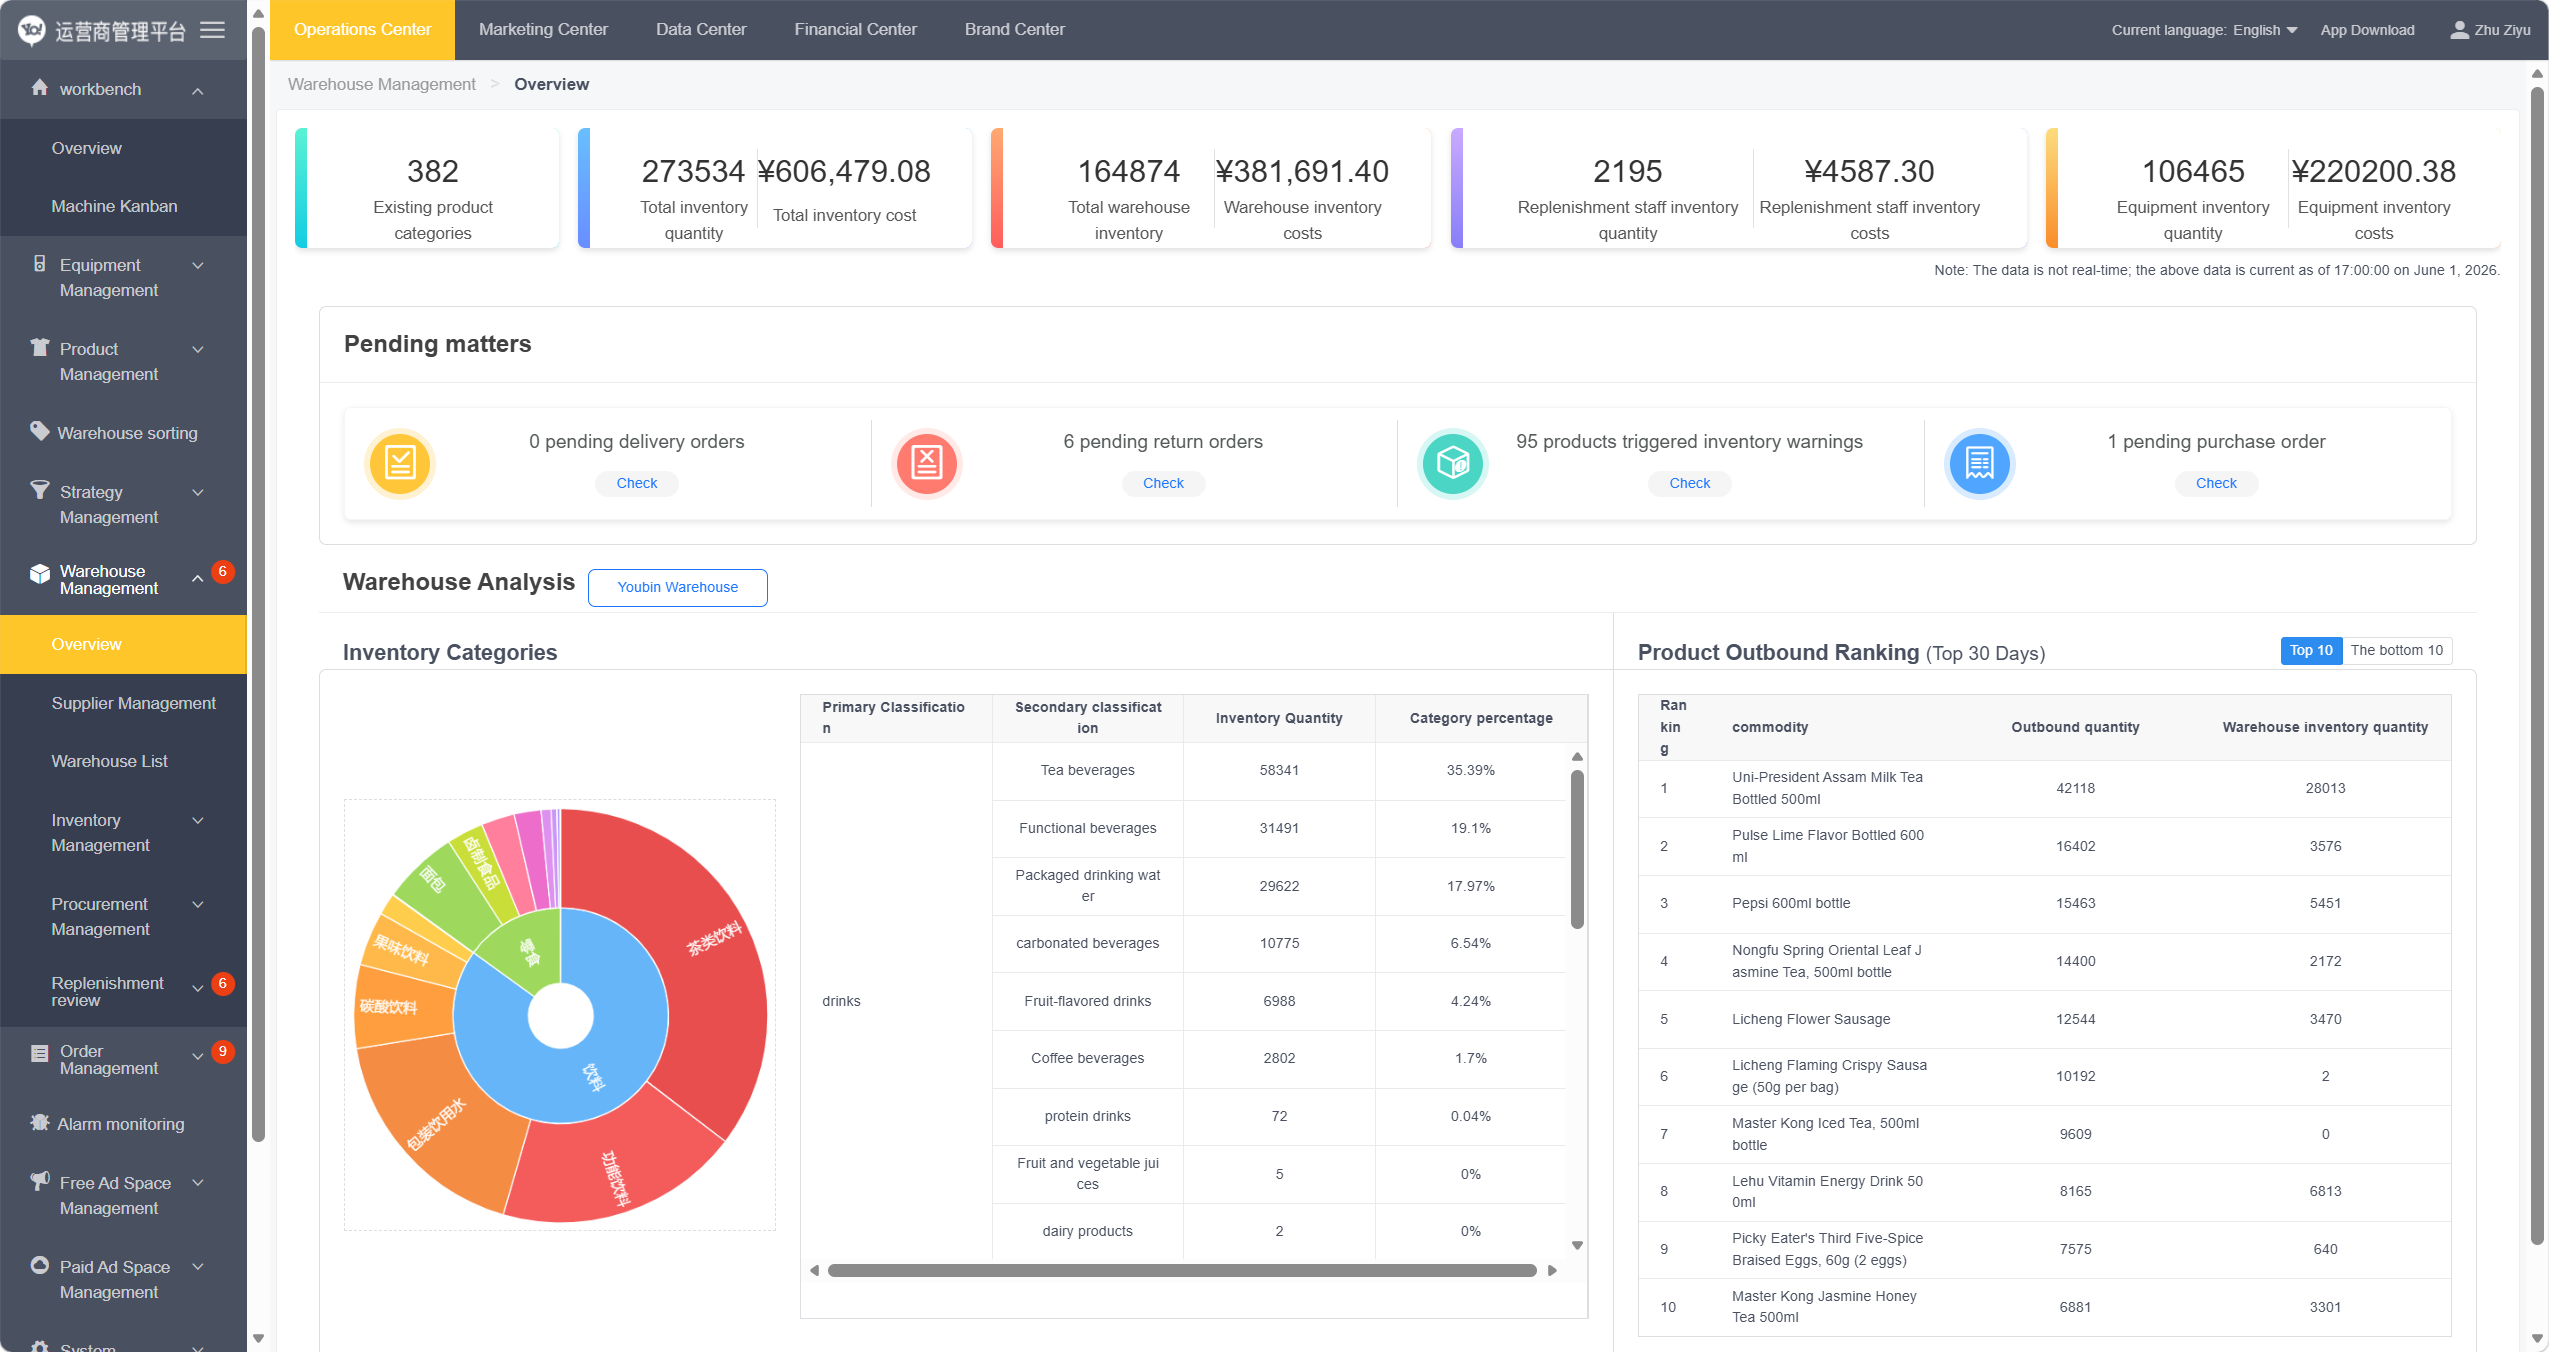
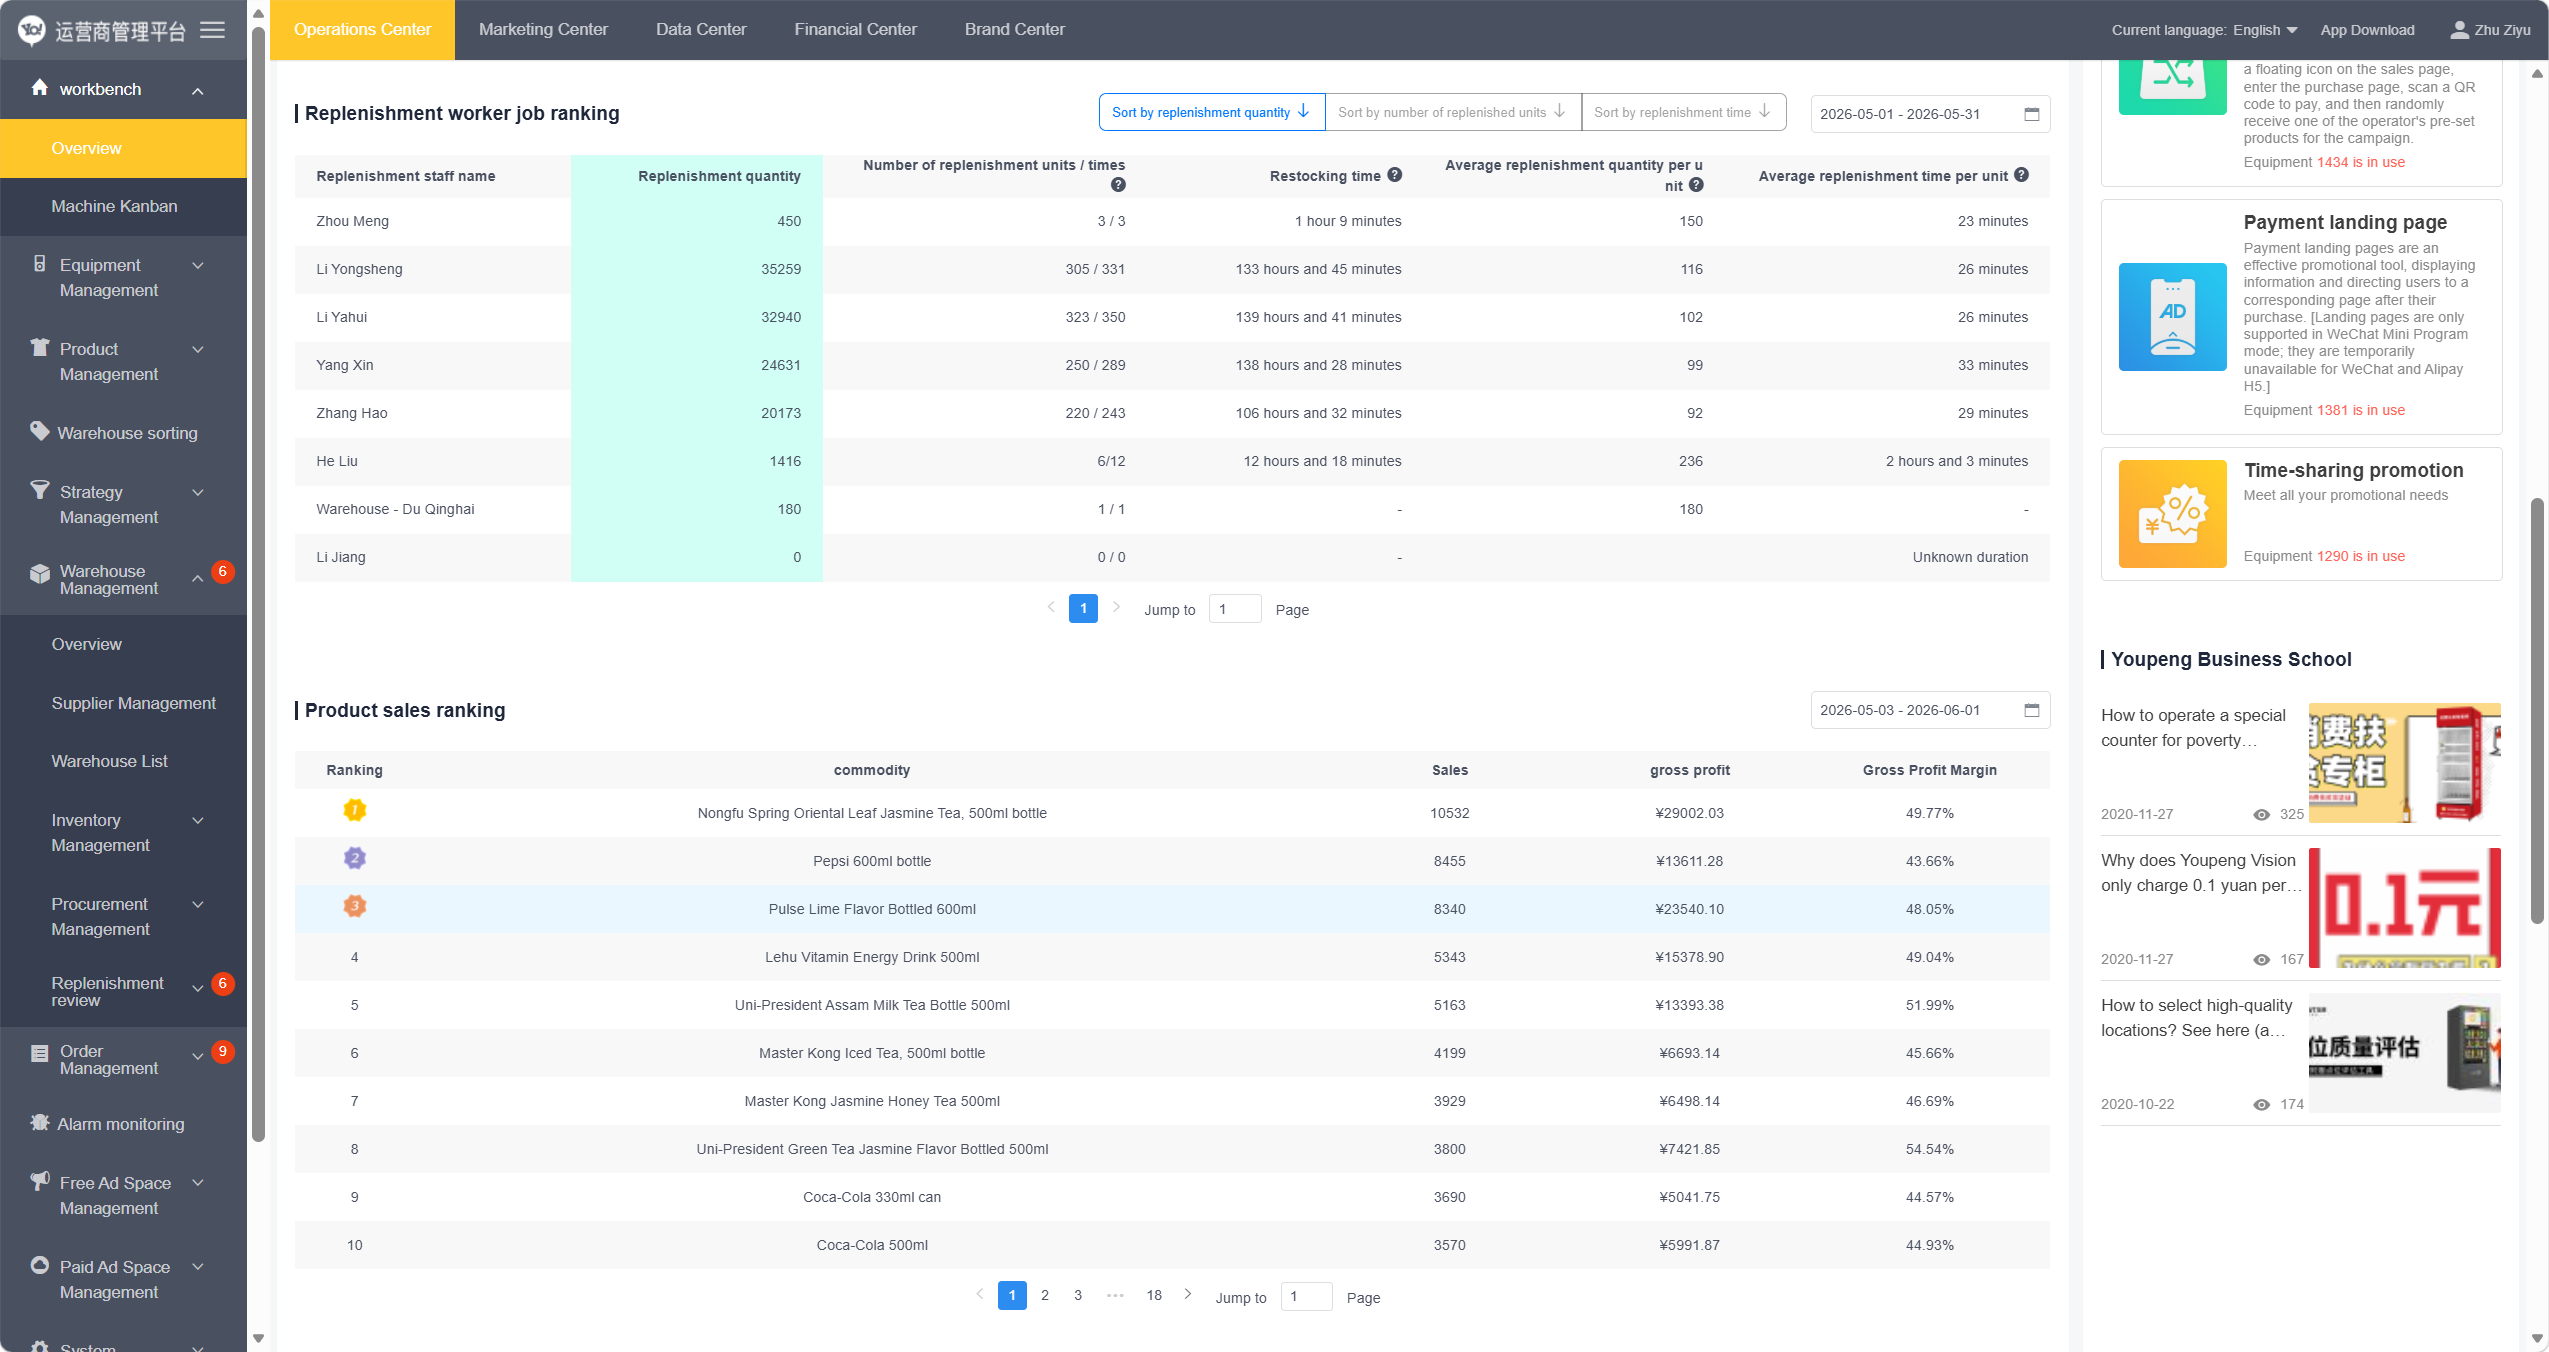
Data analytics is one of YoPoint's most powerful features. Open the Data module in the app:
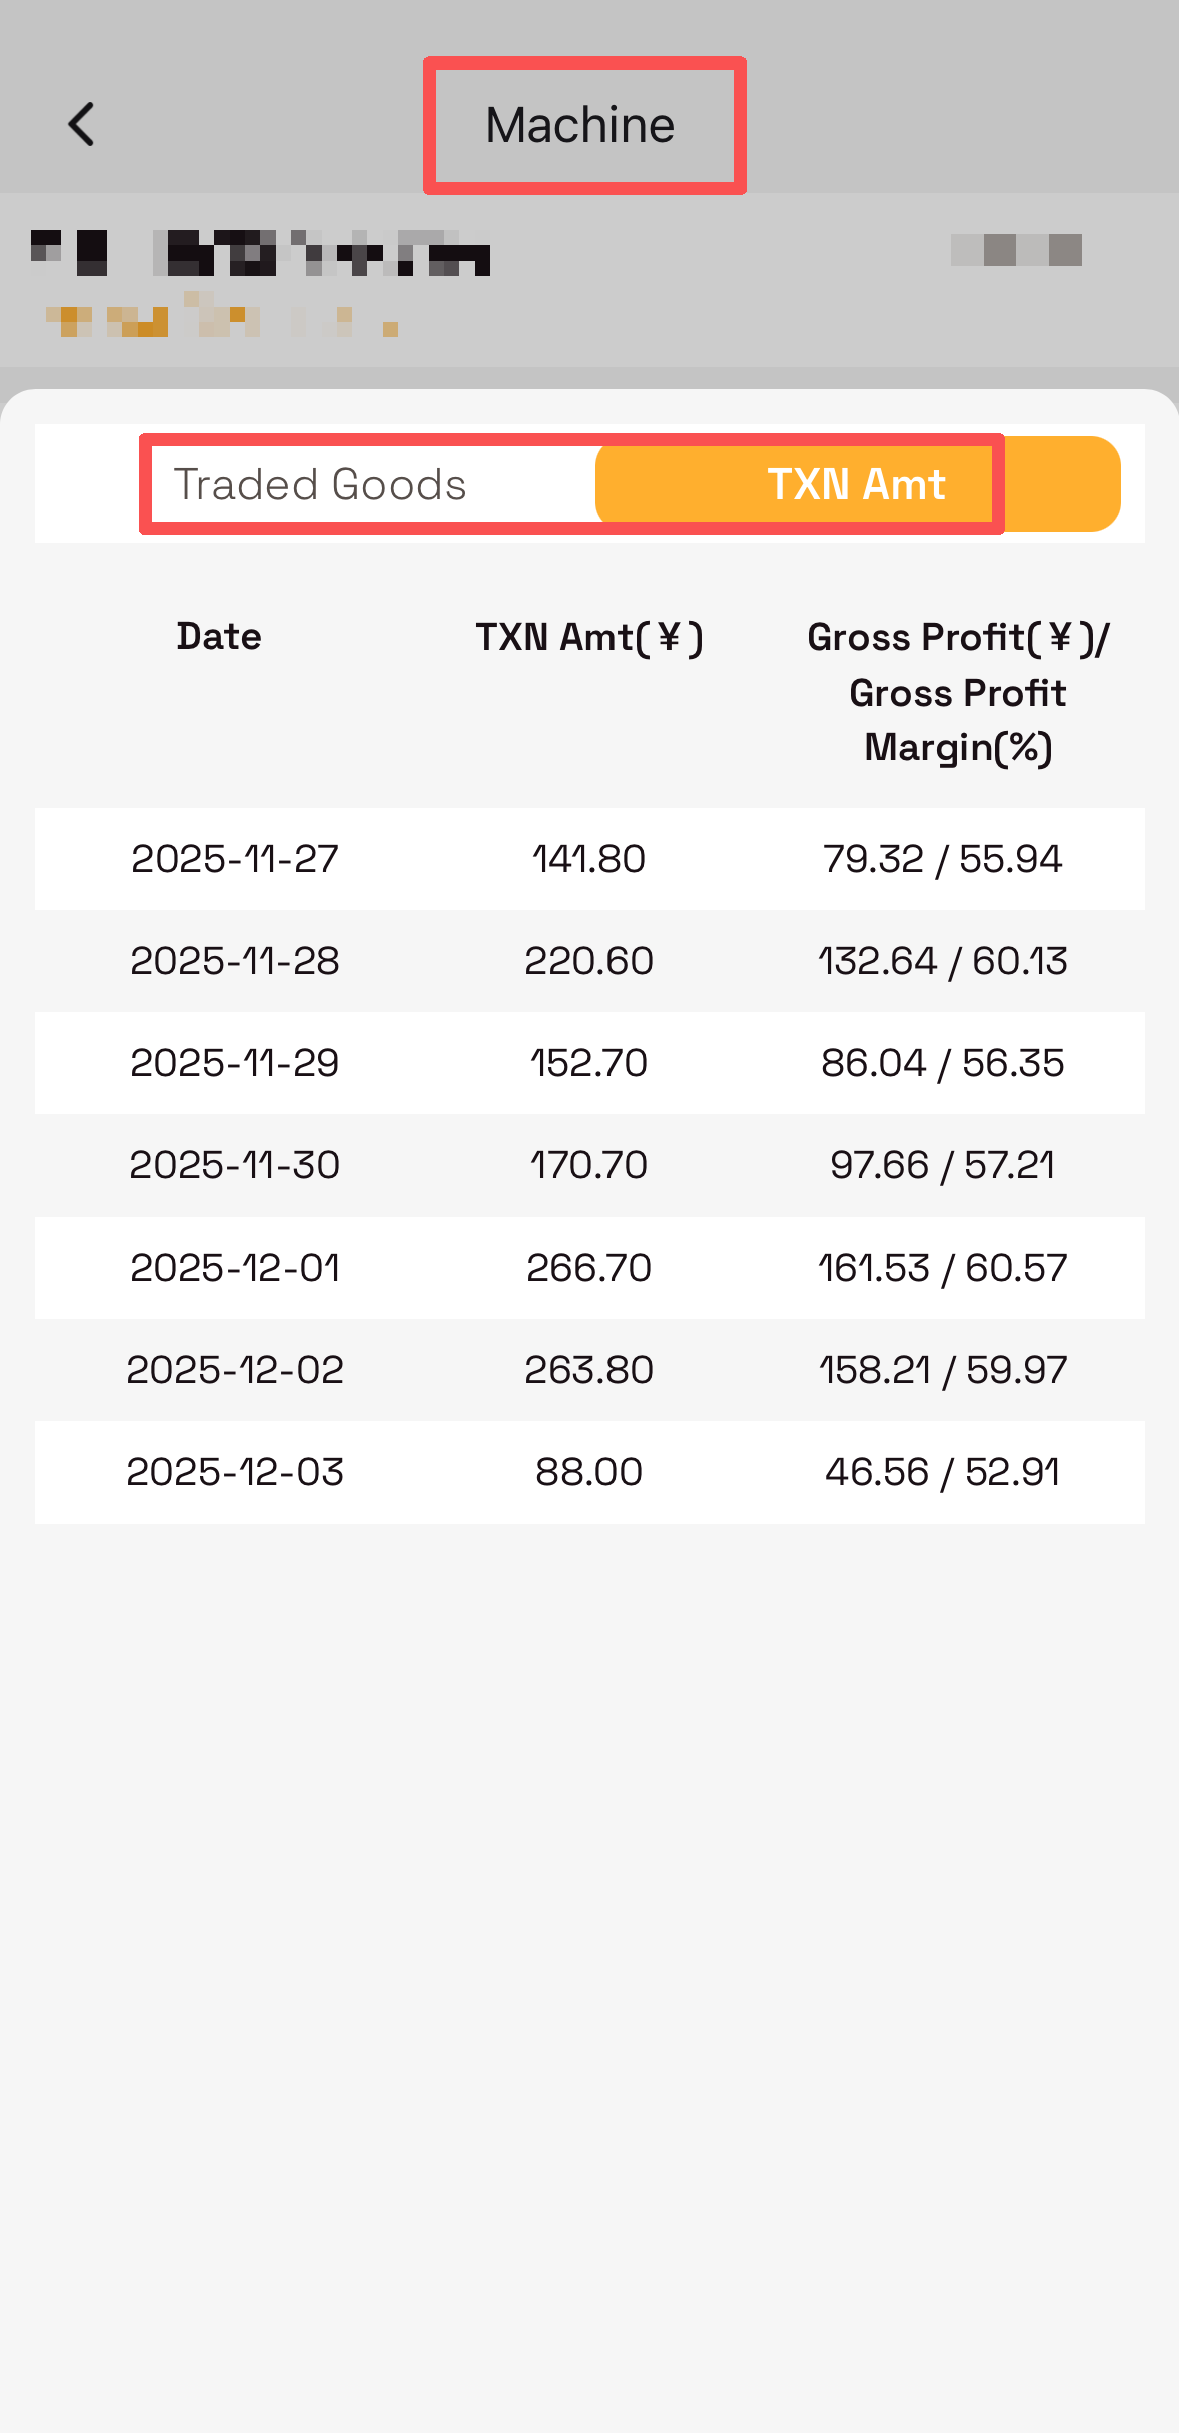
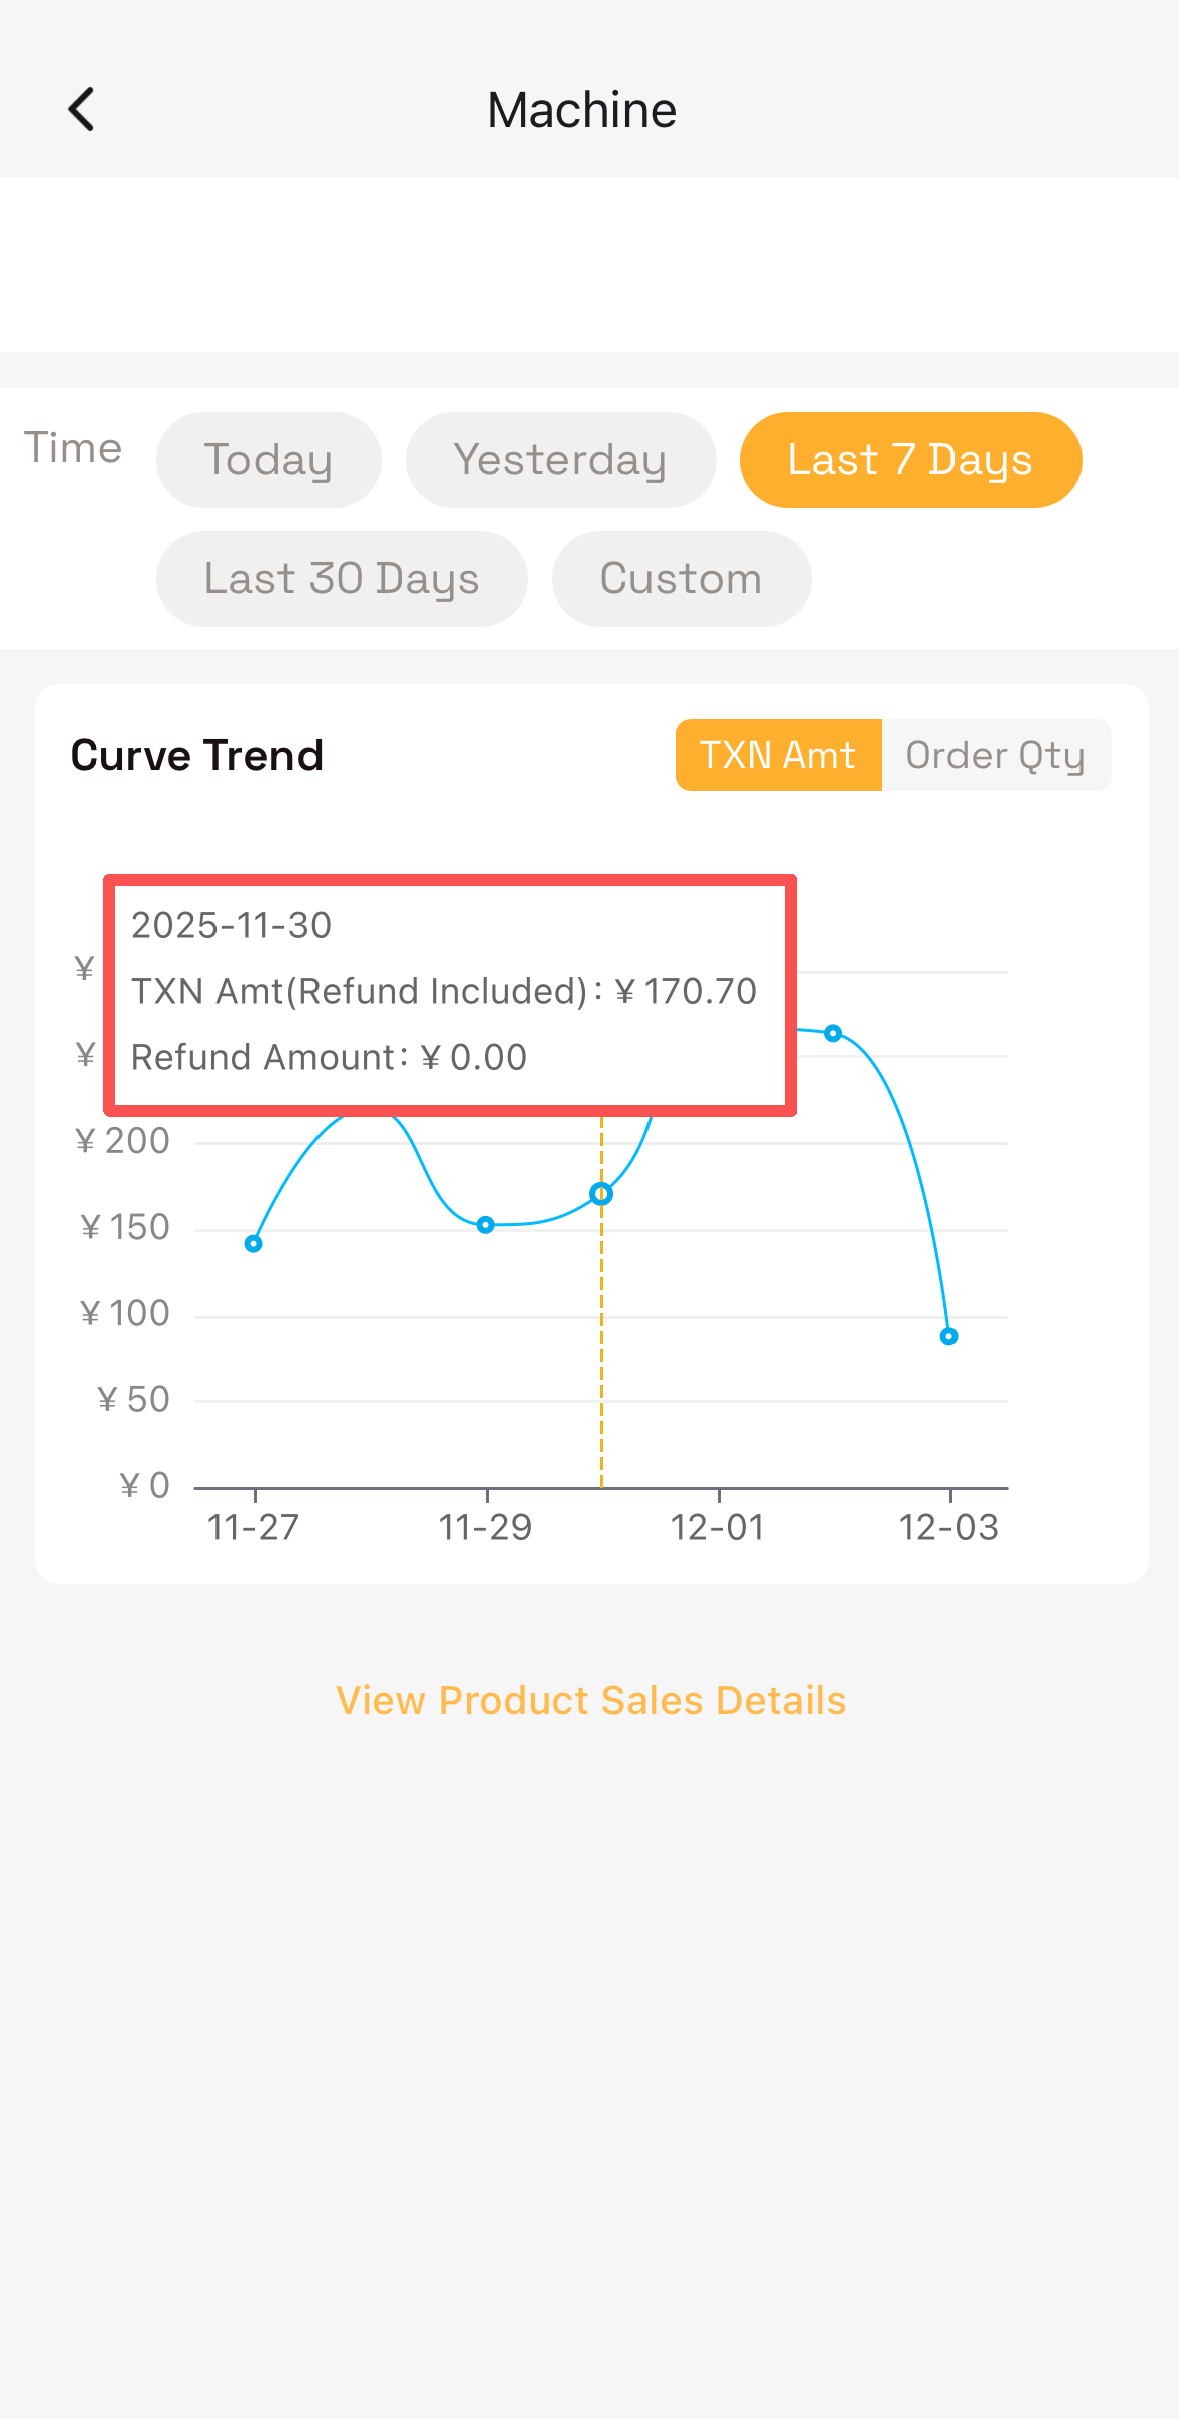
Review sales for yesterday, past 7 days, 30 days, or a custom period.
Use the interactive chart to trace exact time, transaction value, and refund status per transaction.
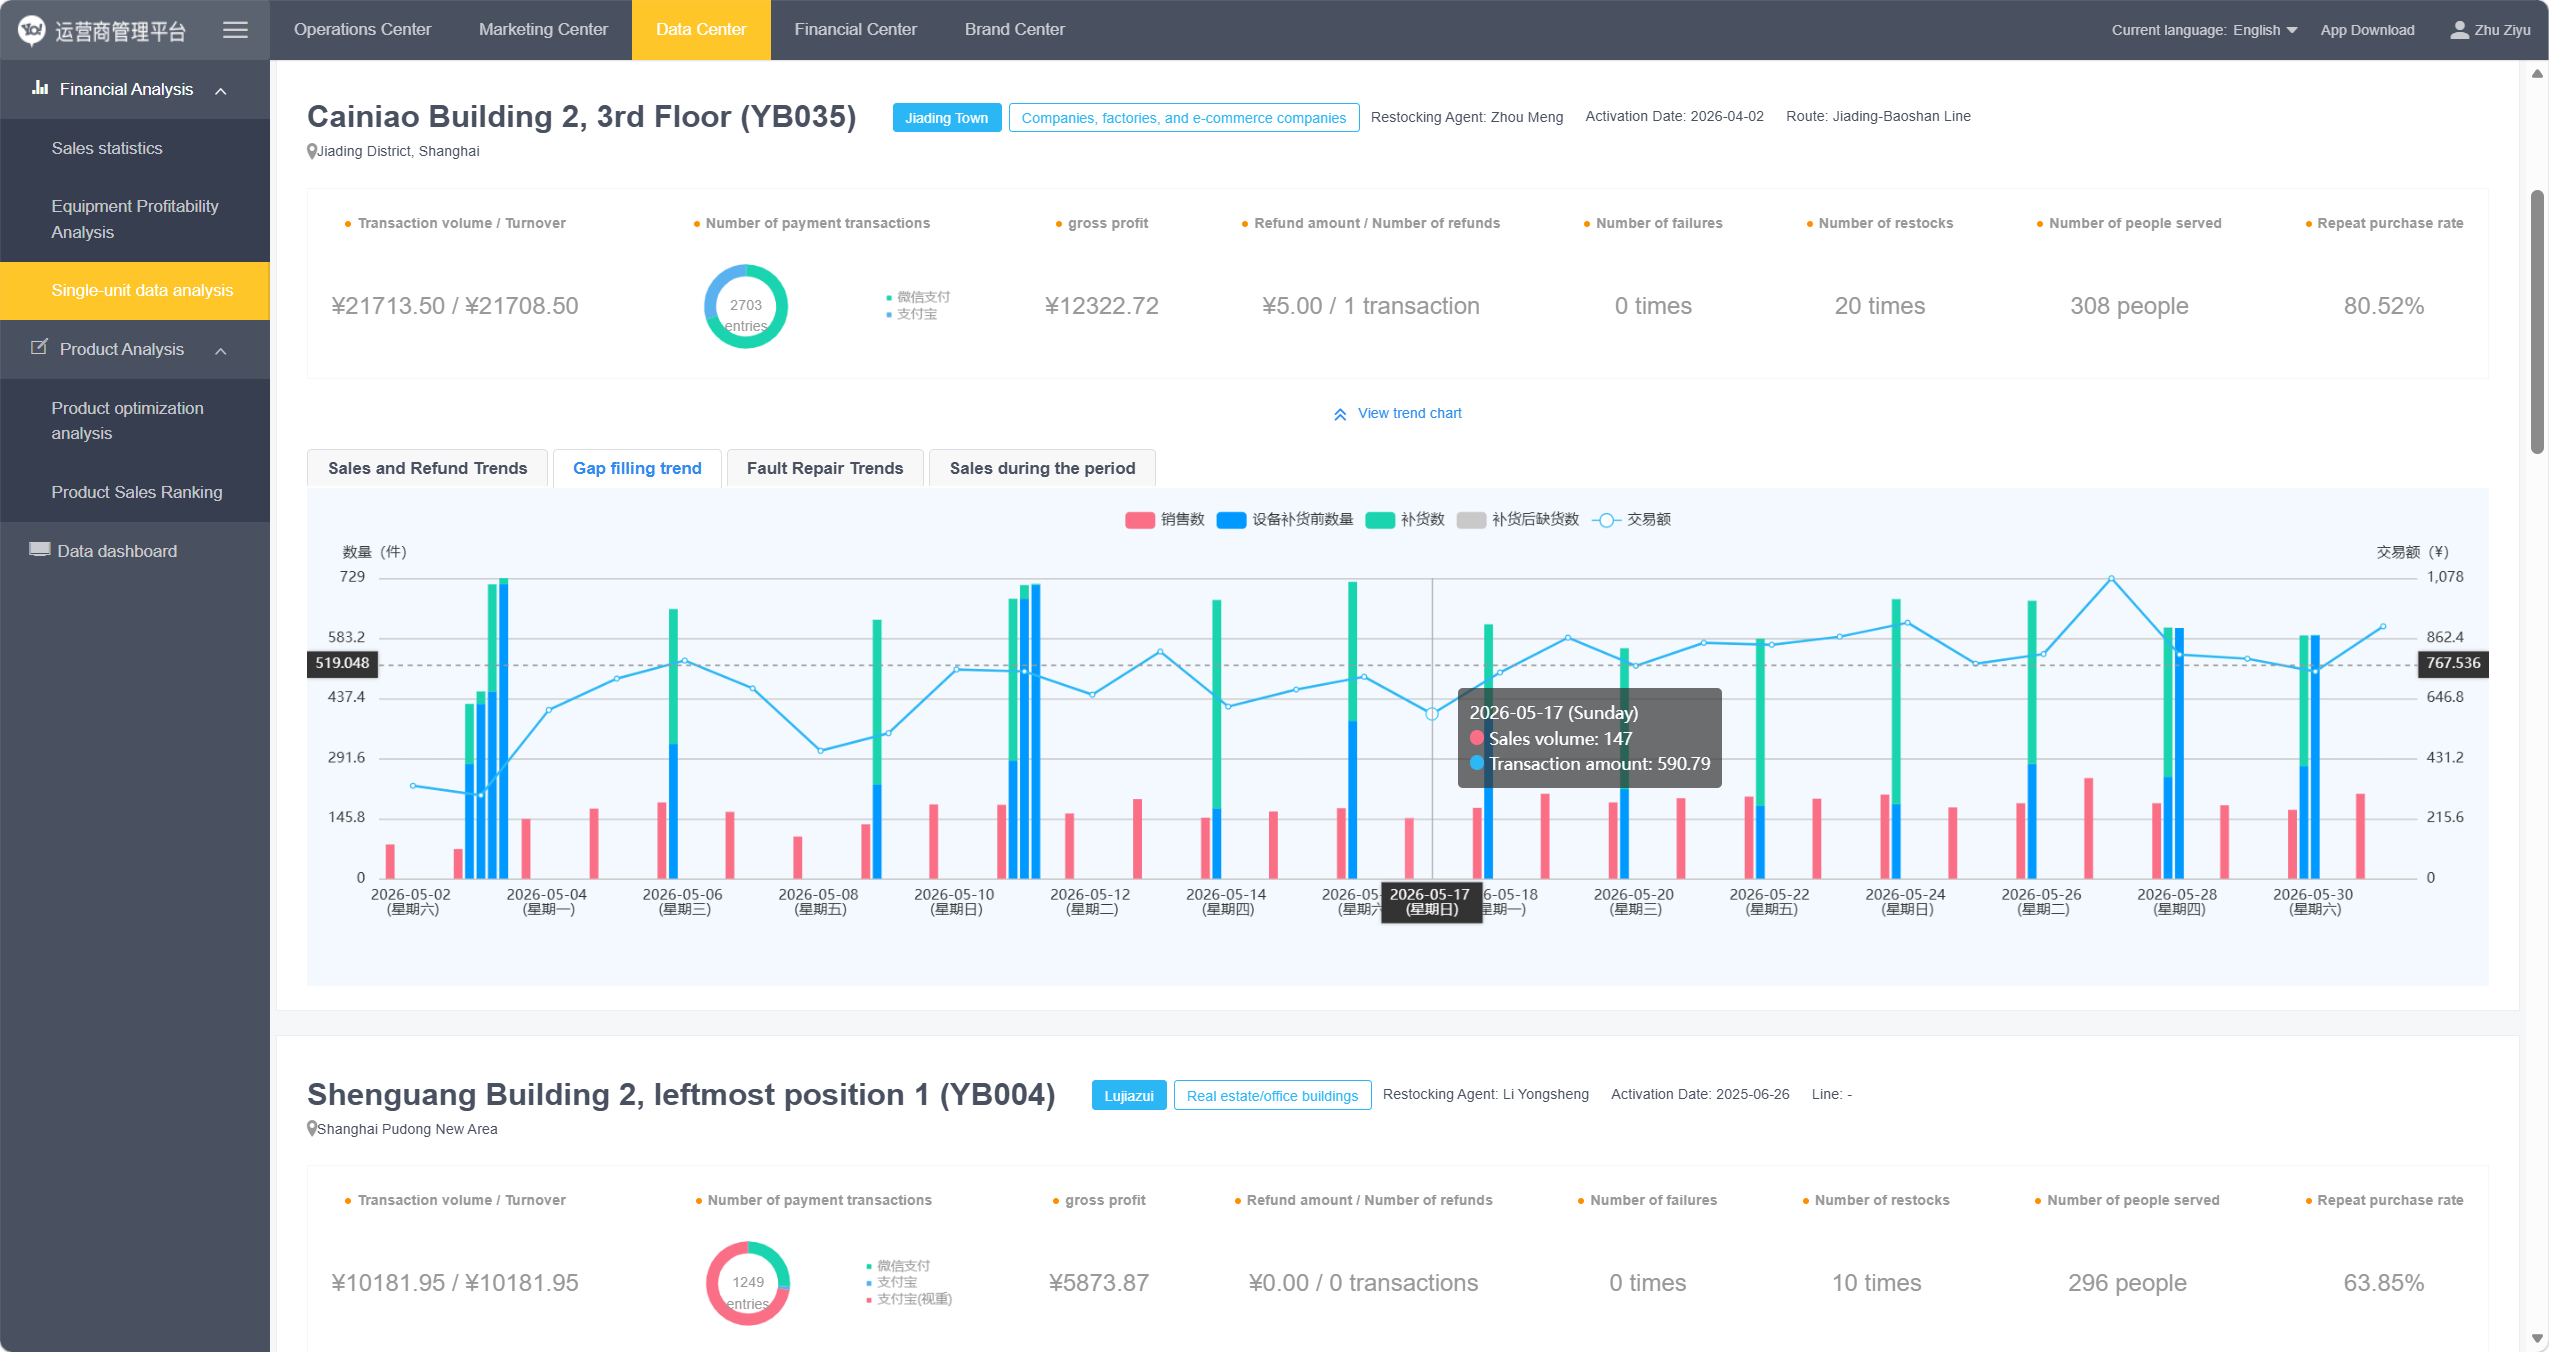
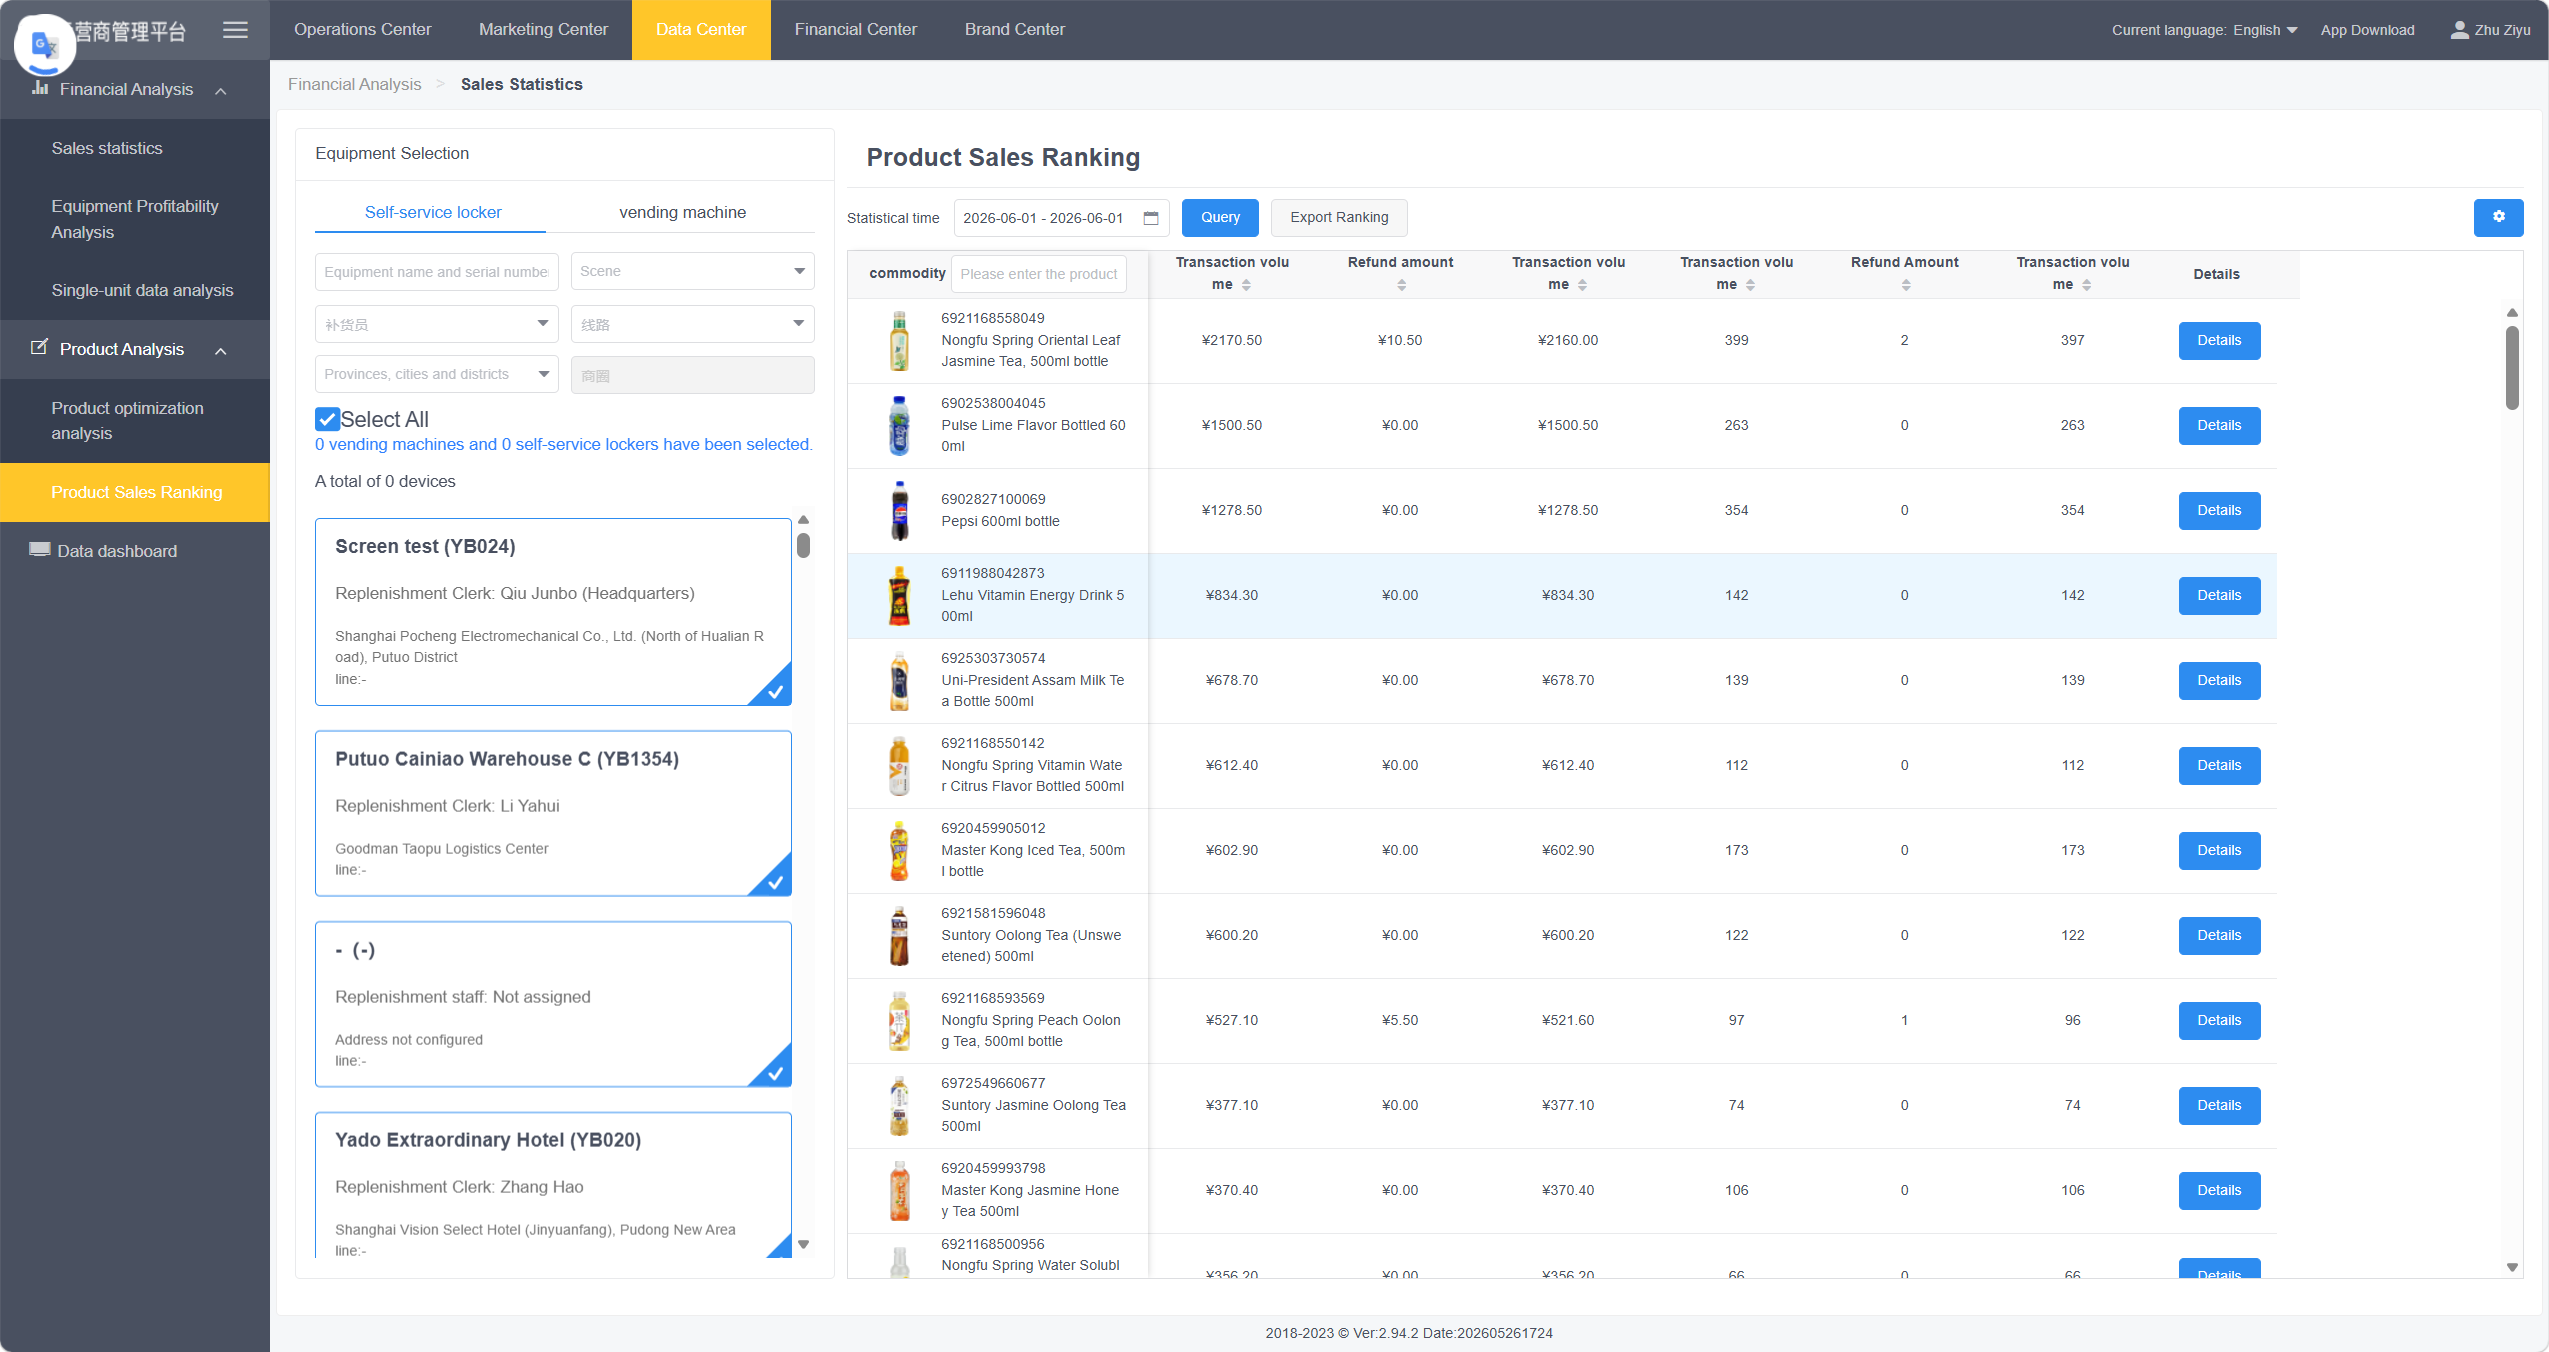
Switch to "Machine/Product" tab to analyze profit per machine and view product sales rankings.
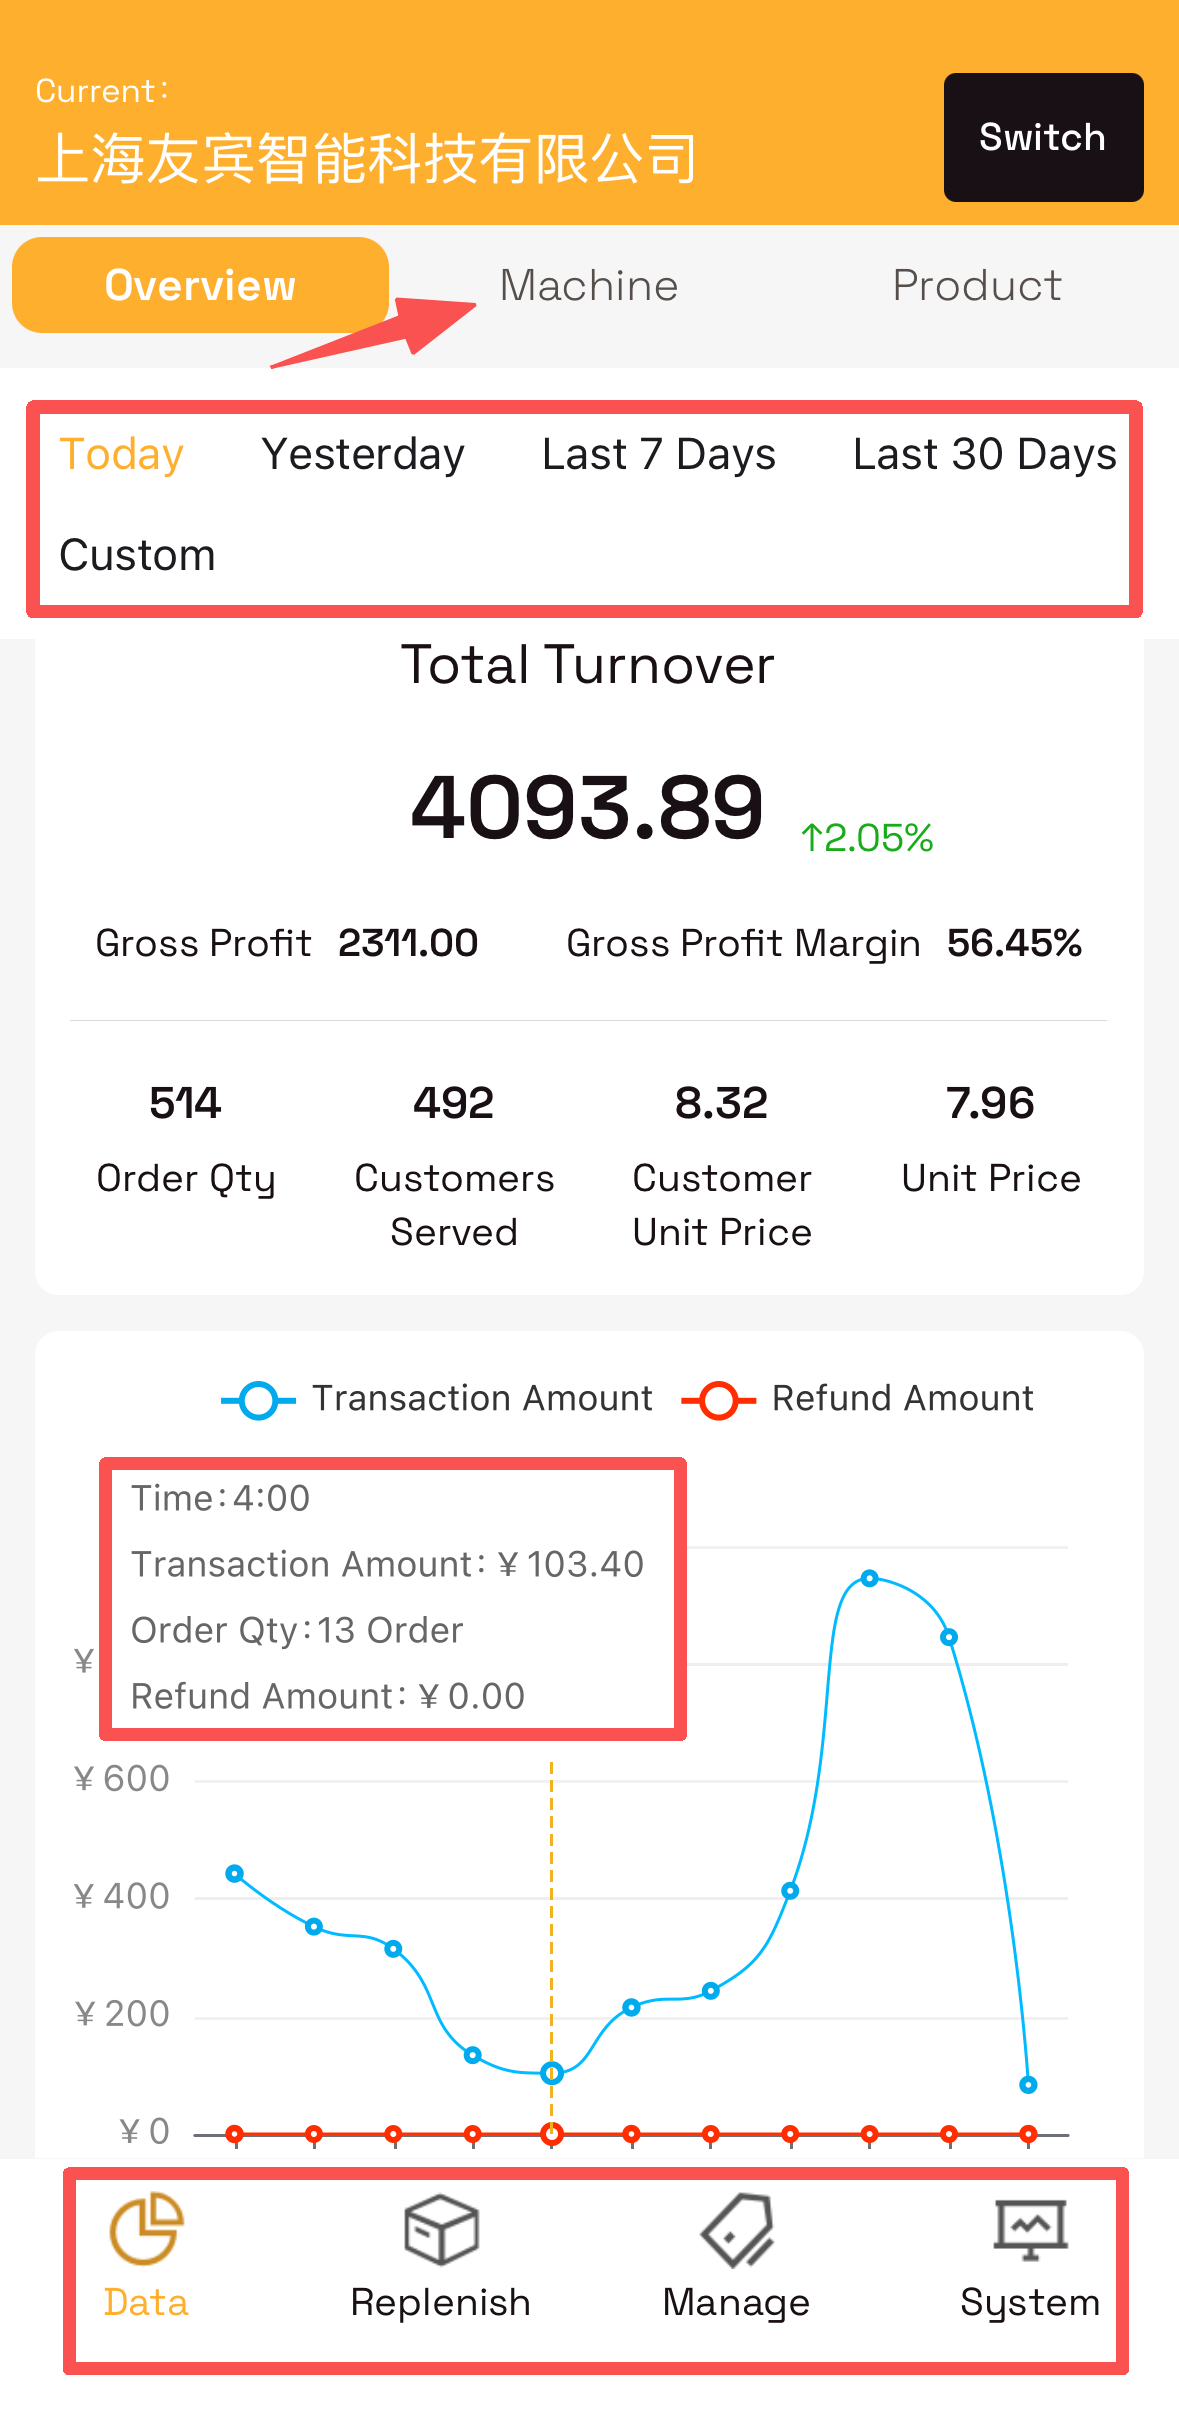
Product Sales Ranking to export full sales data for any period. Use Export Ranking to generate an Excel report — ideal for in-depth analysis and record-keeping. Continuously refining your product mix ensures every machine is stocked with the best-selling, highest-margin items.The Data Center on the PC portal offers deeper reporting:
- Sales statistics and product profitability analysis
- Profit margin calculation per device and product optimization suggestions
- Comprehensive product sales rankings

You may contact us at support@yopoint.com to schedule a demo presentation on how to master the operations platform and boost sales.
If you enter accurate financial data (product cost and selling price), the system automatically generates financial records to simplify tax reporting obligations.
- View "Profit Analysis Details" per machine
- Generate time-segmented sales reports for detailed revenue breakdown

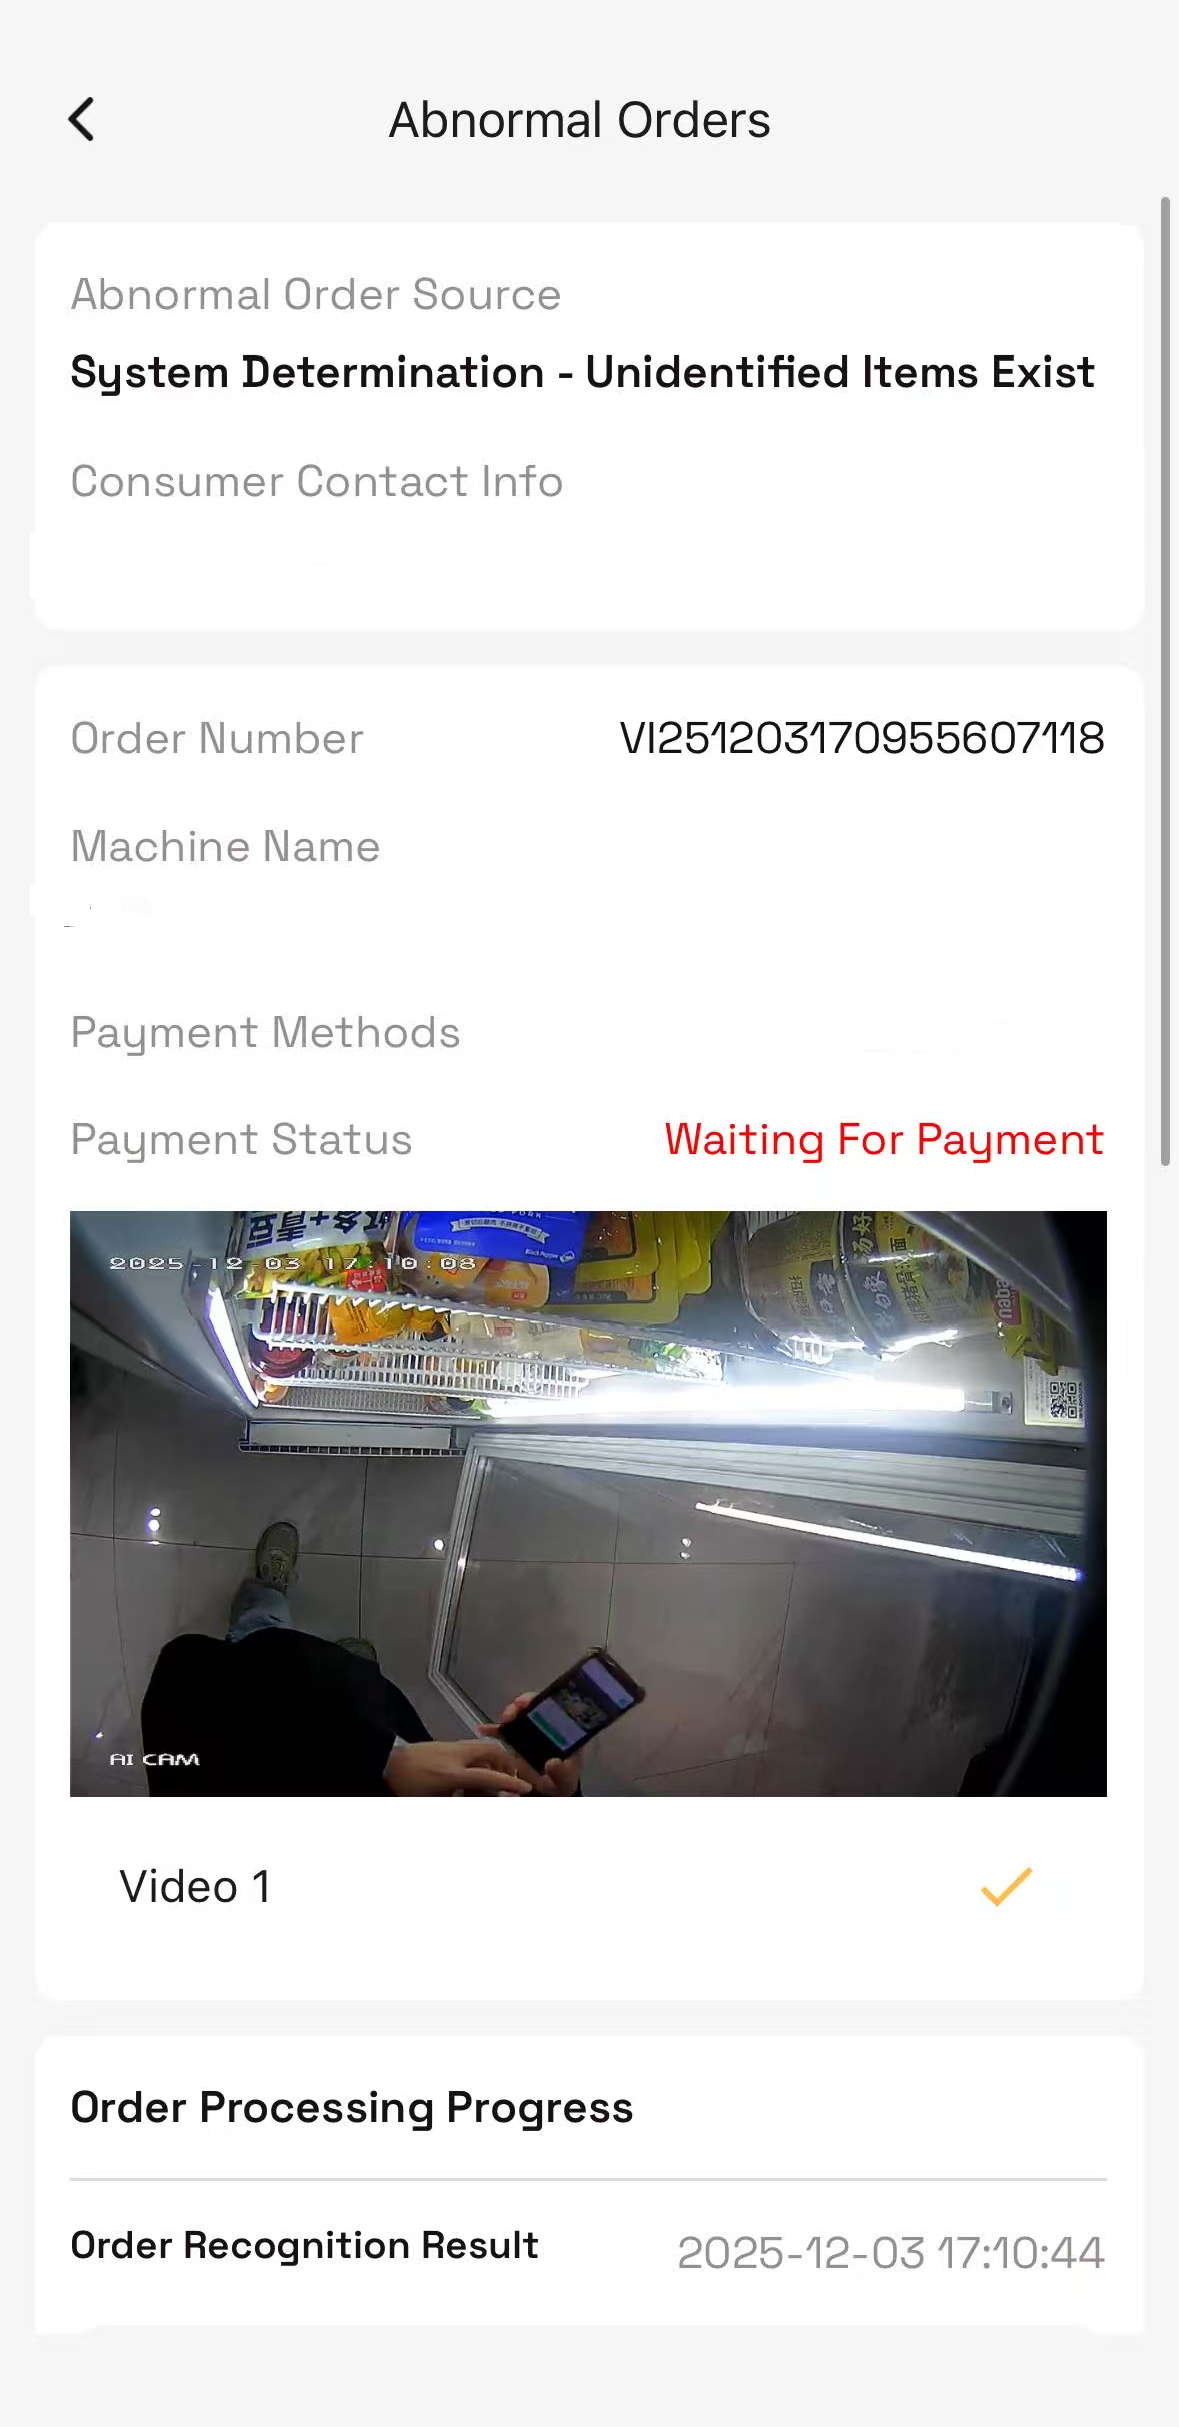
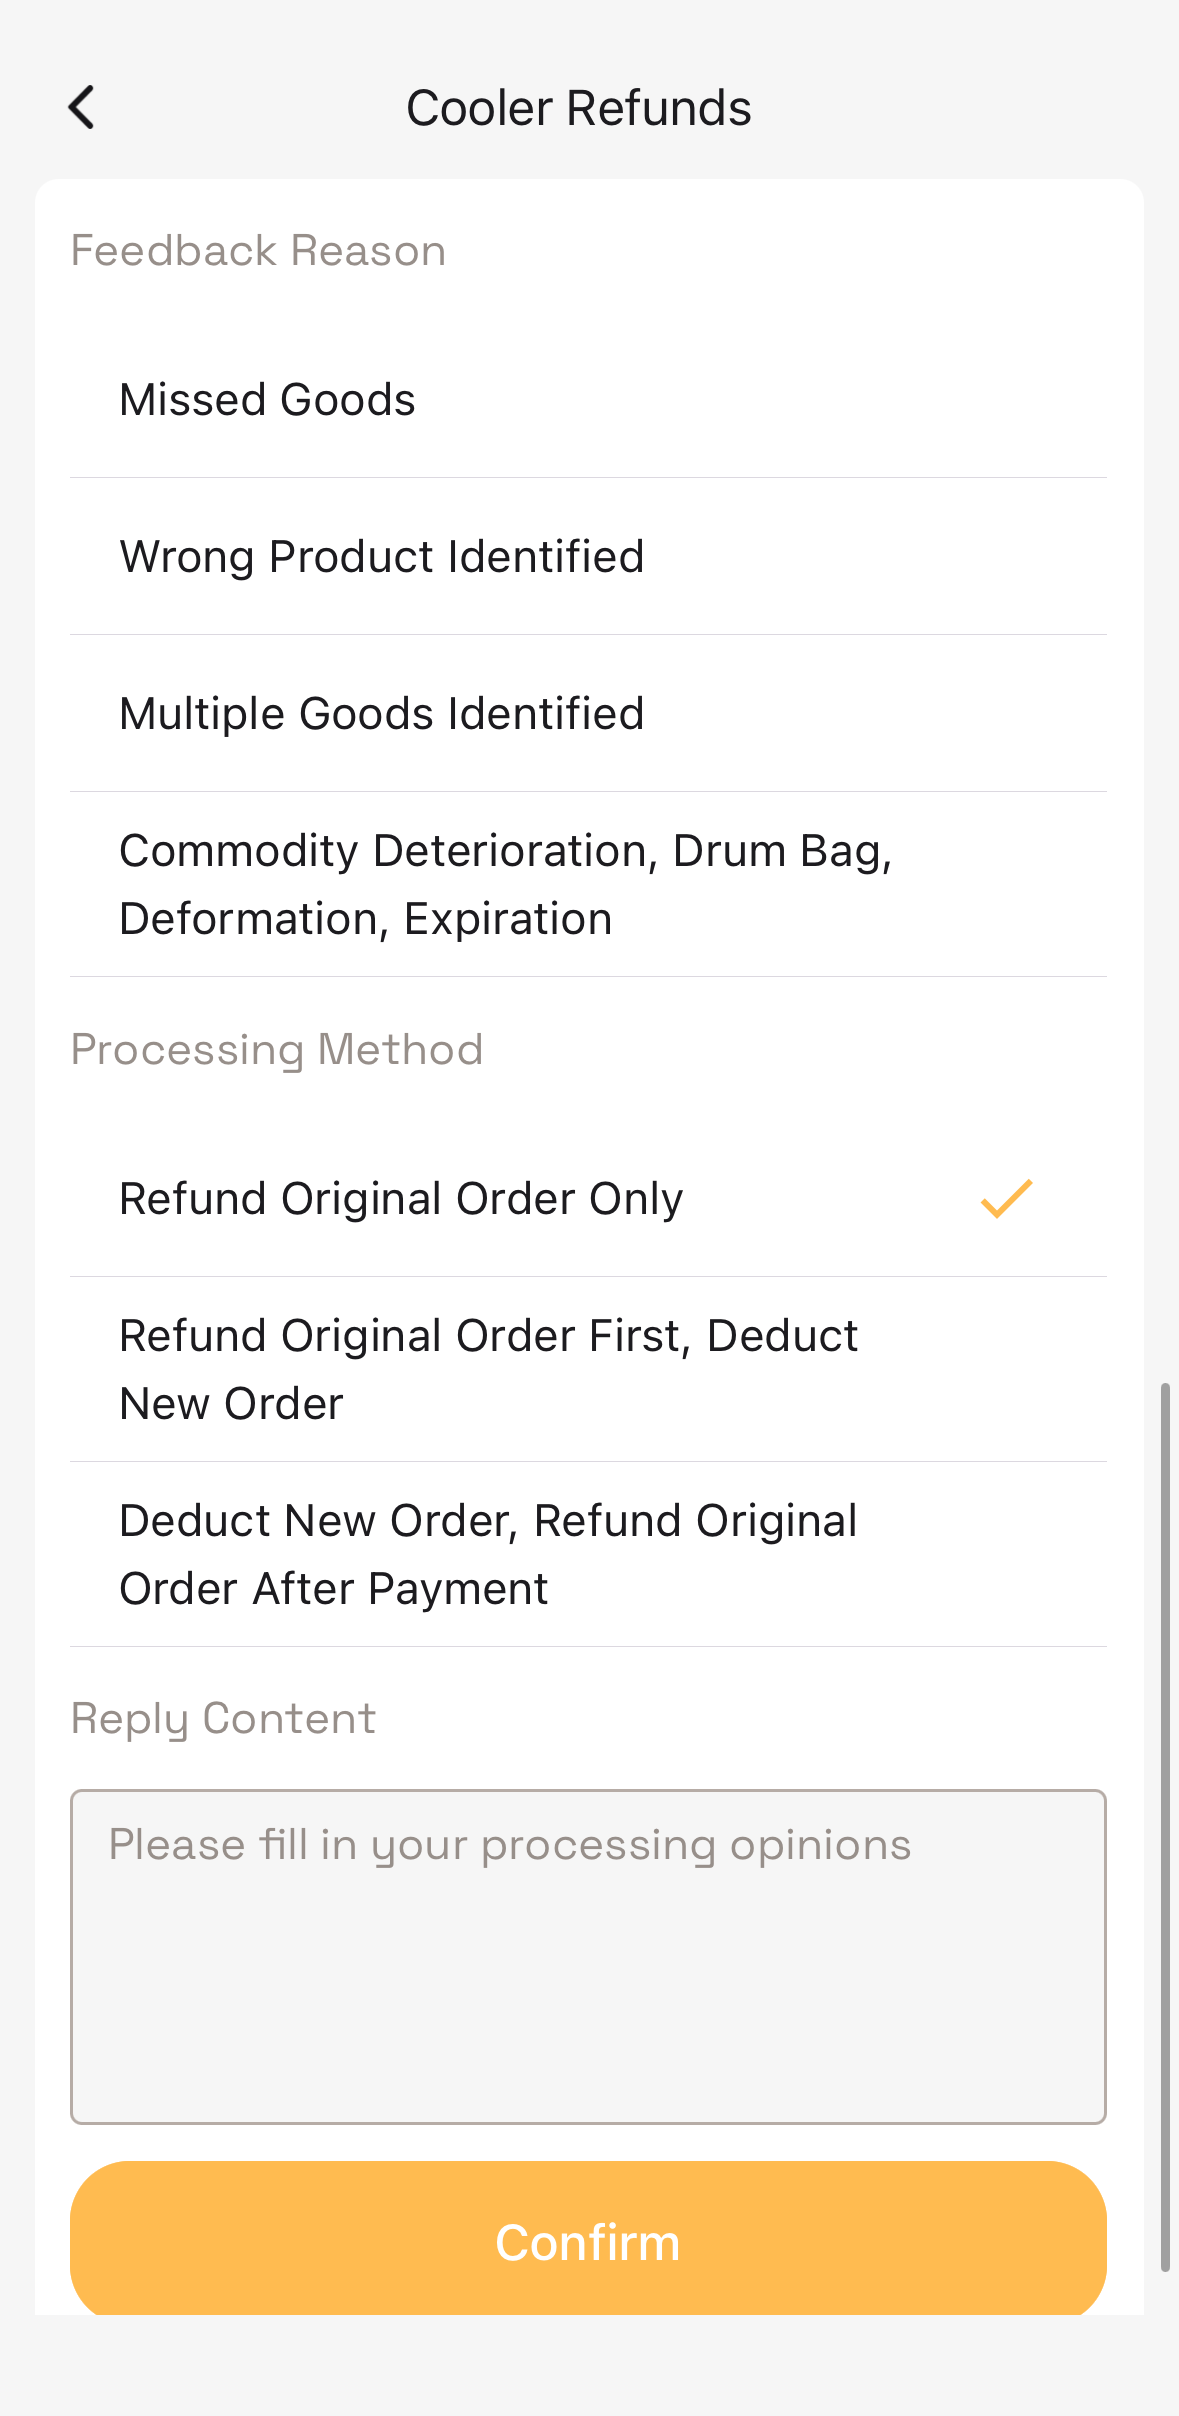
Despite the visual recognition system achieving an accuracy rate of up to 99.5%, edge cases occur where items are misidentified — requiring manual review and correction.
| # | Abnormal Type | Key Resolution / Notes |
|---|---|---|
| 1 | Product Not Listed | The replenisher introduced a new product during restocking but failed to add it to the machine's shelf listing first. |
| 2 | Similar Packaging | Avoid listing products with near-identical packaging, or different versions of the same product in the same machine. |
| 3 | Packaging Update | The product packaging has changed, but the product library images have not been updated to match. |
| 4 | Incomplete Video | If footage displays static, a green screen, or appears incomplete — contact hardware support to inspect the camera and door lock. |
| 5 | Abnormal Behavior | For customers who repeatedly engage in disruptive behavior (e.g., deliberately obstructing the camera), you may add them to the machine's blacklist to prevent future access. |
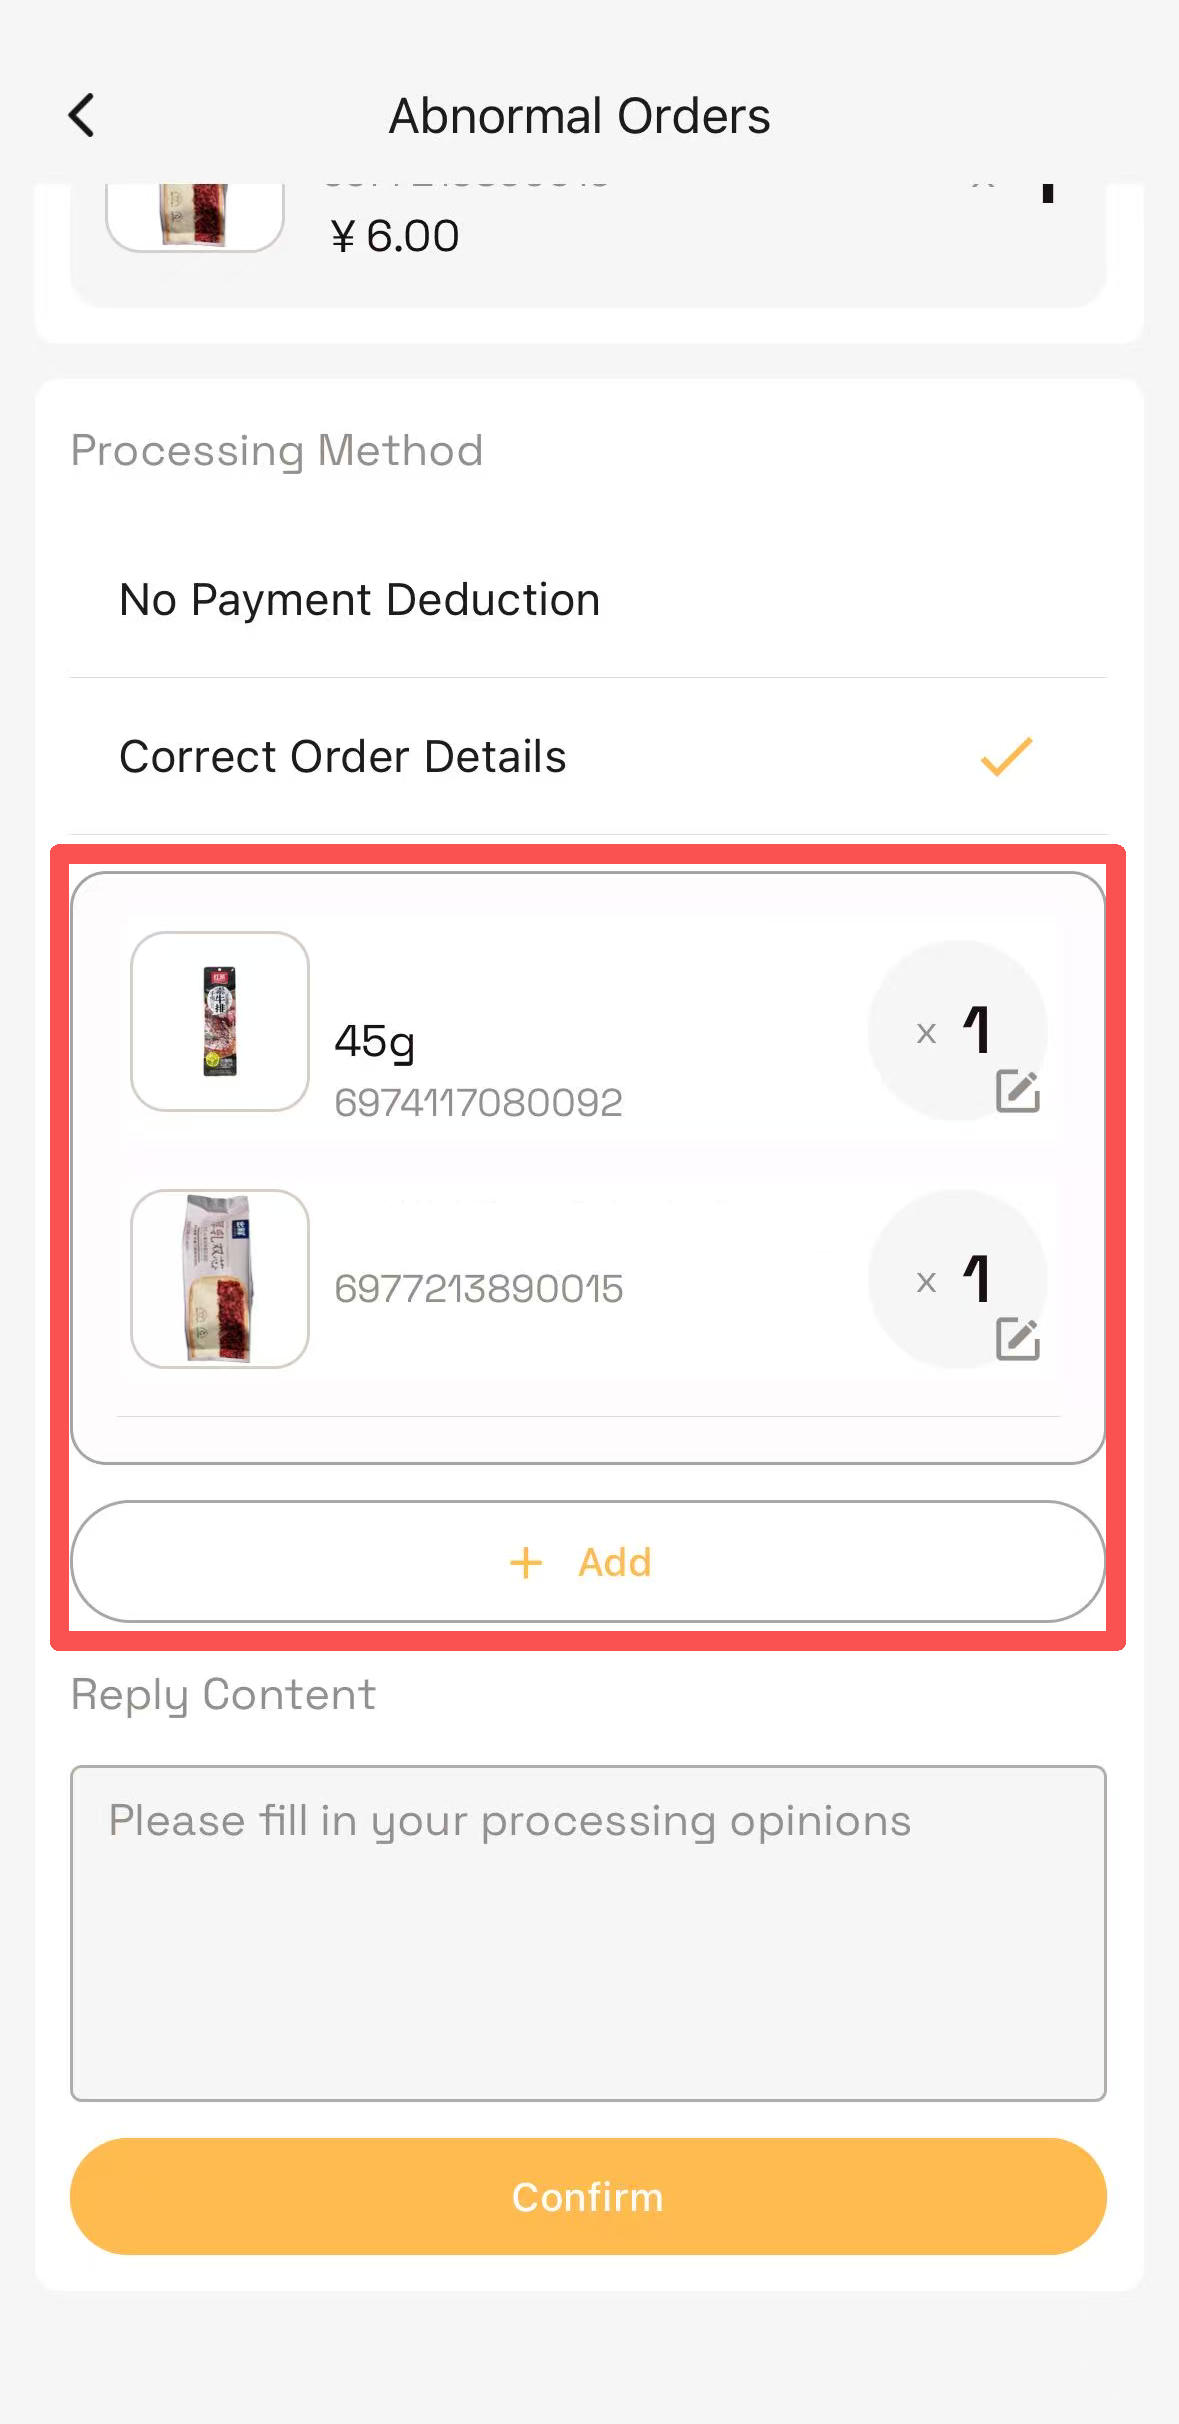
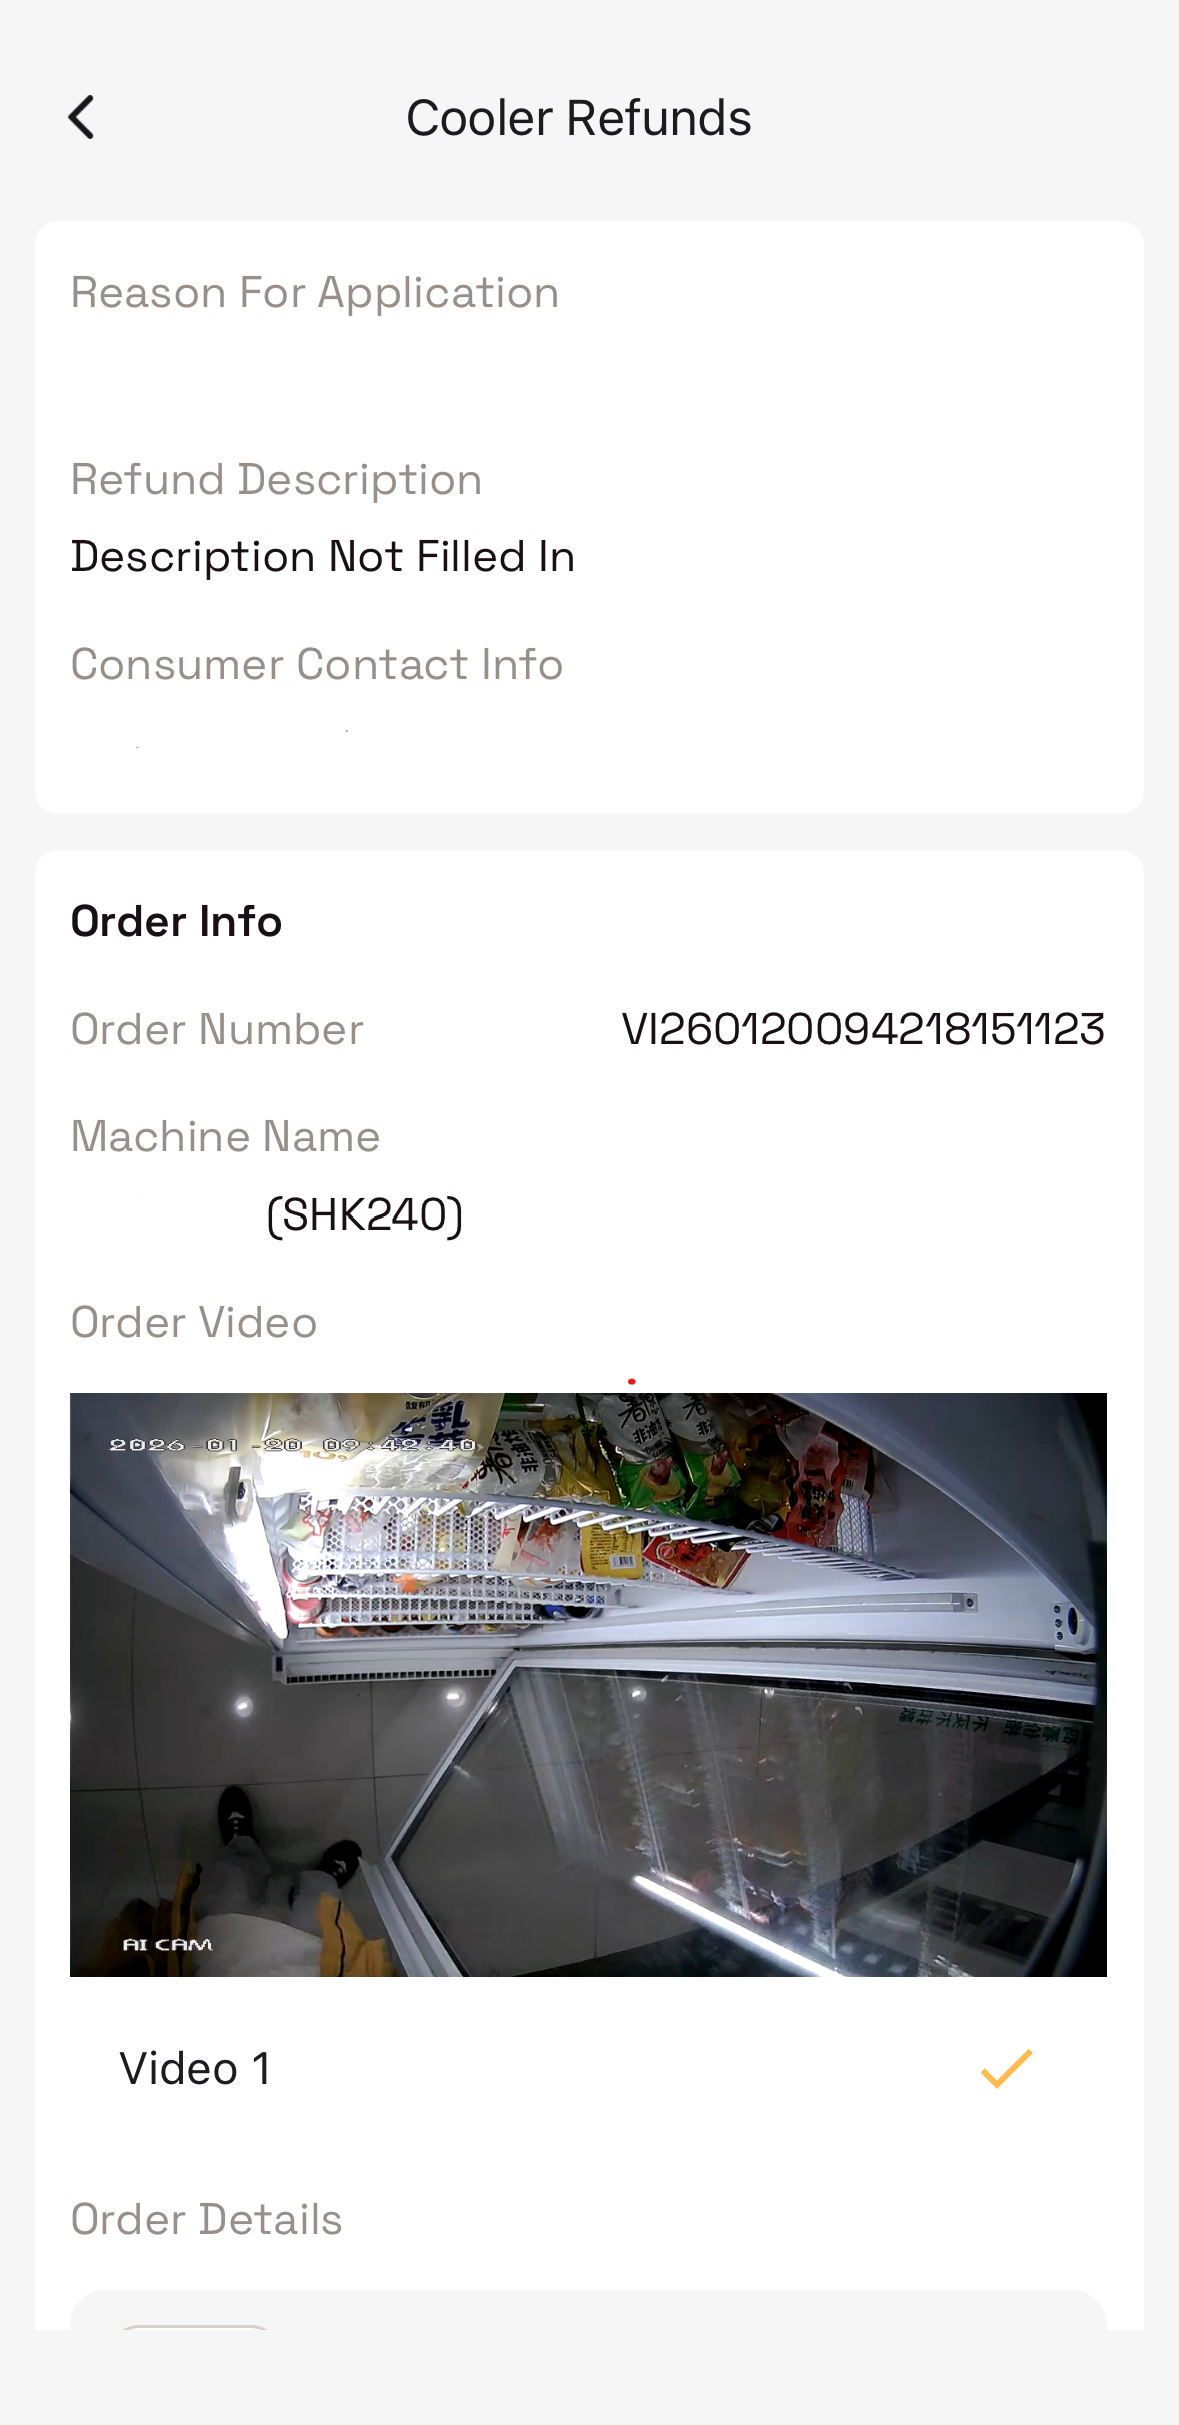
- Select the abnormal order to open the detail page.
- Watch the full shopping video.
- Use
[ + ]/[ − ]buttons to correct items and quantities. - Add an optional note if needed, then click
Confirmto finalize.
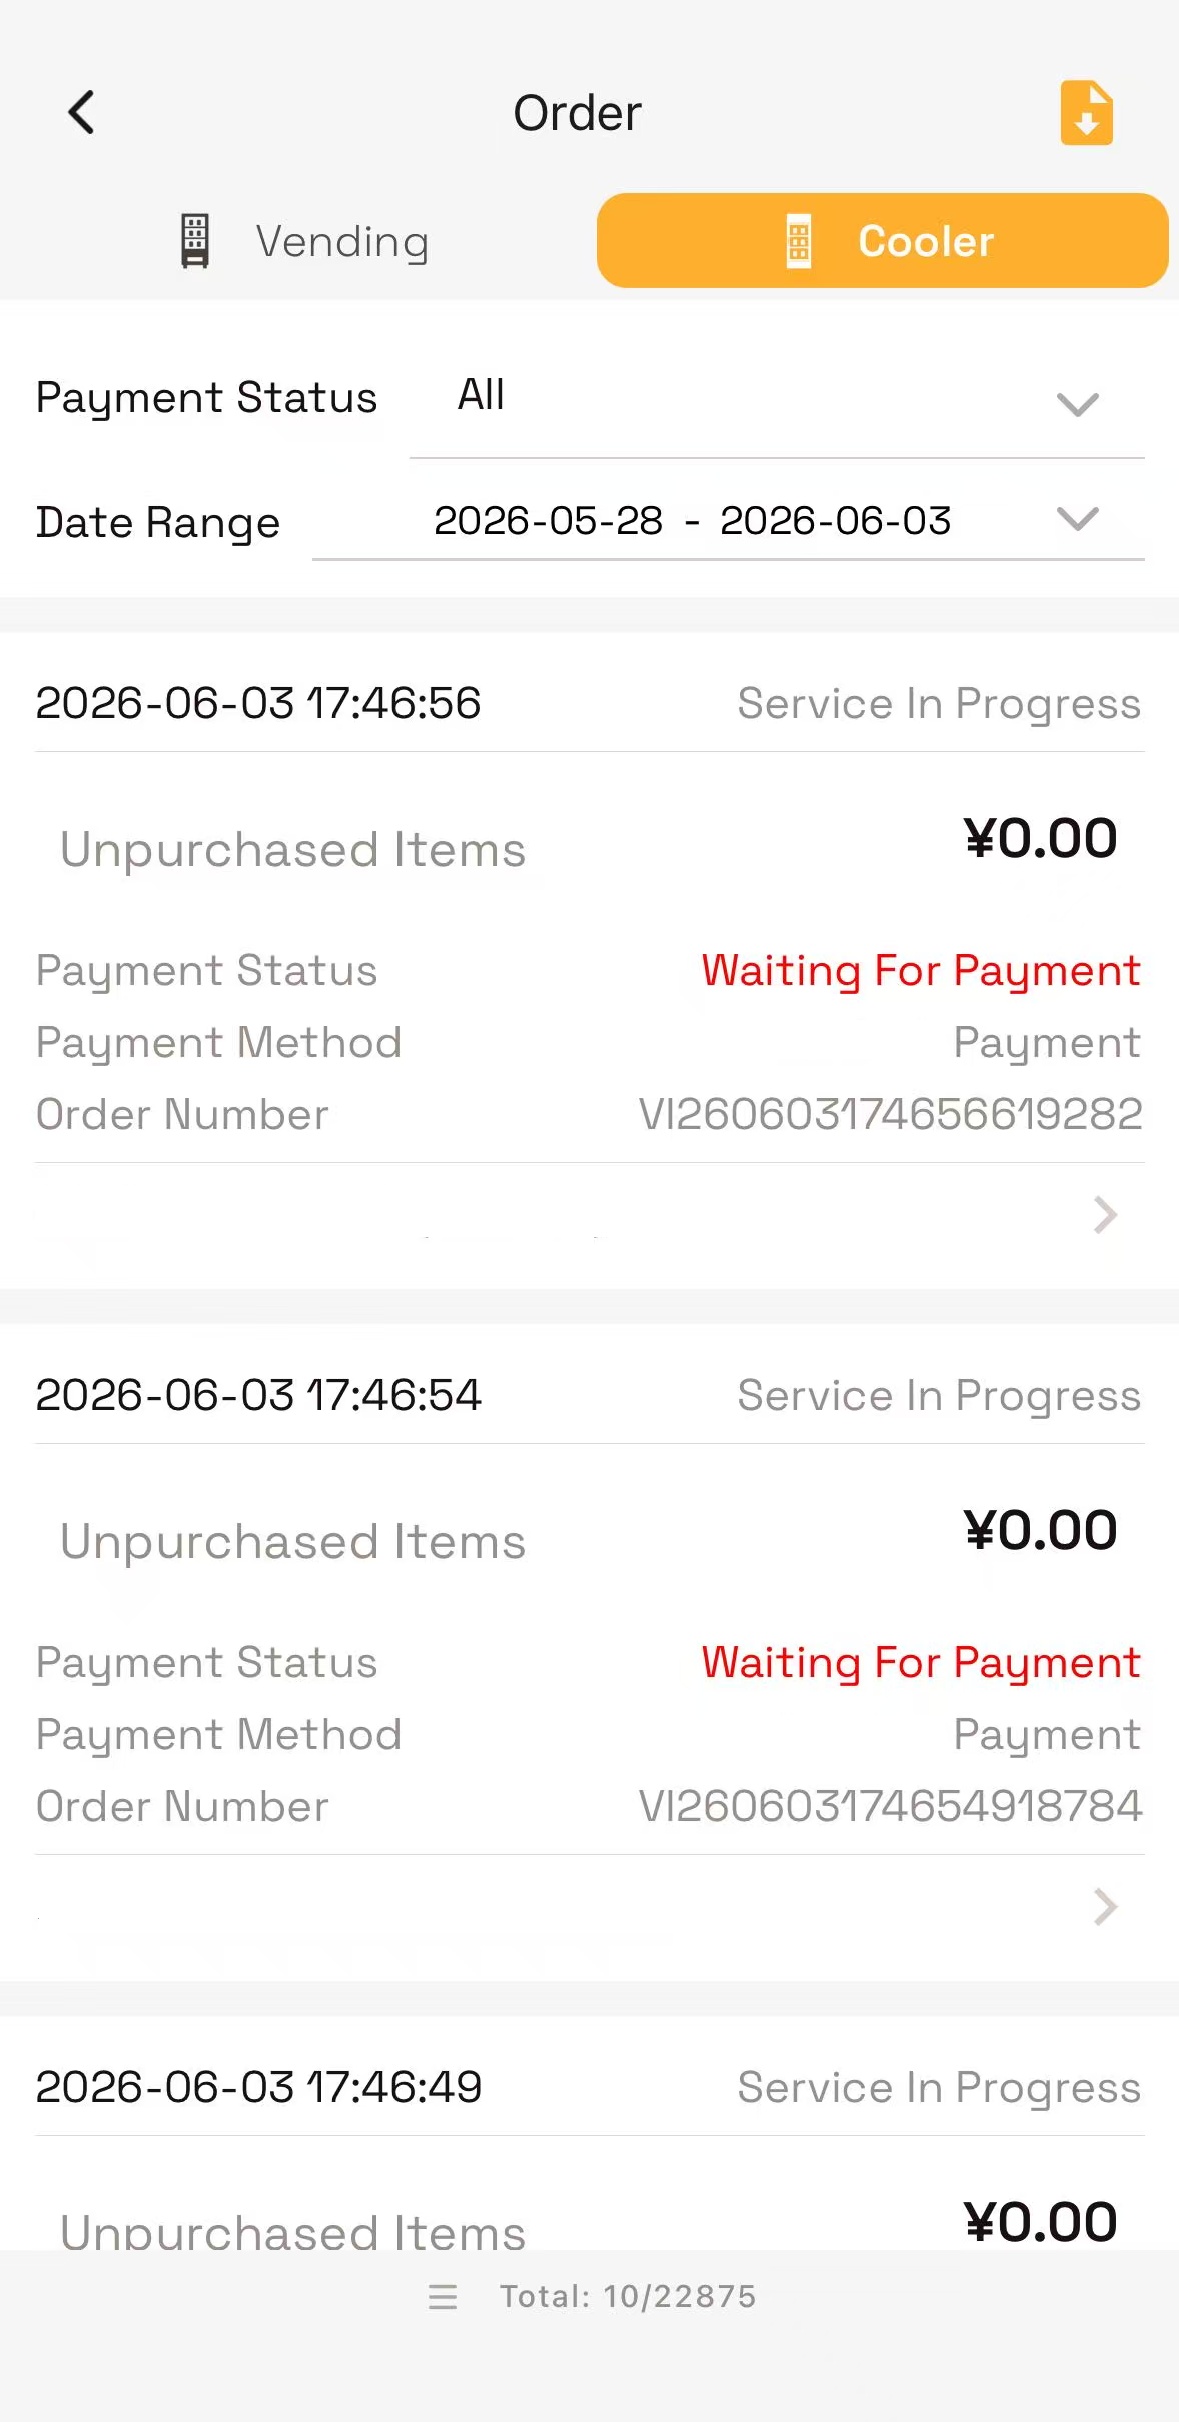
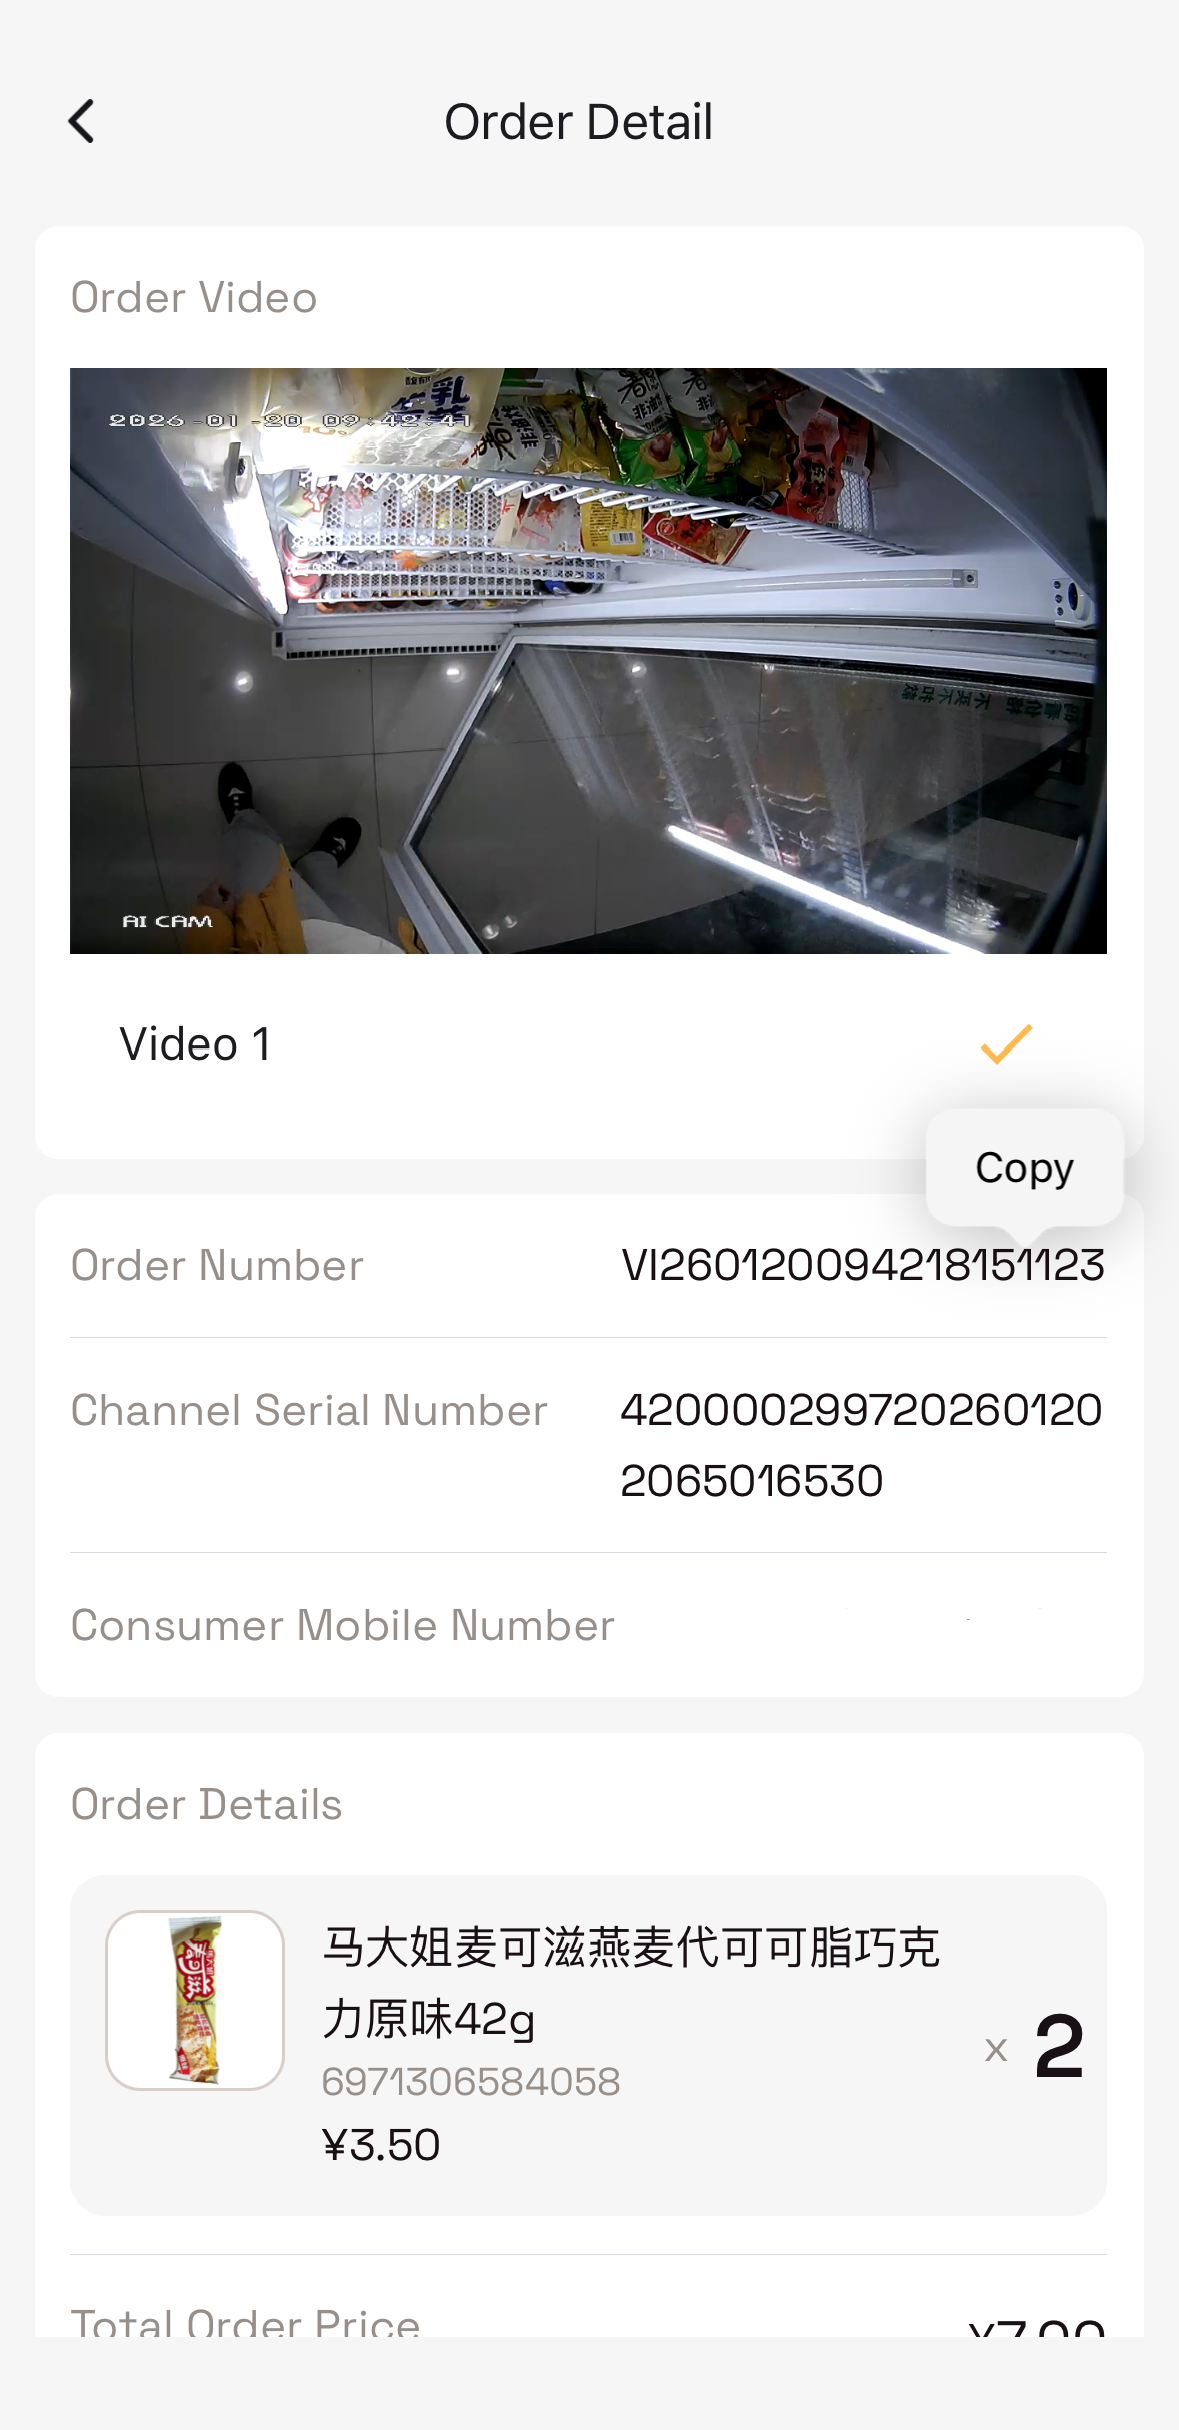
View full transaction details for any selected machine:
- Order Number (e.g.,
VIV1360220084214152101) - Video Recording ID (e.g.,
3211102992602601202895009530) - Customer contact number
- Purchased items and total amount
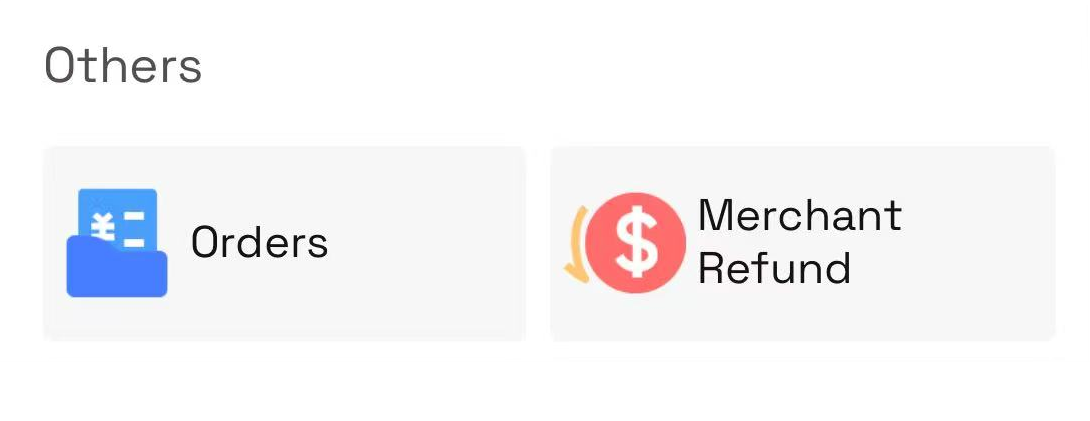
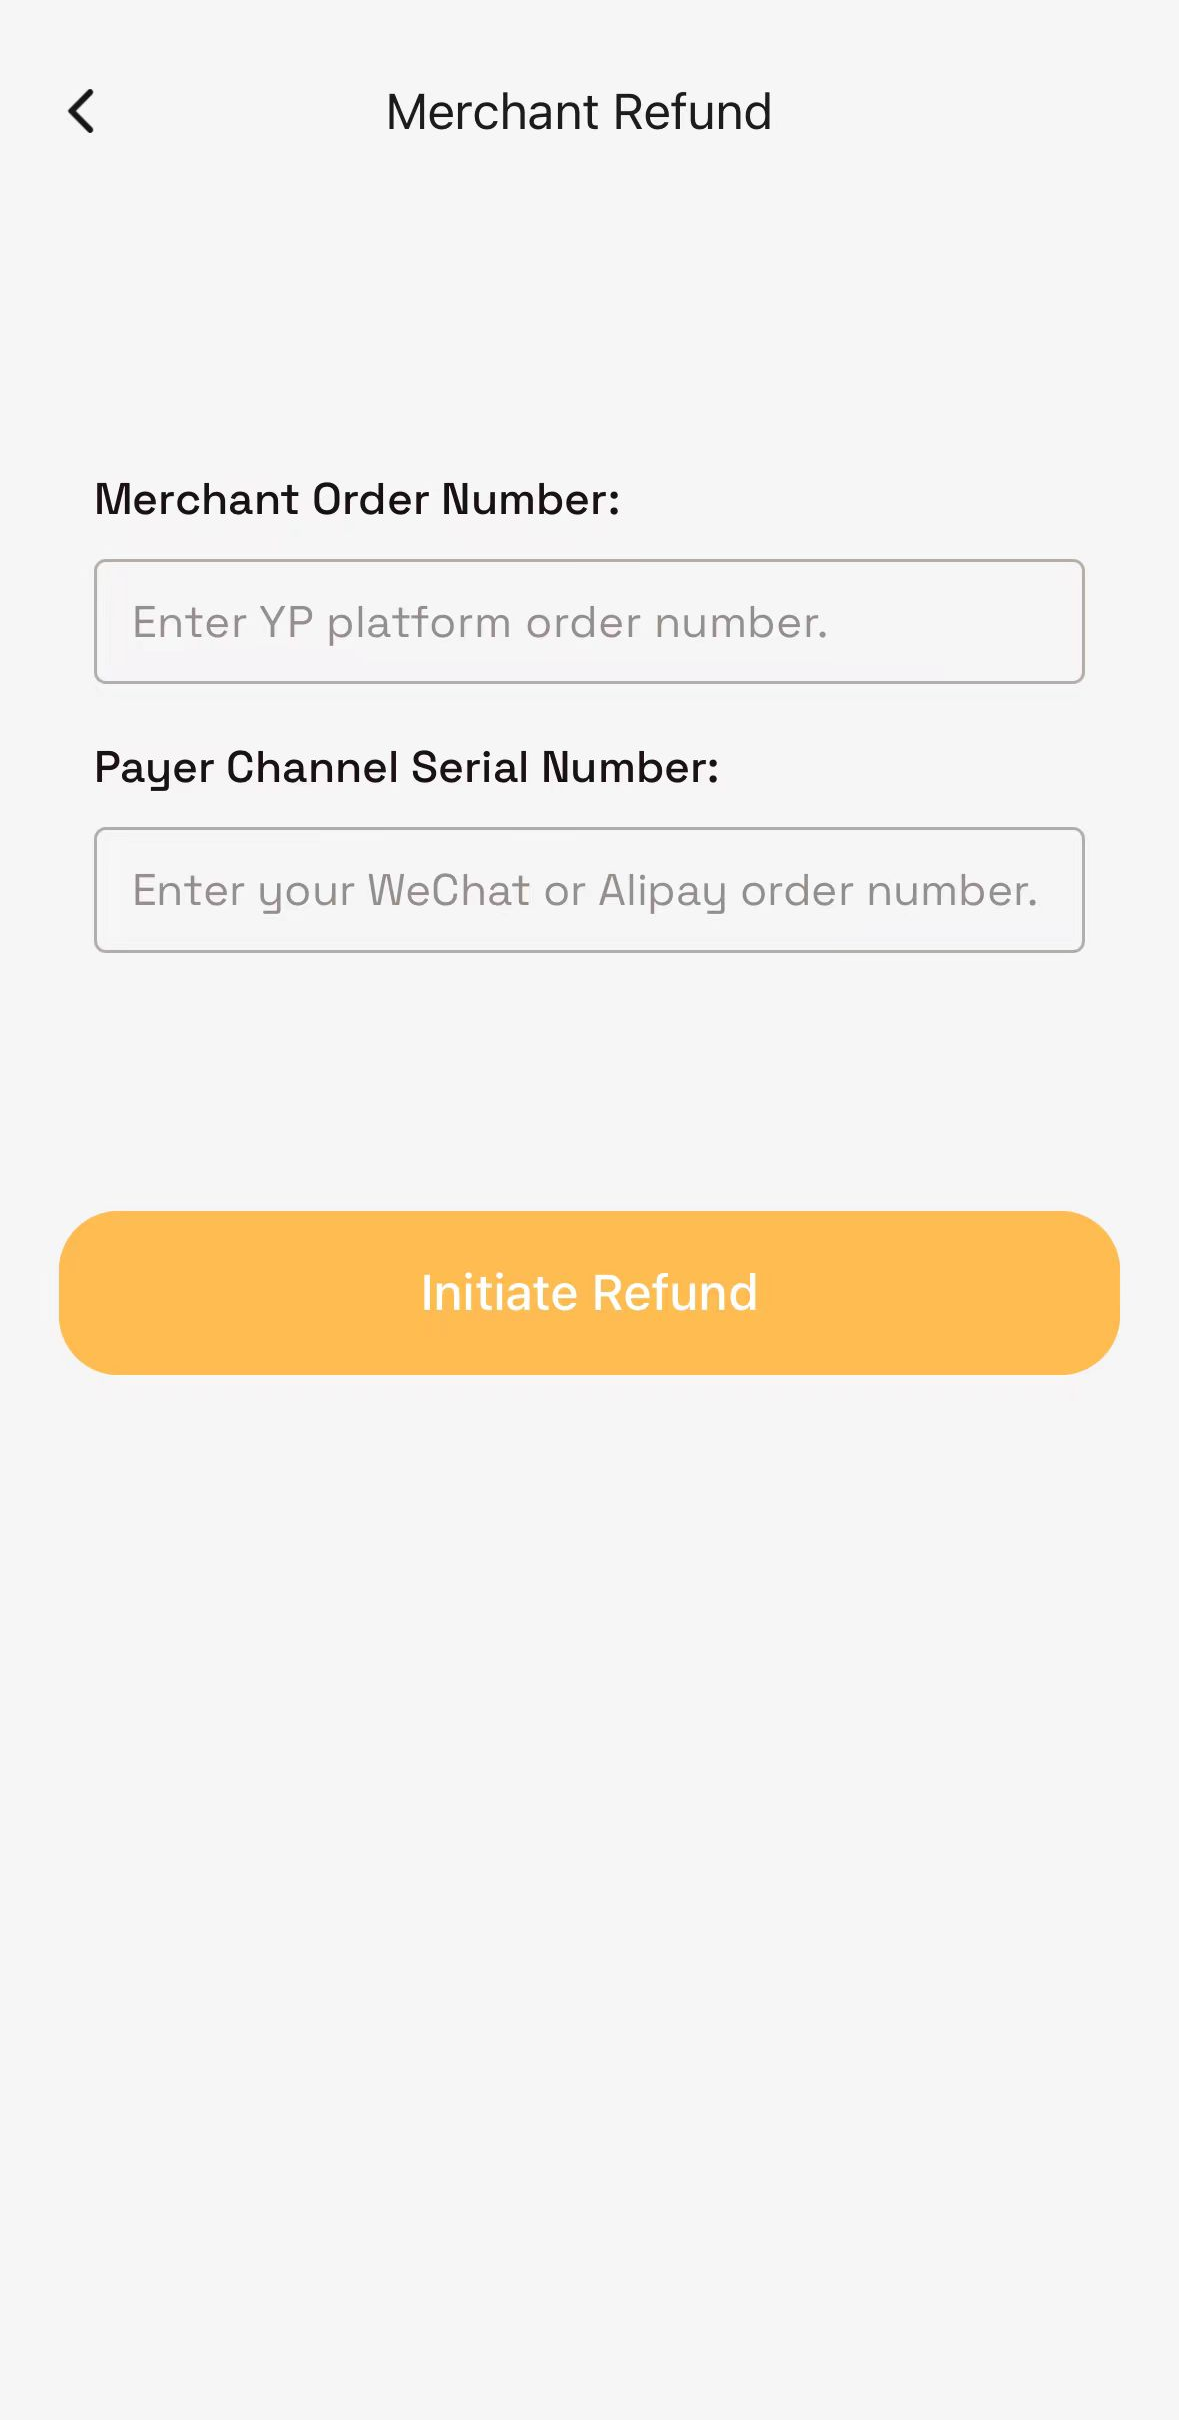
- Locate the relevant machine and order.
- Copy the Order Number and paste it into
Merchant Refund. - Scroll down, fill in the refund reason and refund method, then confirm.
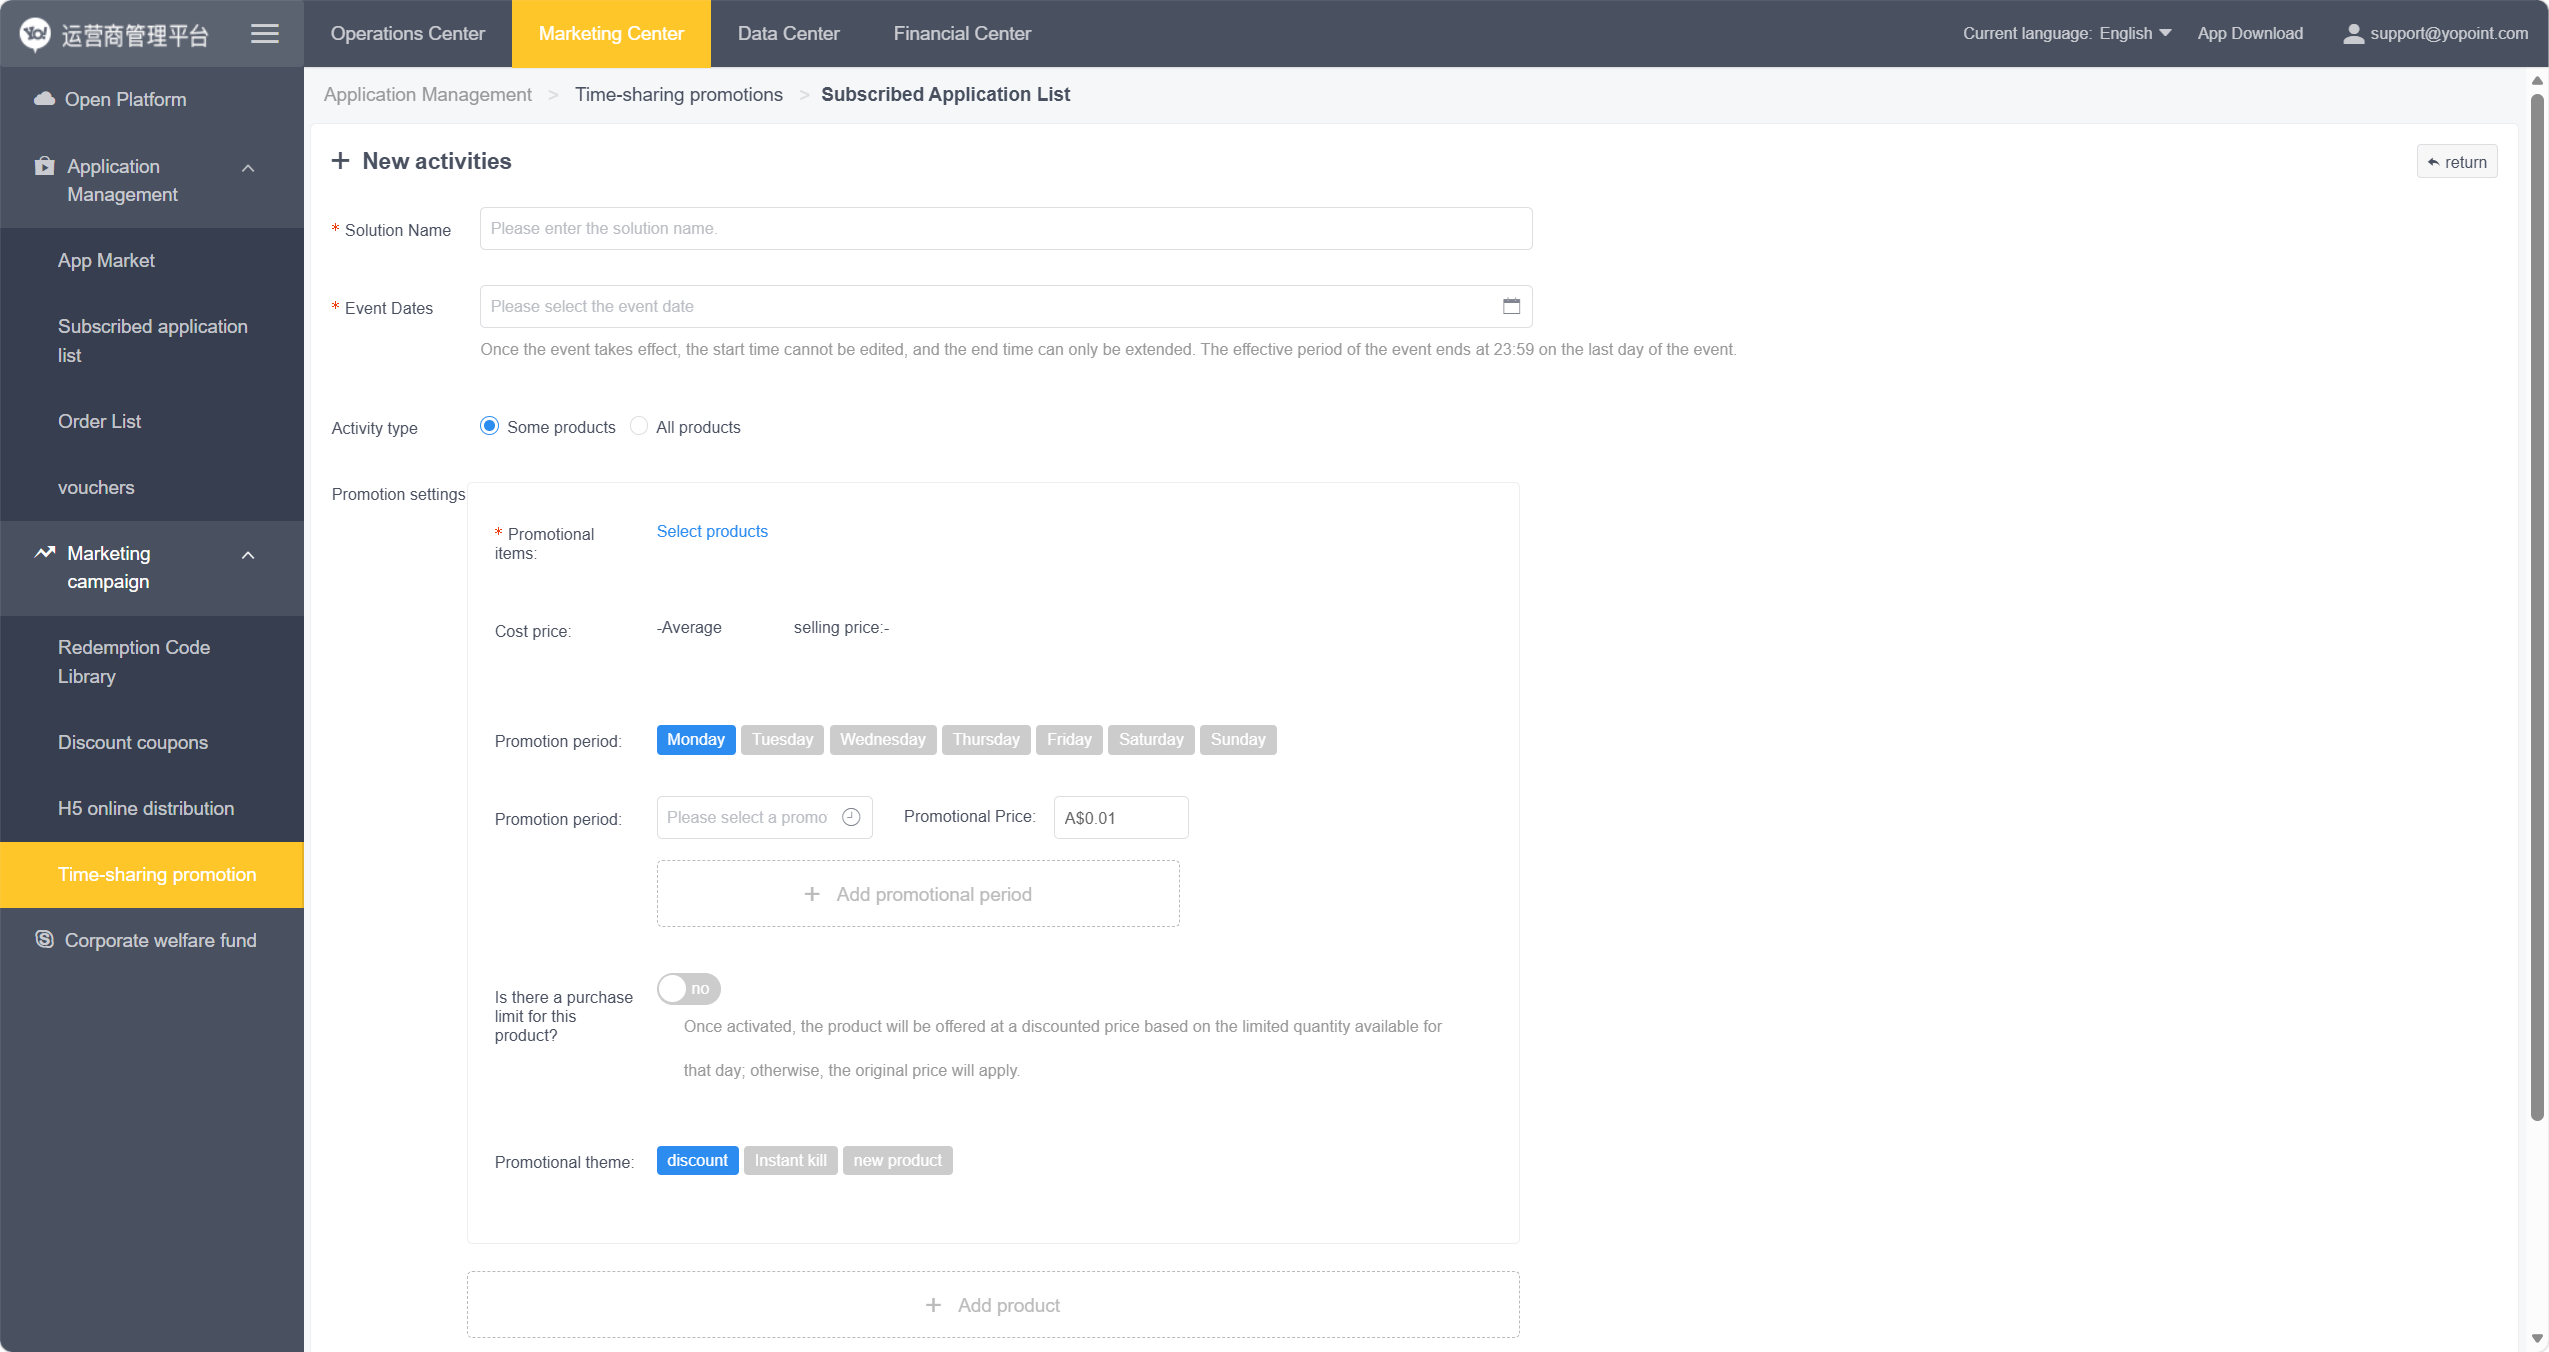
The system supports two types of discounts: (Purchase required to access this service.)
Limited-time offers for customers. Add-on feature — purchased on a pay-per-use basis.
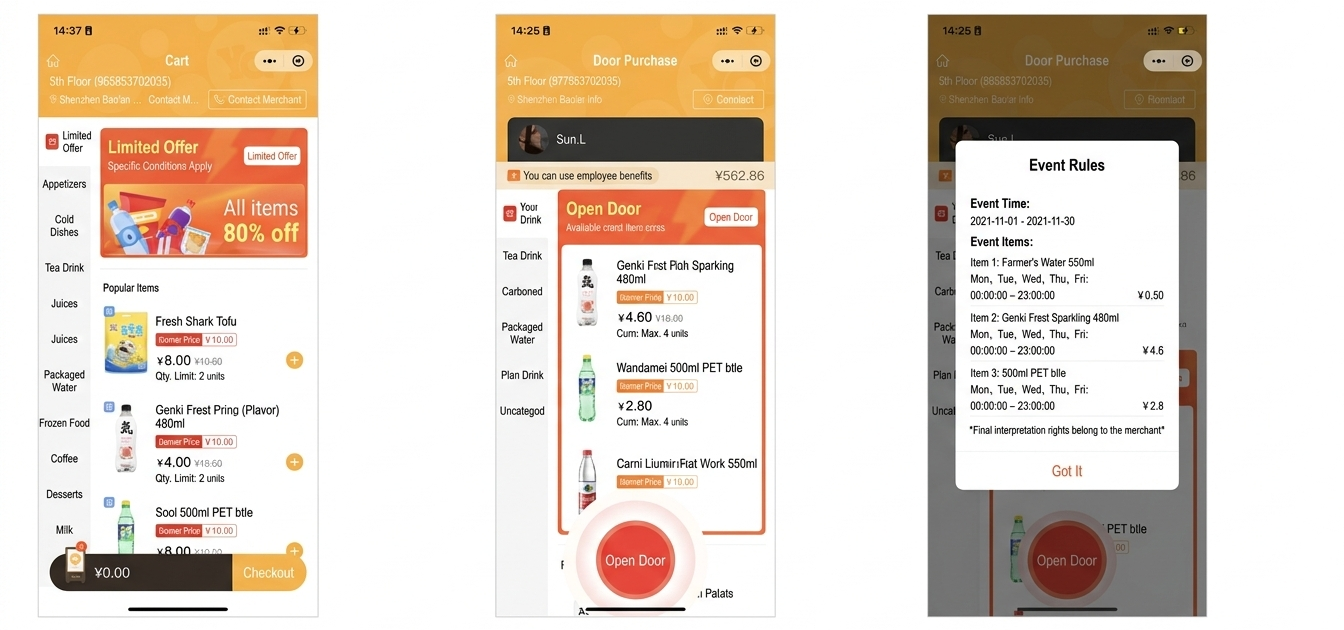
Internal employee benefits. Available for regional customers.
- Select Products: Promotion applies only to selected items.
- Cost Price: Enter the promotional (discounted) price.
- Promotion Period: System currently defaults to China Standard Time (CST). Adjust for your local time zone. (Local time support coming in a future update.)
To apply all day, set:00:00:00 – 23:59:59 - Promotion Theme: Select a label to display on the customer interface.
-
Enter company information. Enter a higher employee count for future scaling.
If you have 50 employees, fill in at least 80–100.A customer account cannot be added to multiple plans. Ensure each plan has enough available slots to add customer accounts.
-
Configure employee onboarding approval settings — choose whether new employees need approval to join the fund.
 Tab Marketing Center
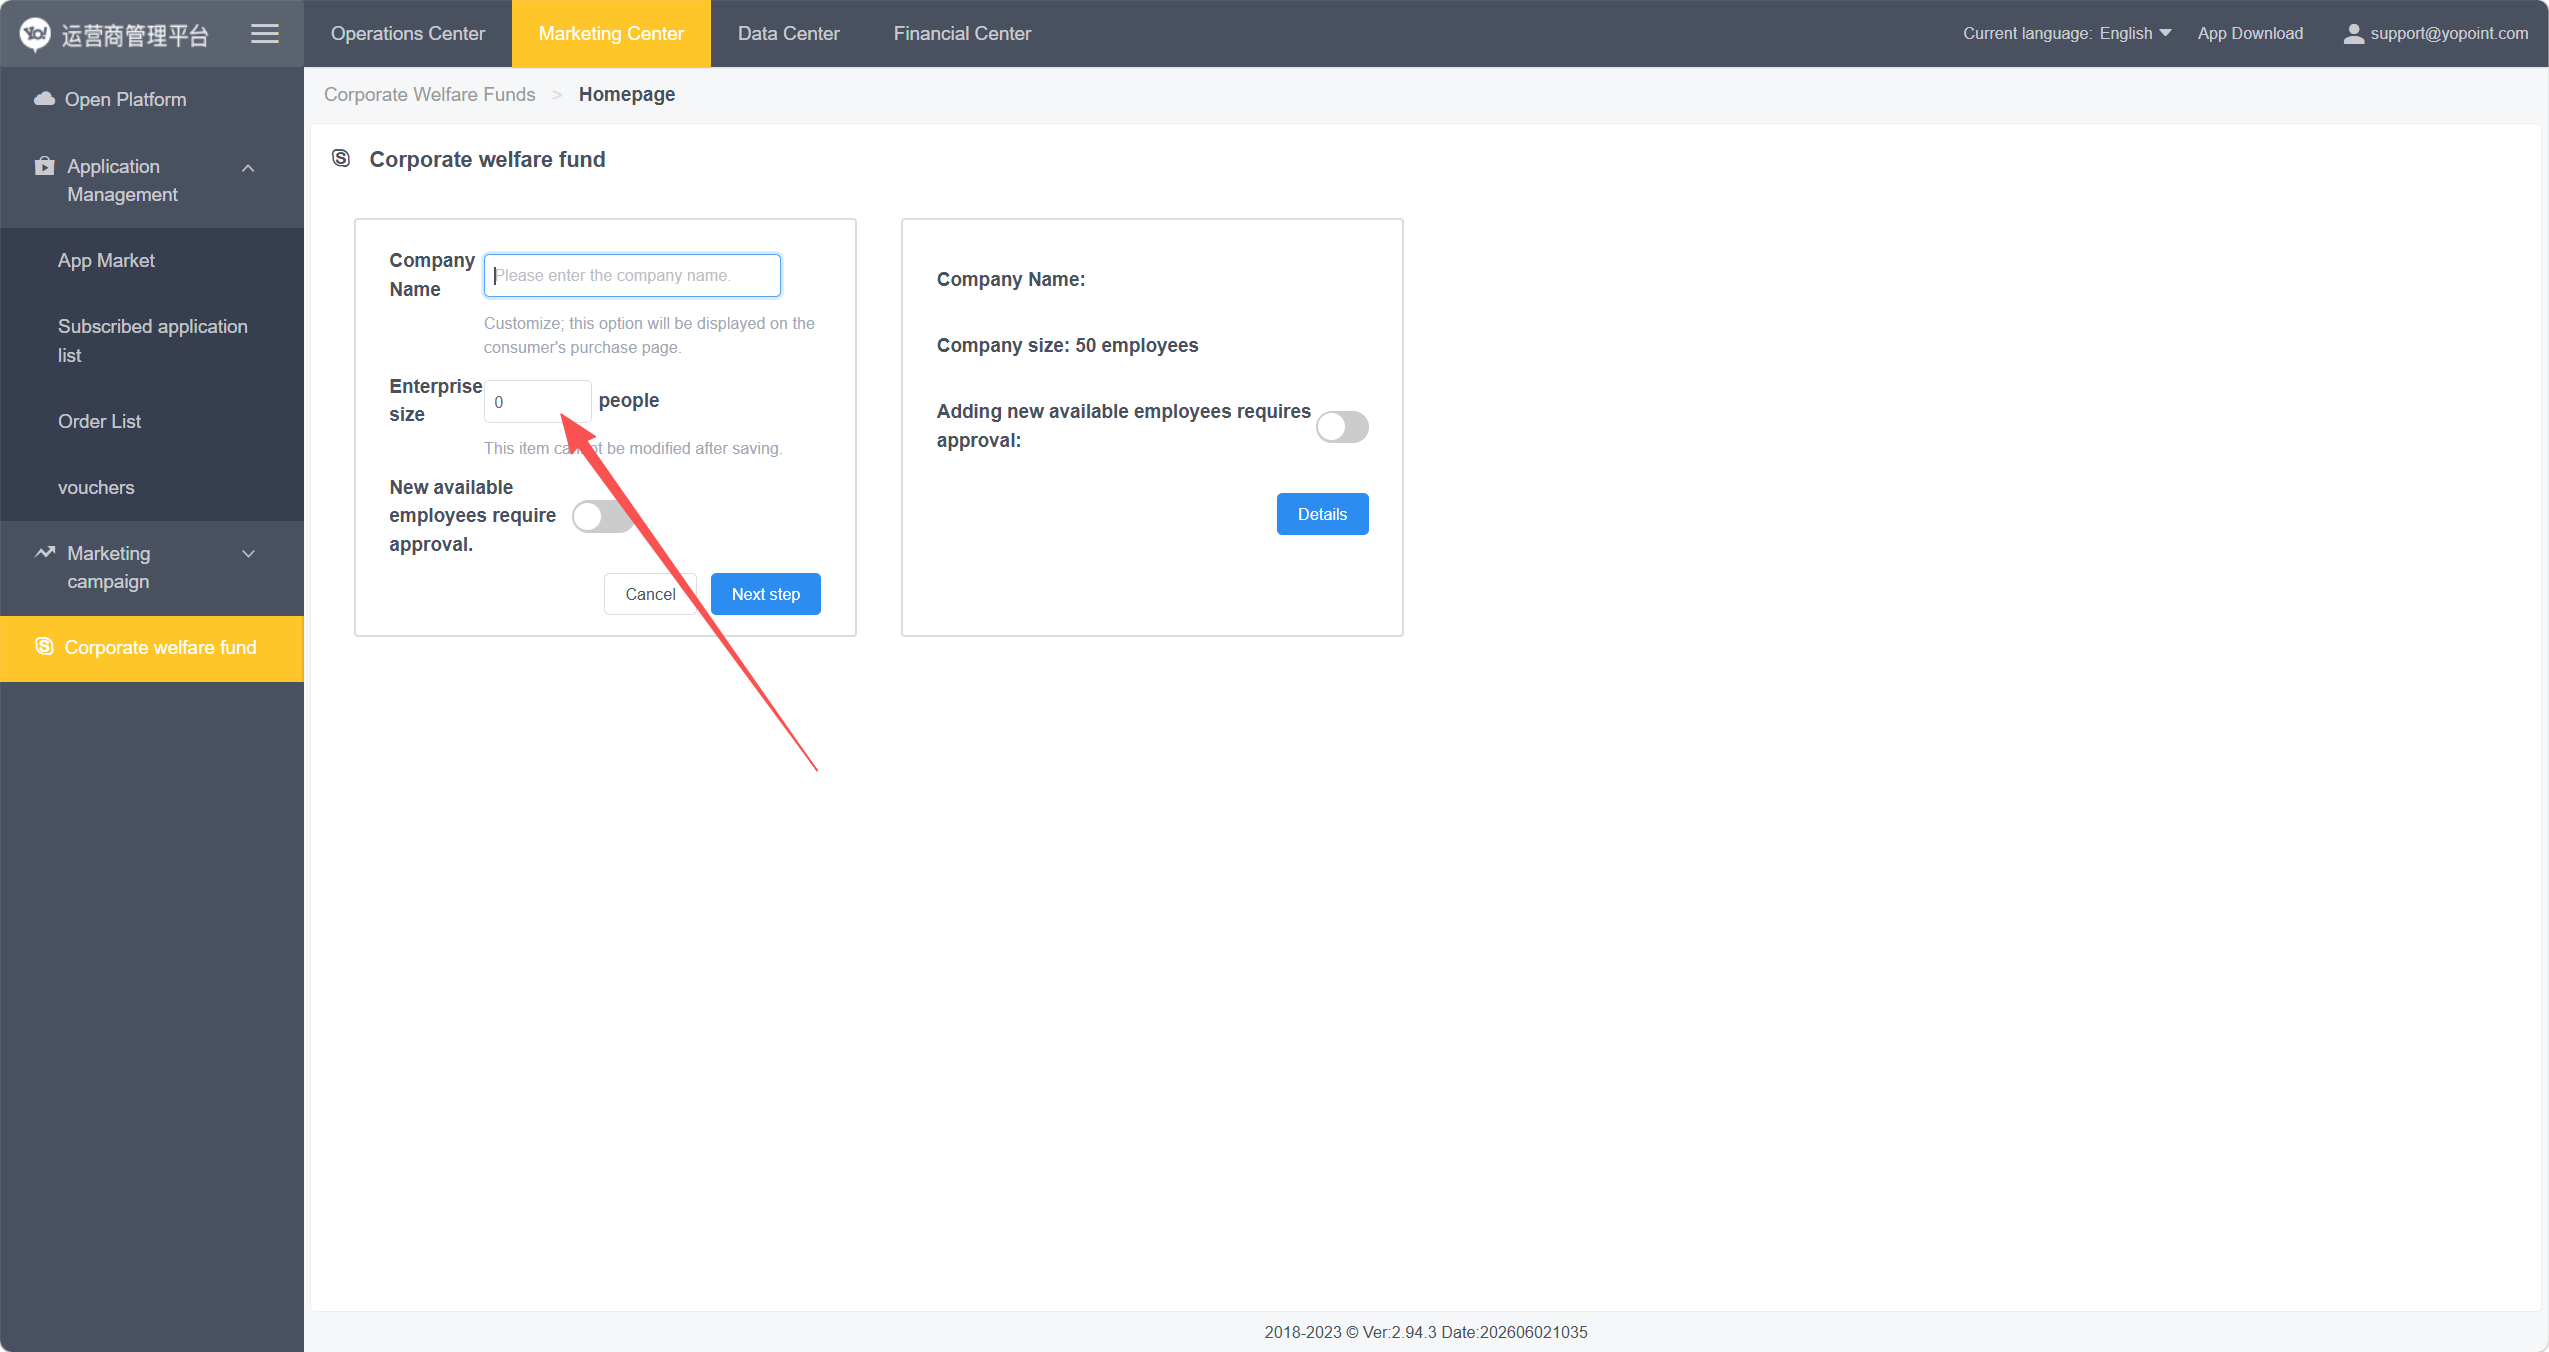 Configure New Fund
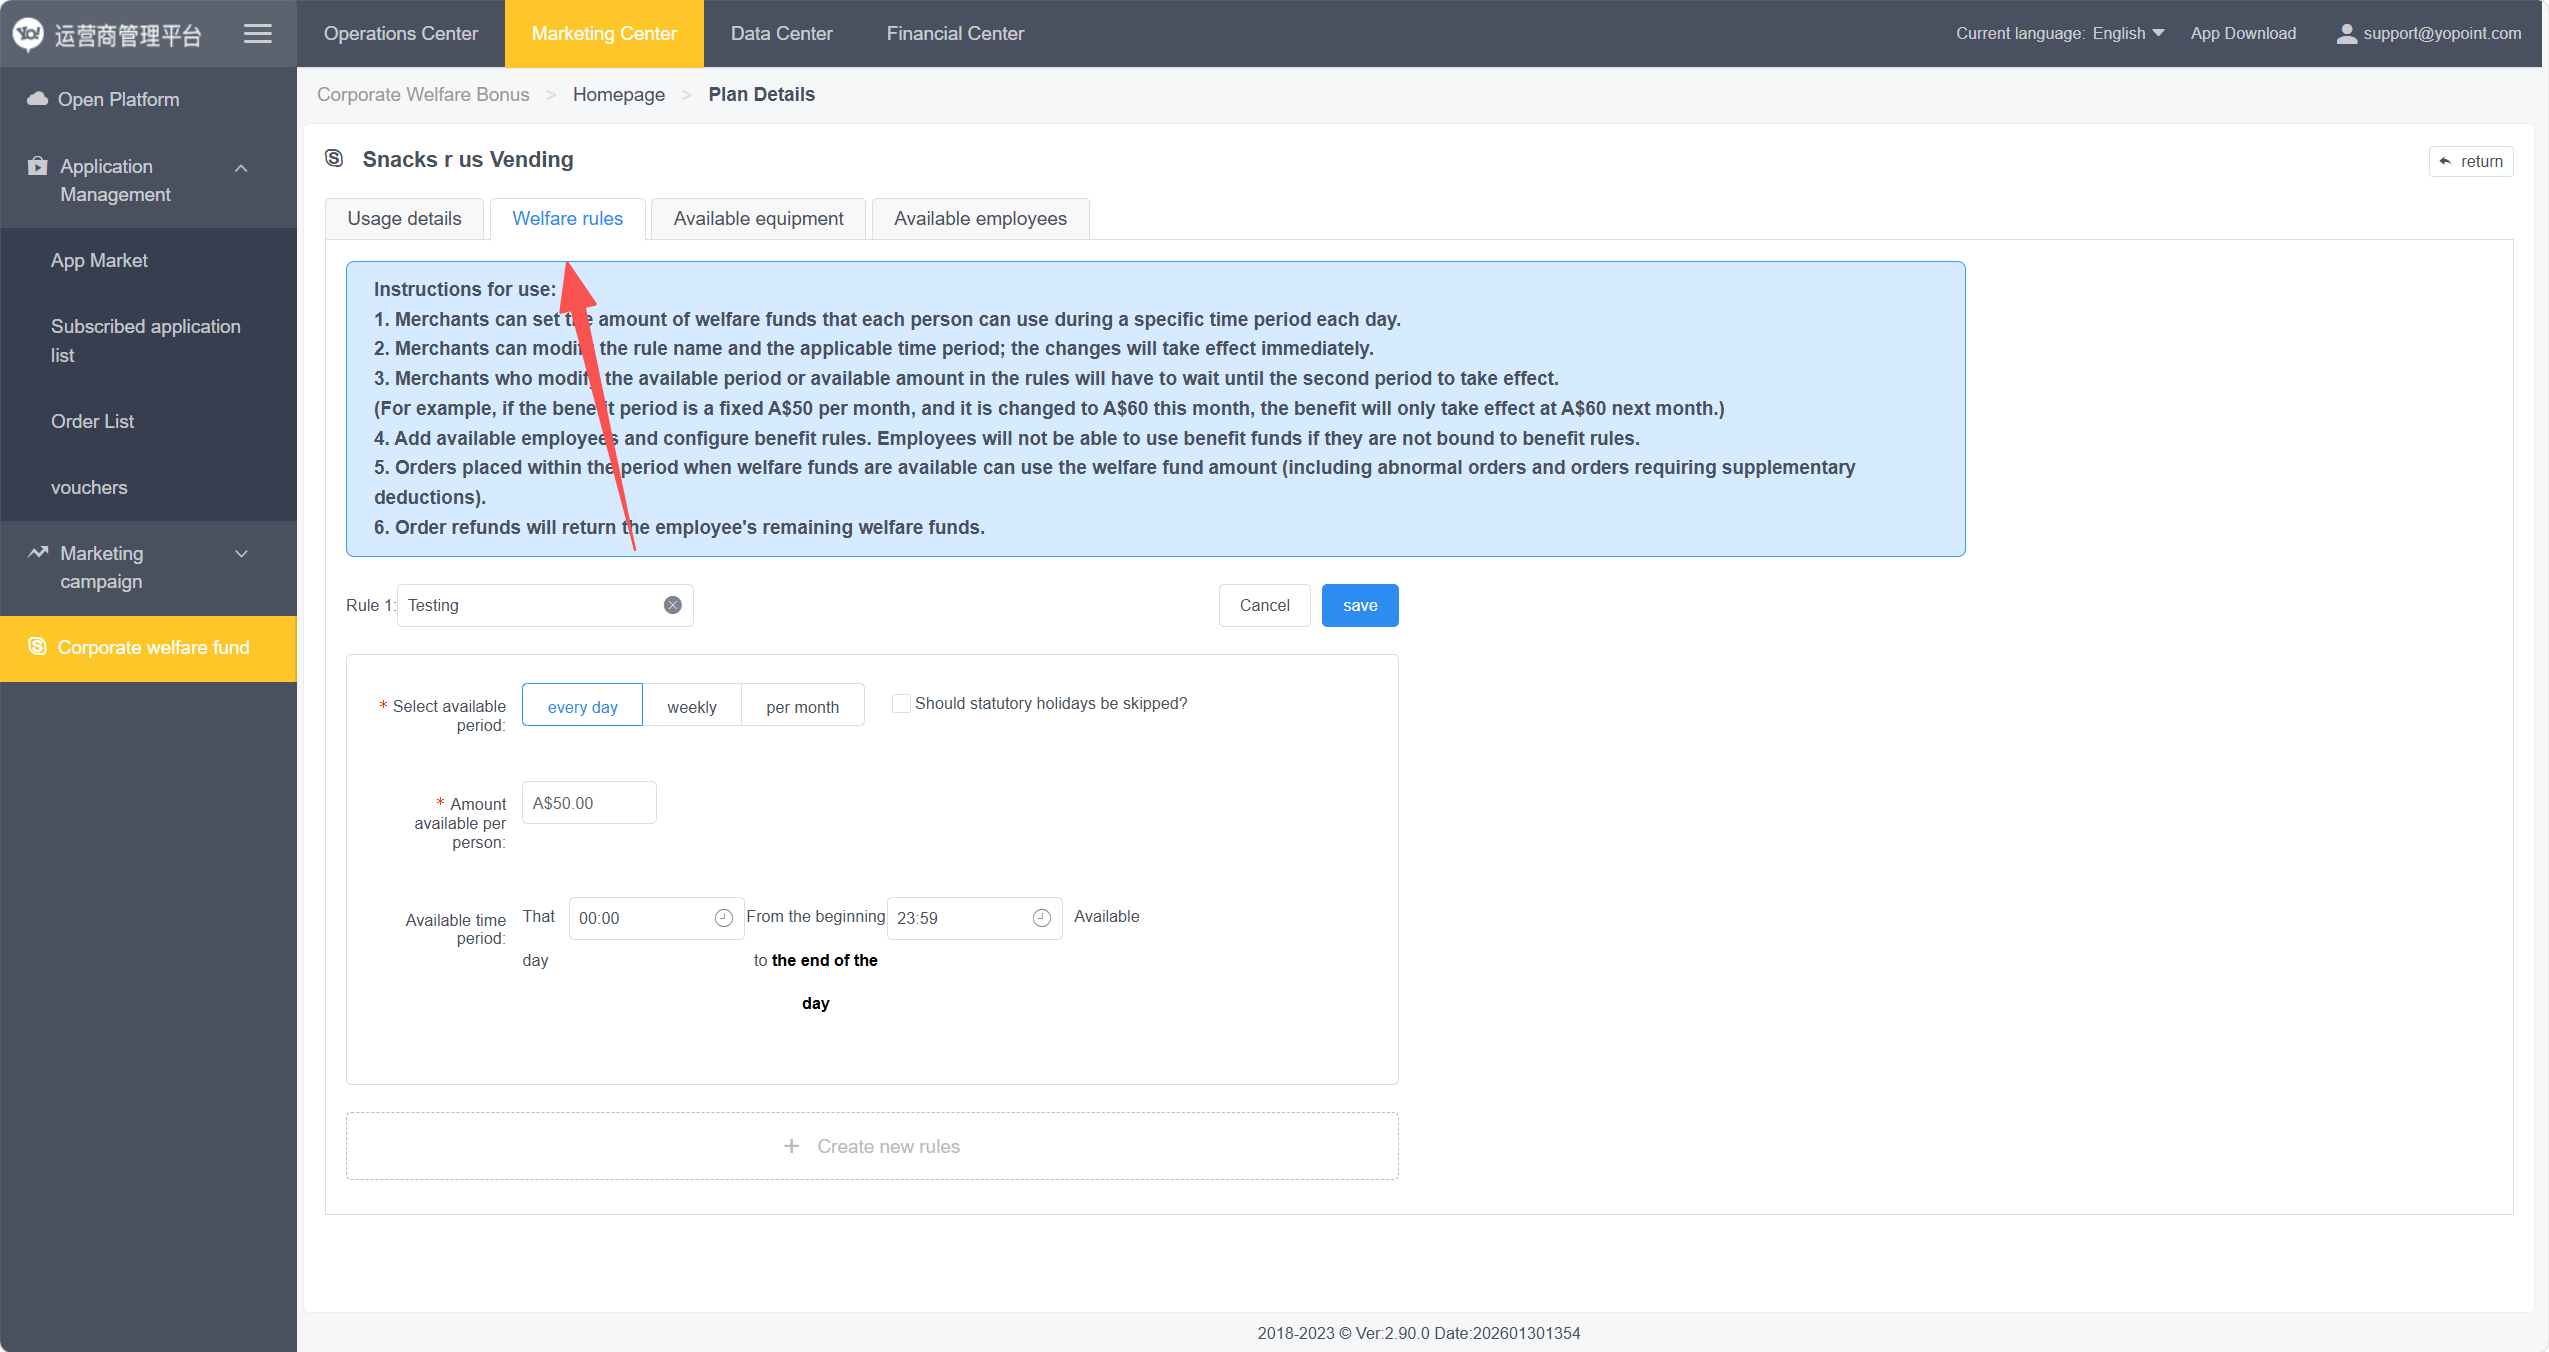
 -
Configure Welfare Rules — open
Welfare Rulesand set:- Discount Period: e.g., "Every day" applies the benefit daily. Rule changes take effect the next day.
- Full-Day Coverage: set time range to
00:00:00 – 23:59:59
-
Assign eligible machines — open
Available Equipment, select target machines from the left panel, then click > to move them to the right panel. -
Add employee accounts — open
Available Employees:- No Approval Required: click
New Employees, fill in details, assign a welfare rule. Supports bulk import via Excel. - Approval Required: employees scan an internal QR code to submit information. Access granted after approval.
 Set Welfare Rules
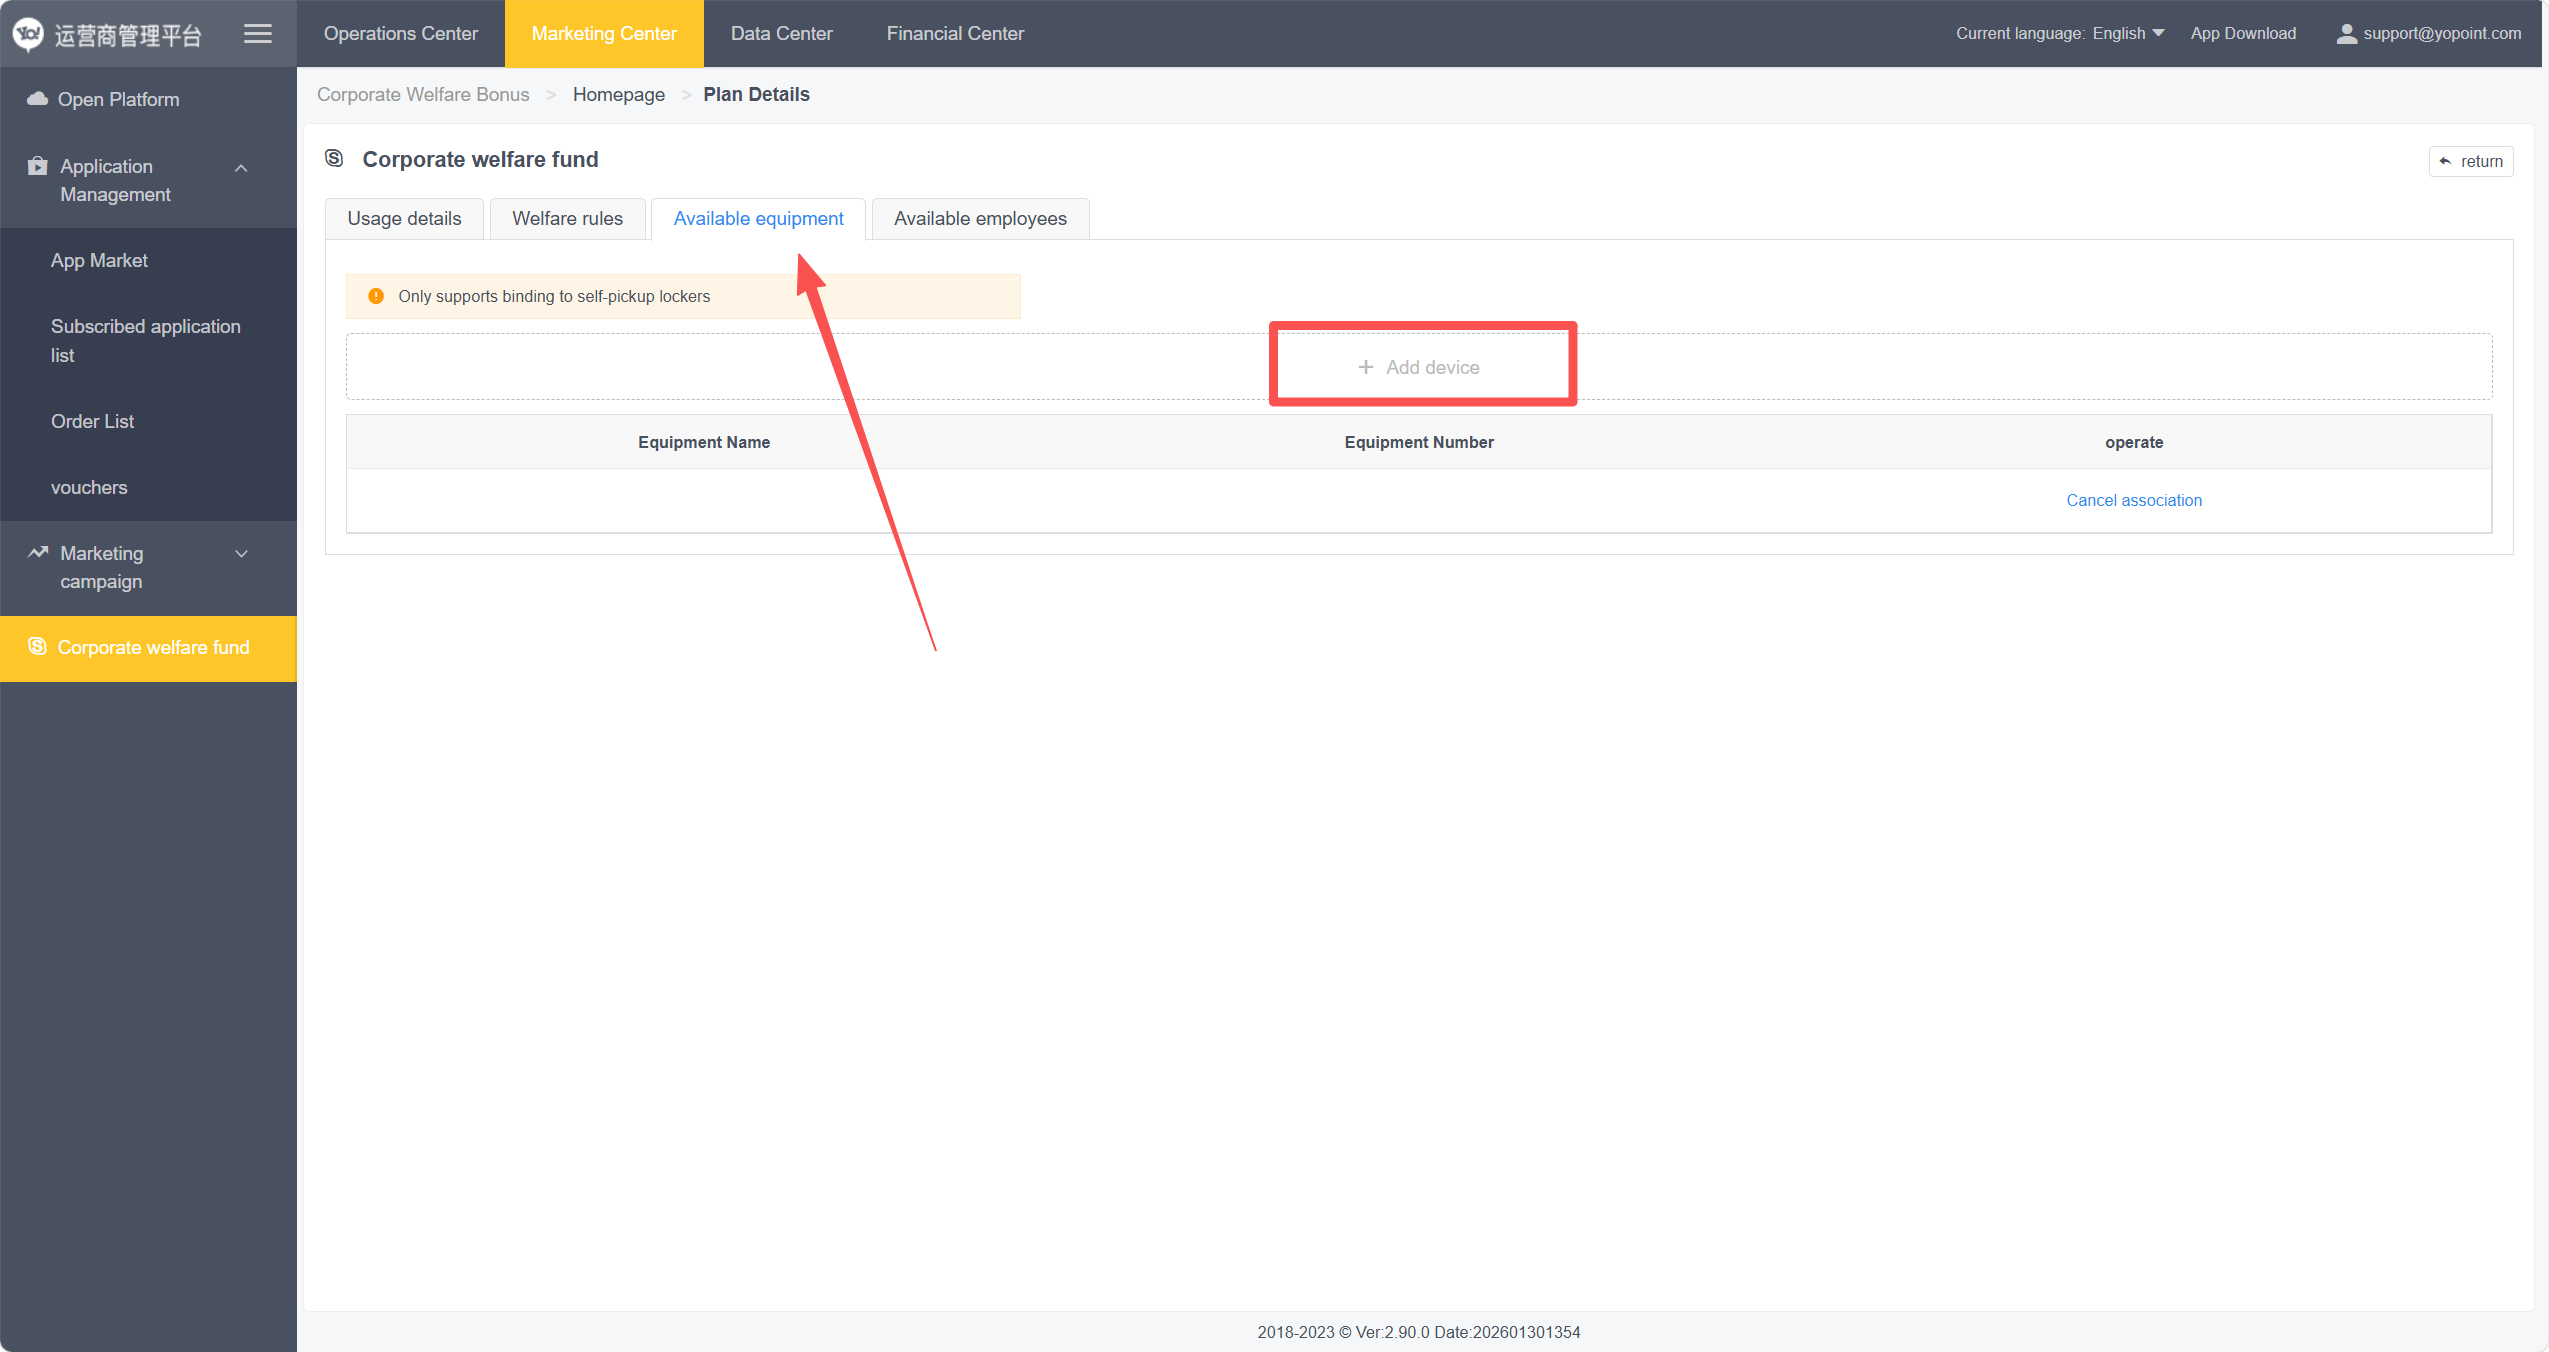 Add Device
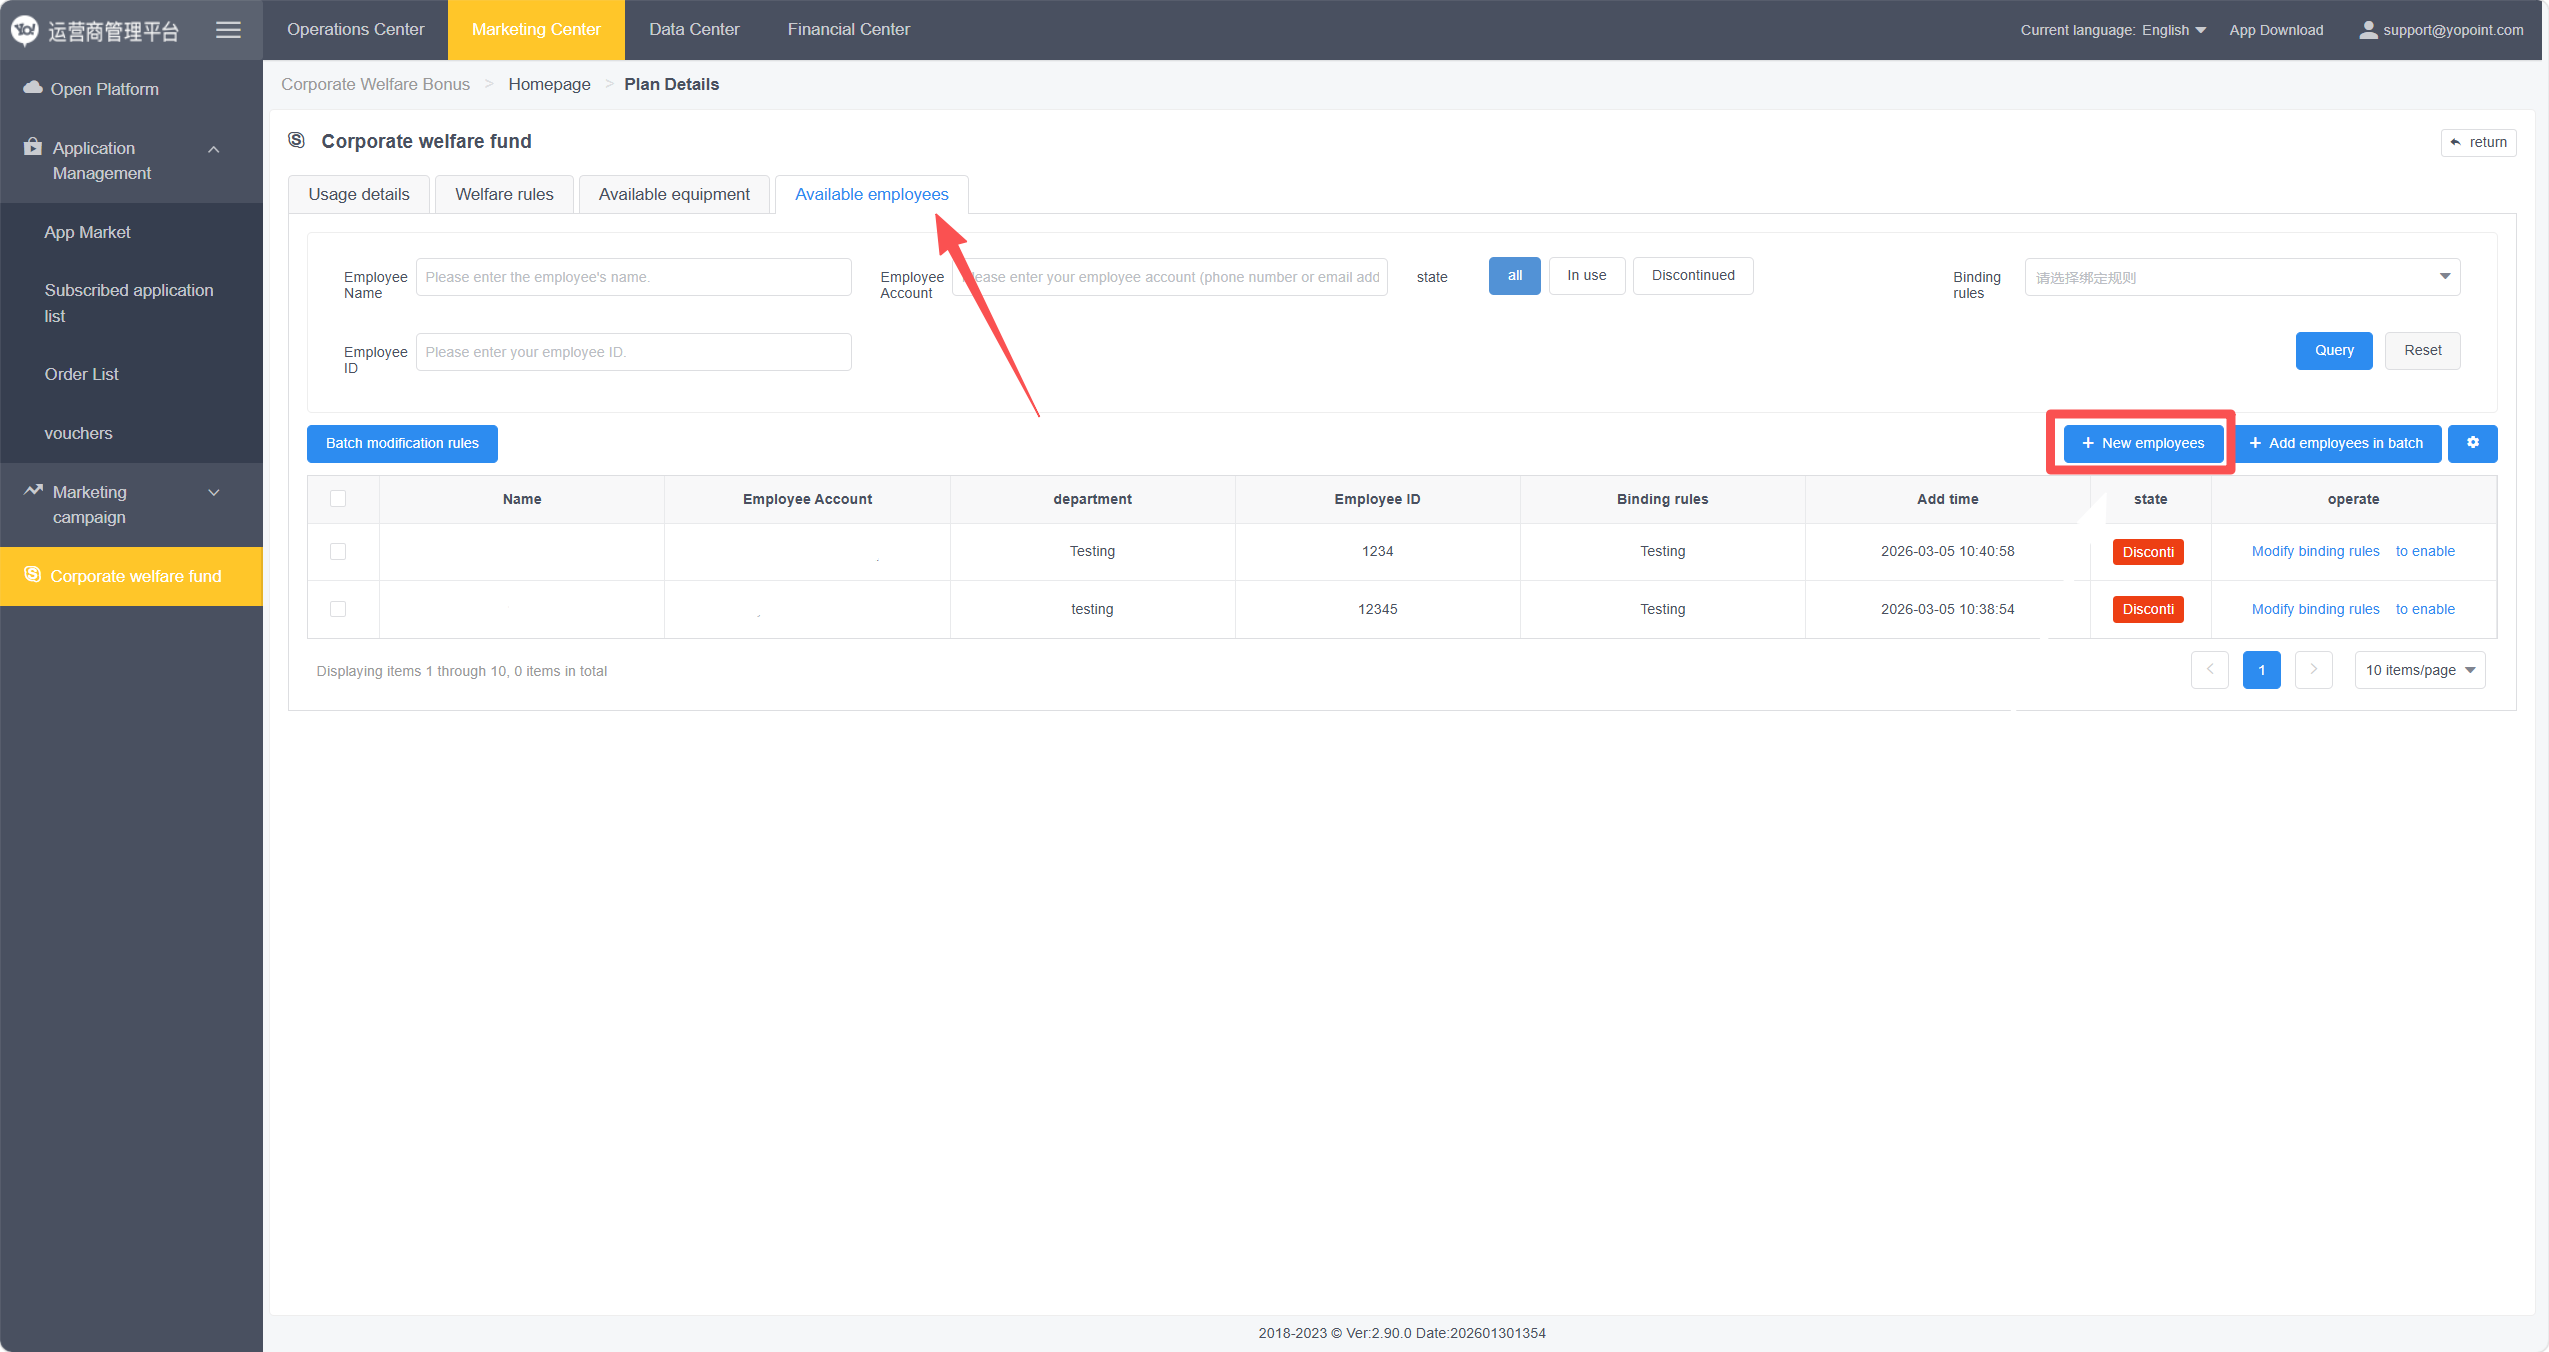 No Approval Required Ref.
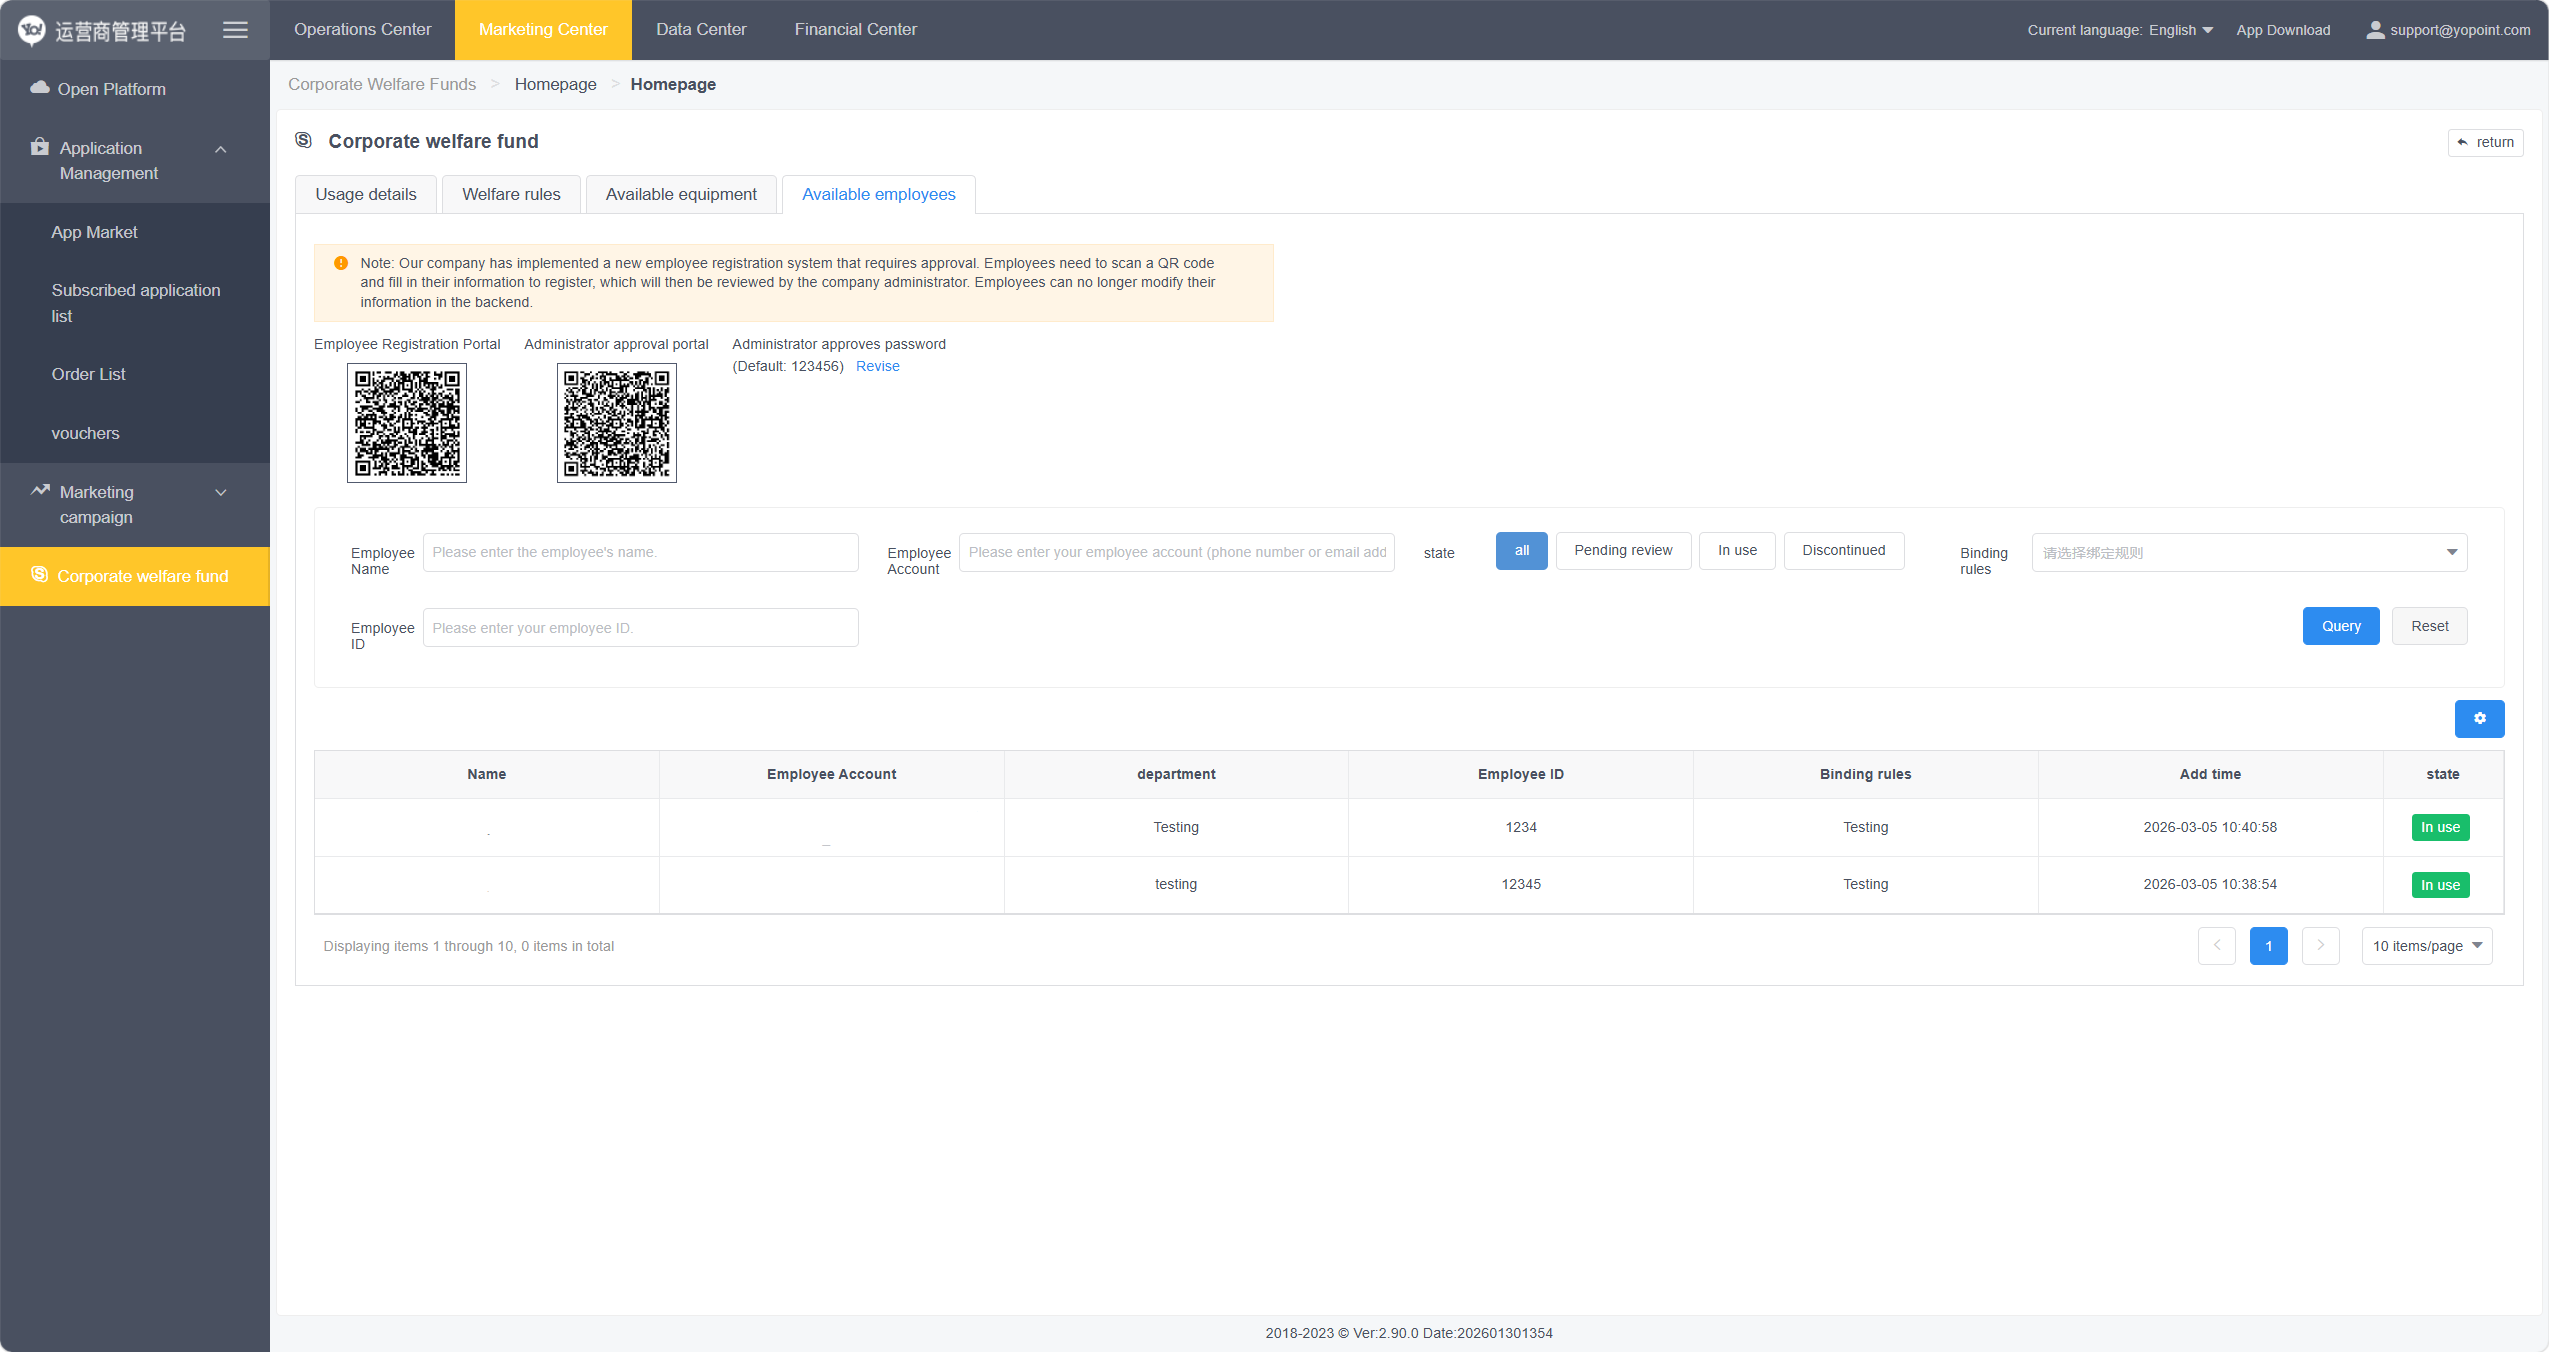 Approval Required Ref.
 - No Approval Required: click
All usage records can be viewed under Usage Details.
You may switch freely between Warehouse Mode and Warehouse-Free Mode, but this requires fully clearing the machine first.
- Click
Replenish → Restock, scan the device QR code, and remove all products from the machine. - Go to
Modify Product / Modify SKUand delete all listed products from the shelves. - Navigate to
System → Warehouse Modeand select your target mode.